Common notes in installation of Sigfox-Ready Sensors
The common instructions for all kinds of Daviteq Sigfox-Ready Sensor. Please see below.
1. HOW DO YOU GET A STRONG RF SIGNAL?
To maximize the transmission distance, the ideal condition is Line-of-sight (LOS) between the Sigfox-Ready sensor and the Sigfox Base station. In real life, there may be no LOS condition. However, the Sigfox-Ready sensor still communicates with the Base station, but the distance will be reduced significantly.
DO NOT install the wireless sensor or its antenna inside a completed metallic box or housing because the RF signal can not pass through the metallic wall. The housing is made from Non-metallic materials like plastic, glass, wood, leather, concrete, and cement…is acceptable.
2. INSTALL BATTERIES FOR SIGFOX-READY SENSOR
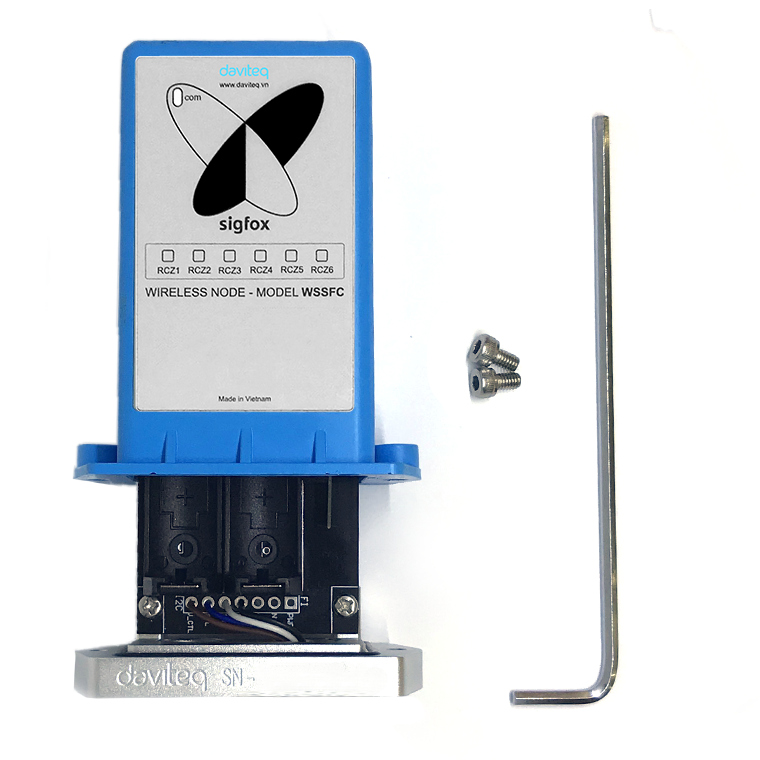
2.1 INSTALL BATTERIES FOR SIGFOX-READY SENSOR WITH BLUE BOX HOUSING
Steps for battery installation:
Step 1: Using L hex key to unscrew M4 screws at the side of the housing and carefully pull out the top plastic housing in the vertical direction
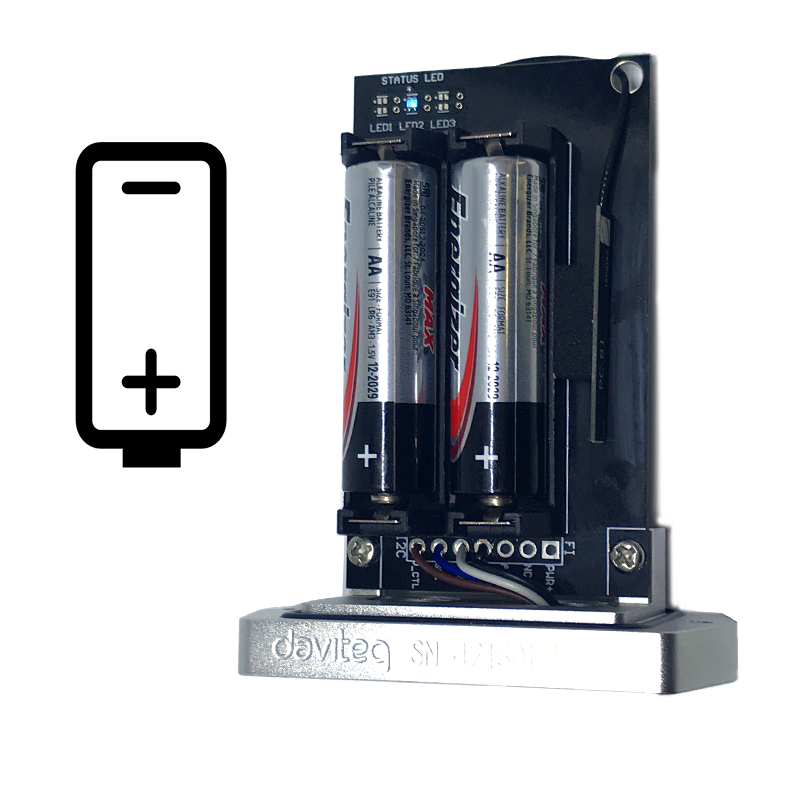
Step 2: Insert 02 x AA 1.5VDC battery, please take note the poles of the battery
ATTENTION:
REVERSED POLARITY OF BATTERIES IN 10 SECONDS CAN DAMAGE THE SENSOR CIRCUIT!!!
ATTENTION:
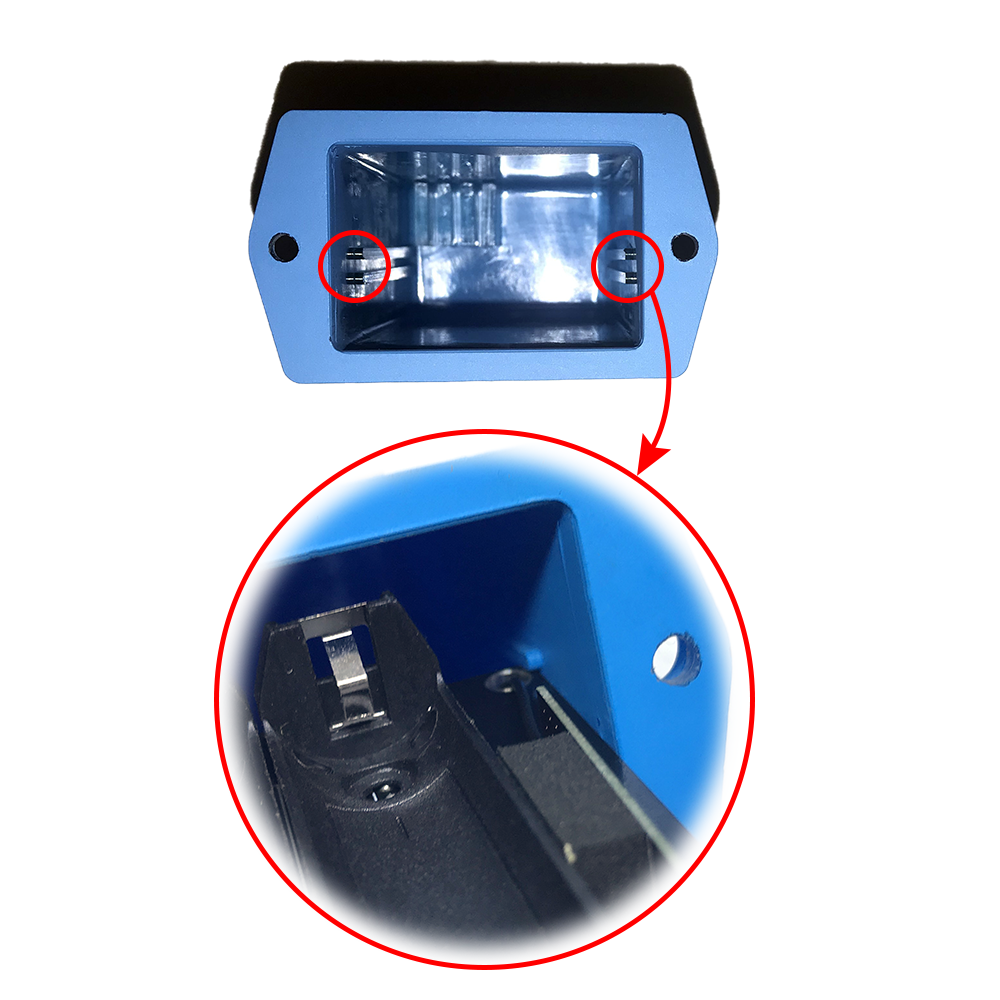
When reinstalling the cover, pay attention to put the PCB edge into the middle slot of the box inside as shown below)
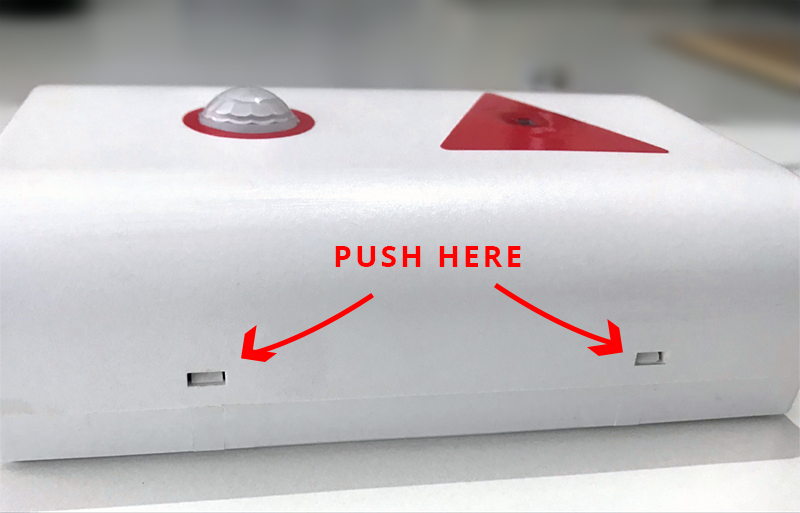
2.2 INSTALL BATTERIES FOR SIGFOX-READY SENSOR WITH WHITE BOX HOUSING, 6 X AA BATTERIES (SENSOR -LPC)

Steps for battery installation:
Step 1: Use flat head screws to push into 2 reed joints
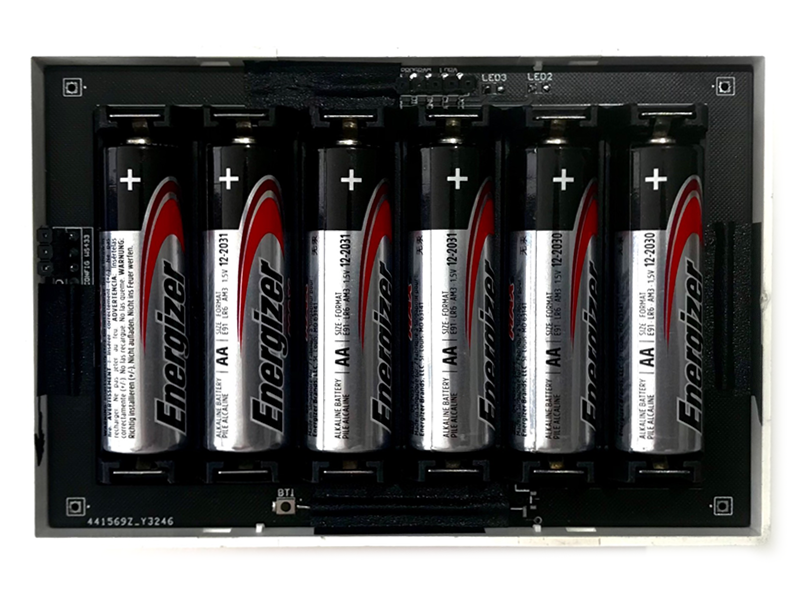
Step 2: Open the housing, then insert 06 x AA 1.5VDC battery, please take note of the poles of the battery
ATTENTION: REVERSED POLARITY OF BATTERIES IN 10 SECONDS CAN DAMAGE THE SENSOR CIRCUIT!!!

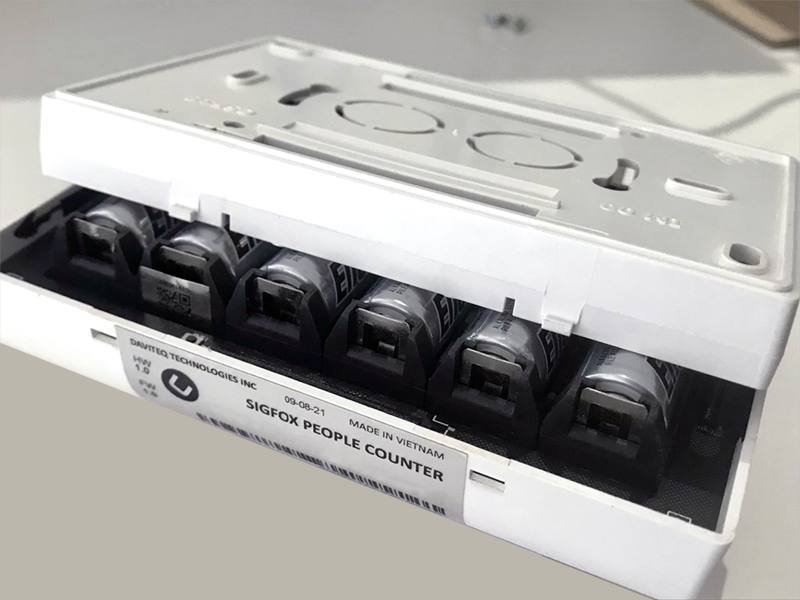
Step 3: Insert the top plastic housing (Please note the 2 reed joints)
2.3 INSTALL BATTERIES FOR SIGFOX-READY SENSOR WITH BLACK BOX HOUSING, 2 X AA BATTERIES (SENSOR -ULA)
Steps for battery installation:
Step 1: Use a screwdriver to open the 4 screws on the underside of the housing
.png)
Step 2: Open the housing, then insert 02 x AA 1.5VDC battery
ATTENTION: REVERSED POLARITY OF BATTERIES IN 10 SECONDS CAN DAMAGE THE SENSOR CIRCUIT!!!
.png)
Step 3: Insert the plastic housing and locking the 4 screws by screwdriver
.png)
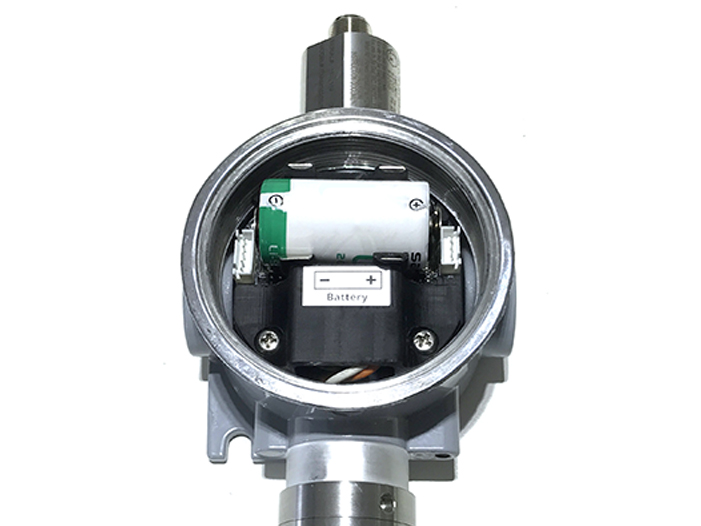
2.4 INSTALL BATTERIES FOR SIGFOX-READY SENSOR WITH EXD-APPROVED HOUSING WSSFCEX-...
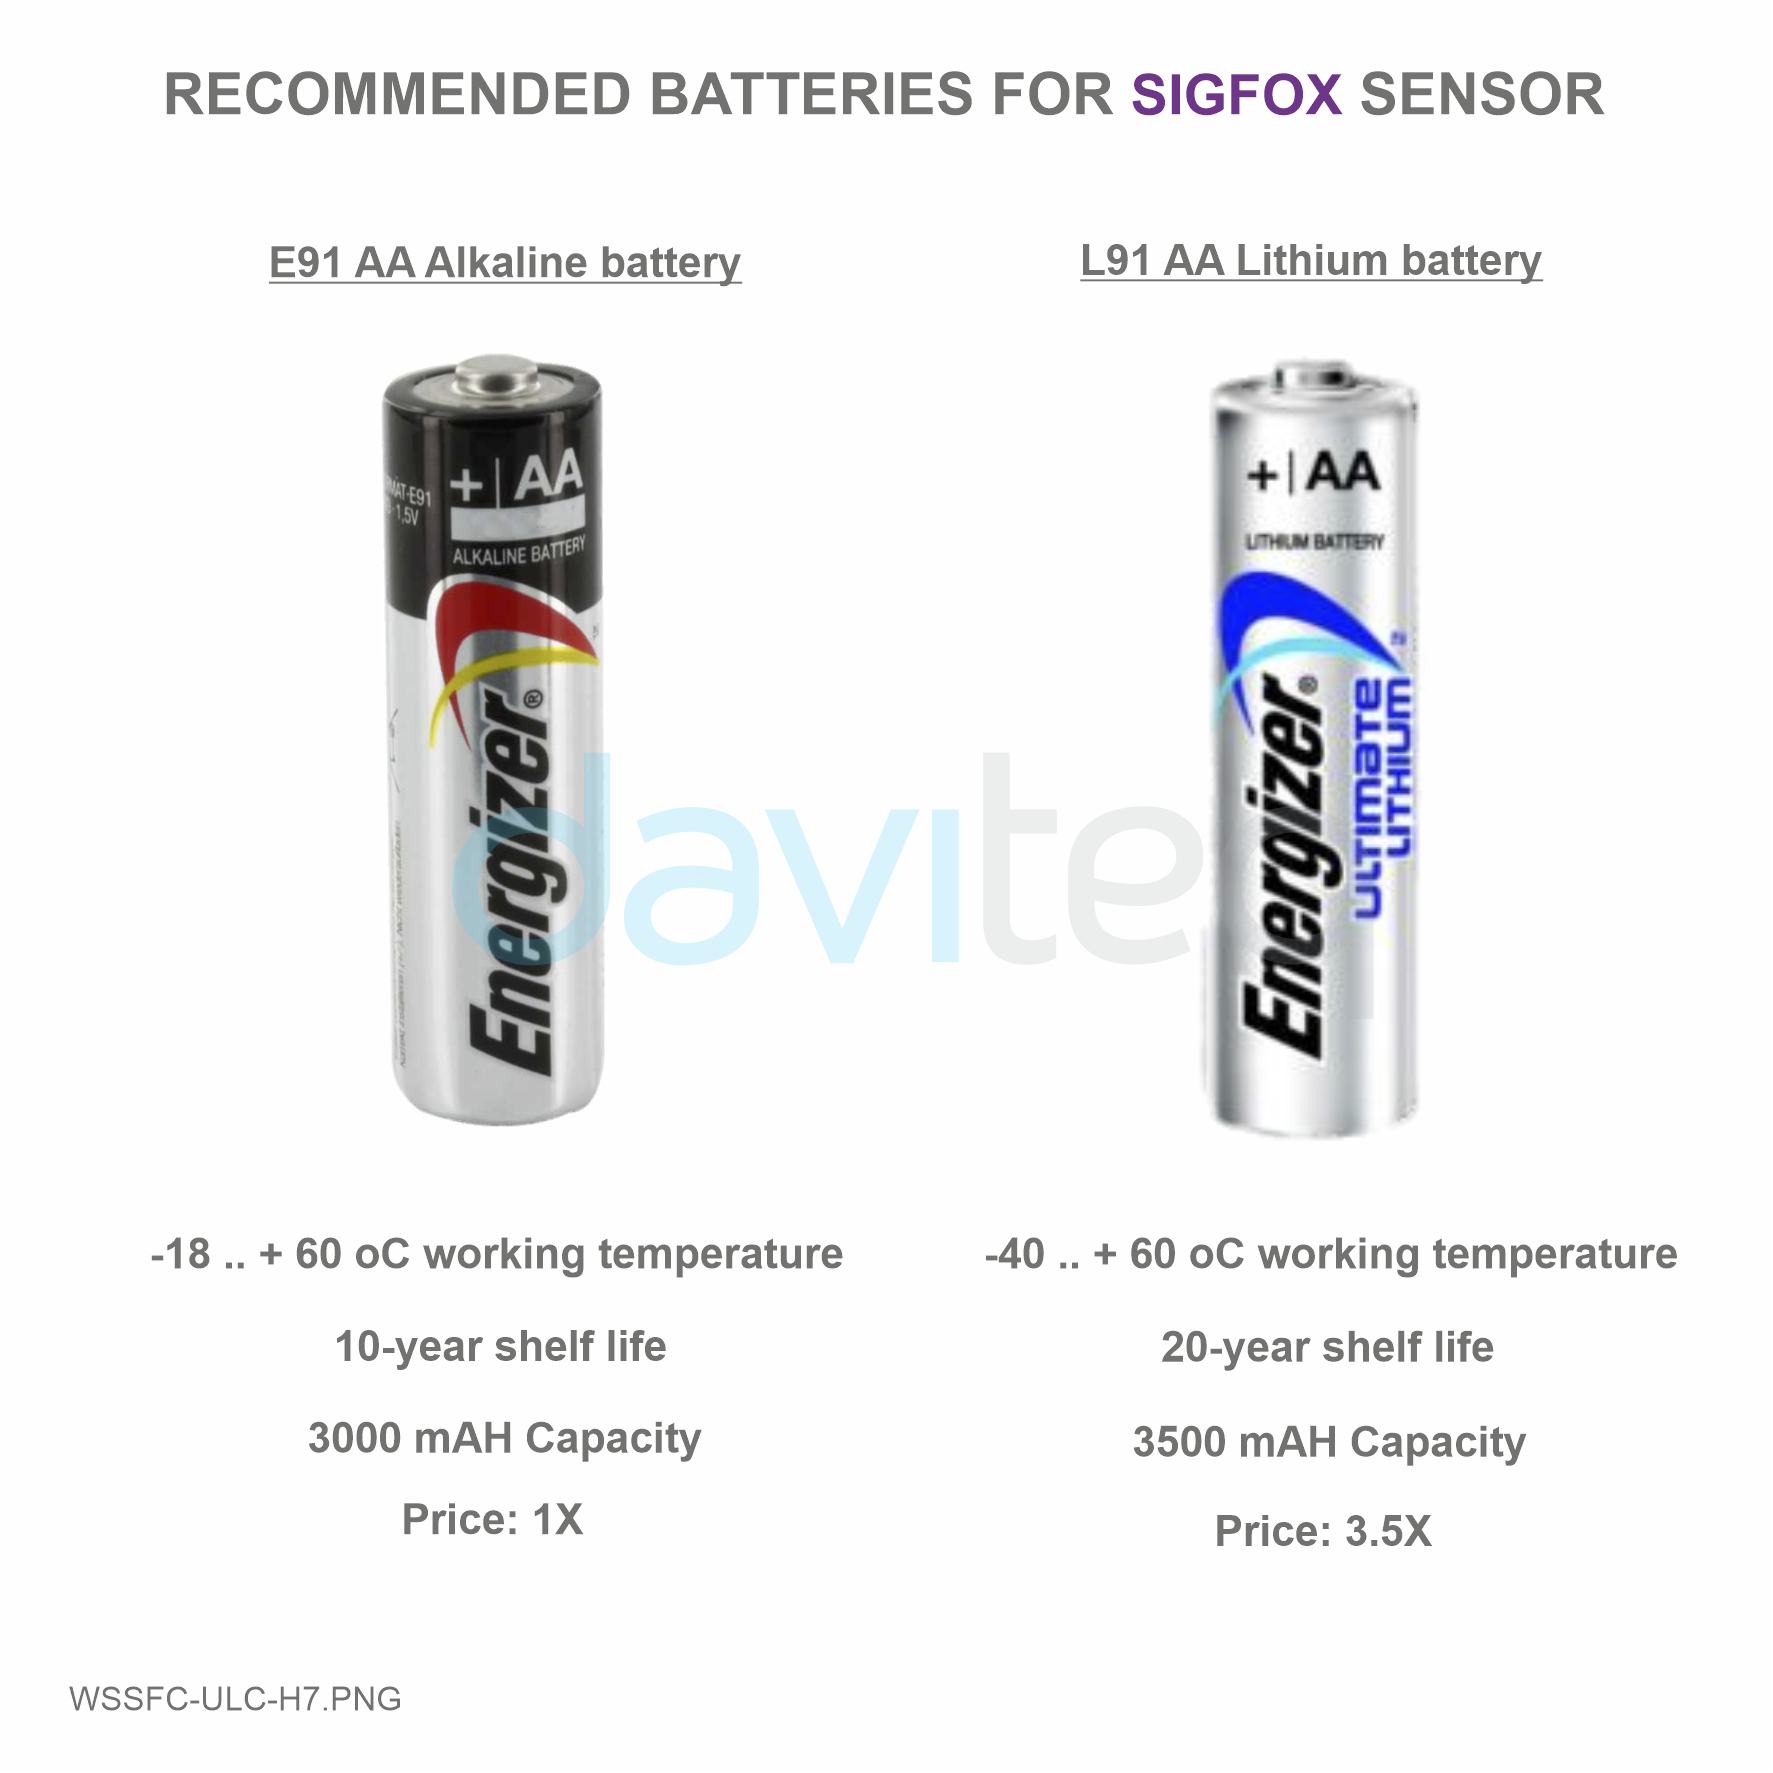
Depends on the design of each device. Each device may need 1 pc of Type C or Type D battery. Please check the specification of that device. We recommend the below batteries to be used with our devices.
 |
 |
Steps for battery installation:
DANGER:
DO NOT REPLACE BATTERY AT HAZARDOUS LOCATION!
DO NOT OPEN THE COVER AT HAZARDOUS LOCATION!
ONLY OPEN COVER AND REPLACE BATTERY IN SAFE AREA!
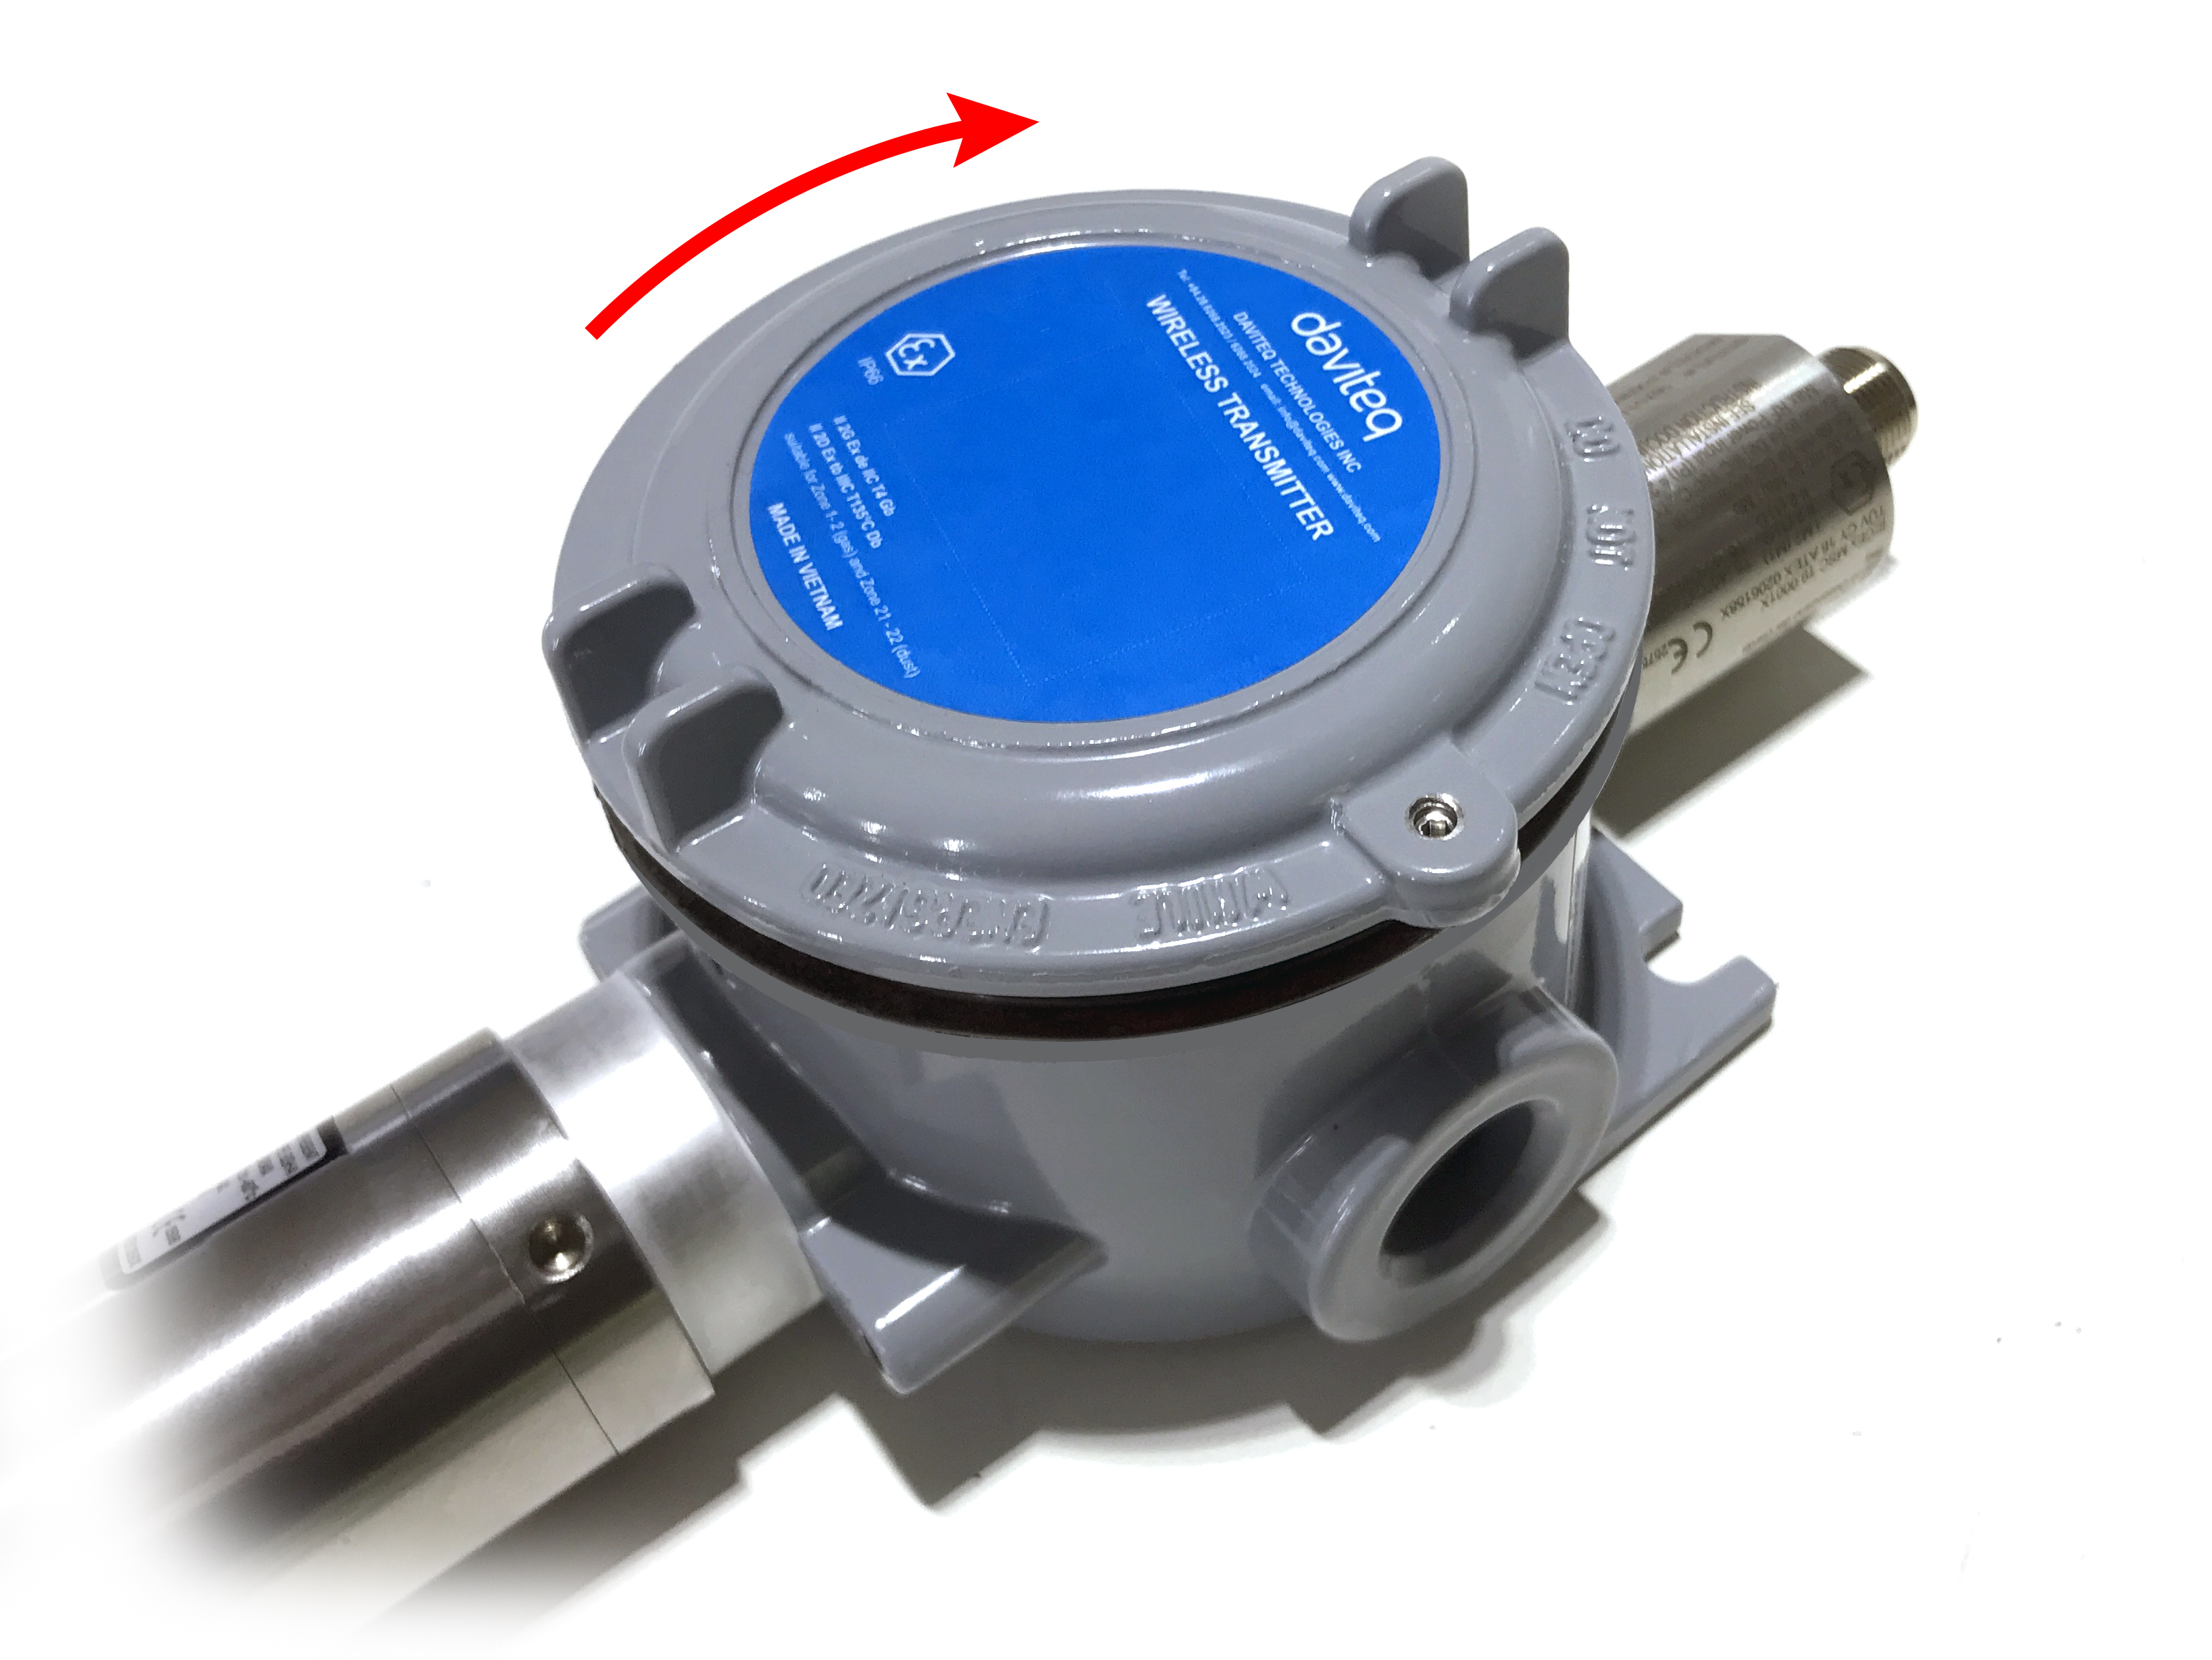
Step 1: Turn the front cover of the sensor counter-clockwise;

Step 2: Carefully take out the front cover of the sensor
Step 3: Insert the battery, please take note the polarity of battery
ATTENTION:
REVERSED POLARITY OF BATTERIES IN 10 SECONDS CAN DAMAGE THE SENSOR CIRCUIT!!!
Step 4: Turn the front cover of the sensor clockwise to close fully.
NOTES:
Using 2mm hex key to lock the cover to prevent the unattended opening.

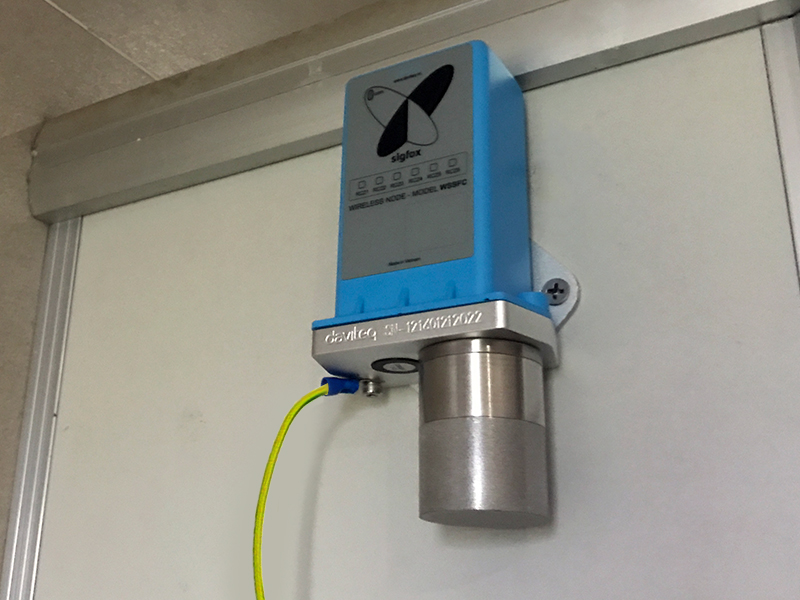
3. MOUNTING FOR SIGFOX-READY SENSOR
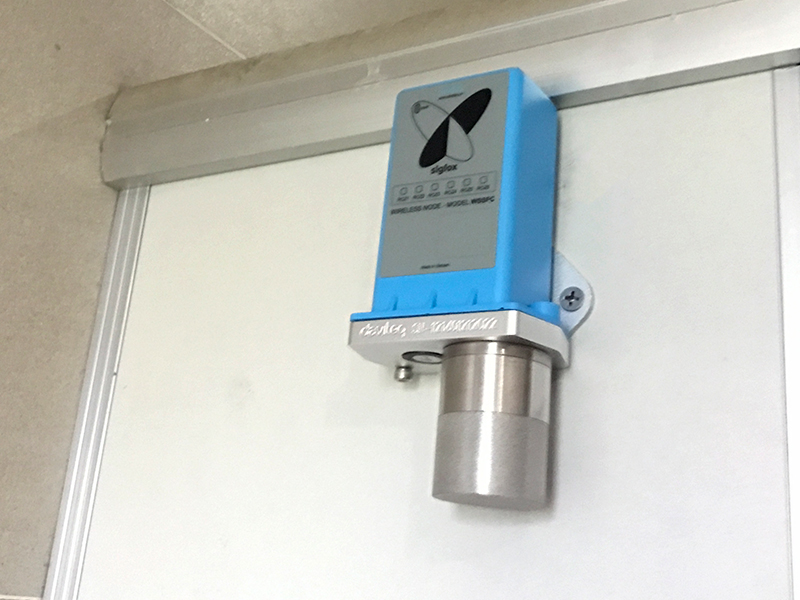
3.1 MOUNTING FOR SIGFOX-READY SENSOR WITH BLUE BOX HOUSING
The following are the steps for the Sigfox-ready sensor with a Blue box housing design.
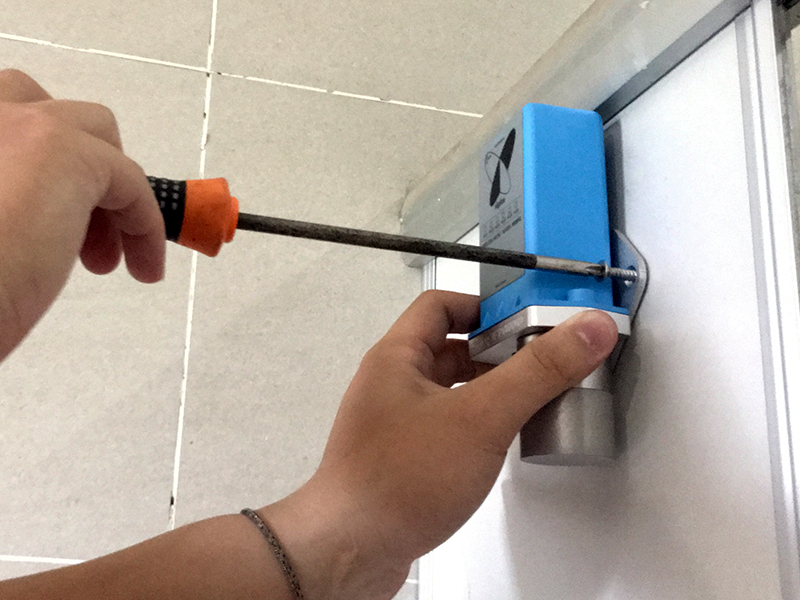
Step 1: Install the bracket on the sensor

Step 2: Determine the mounting position and secure the sensor with the included screws
Step 3:Grounding the sensor
3.2 MOUNTING FOR SIGFOX-READY SENSOR WITH WHITE BOX HOUSING
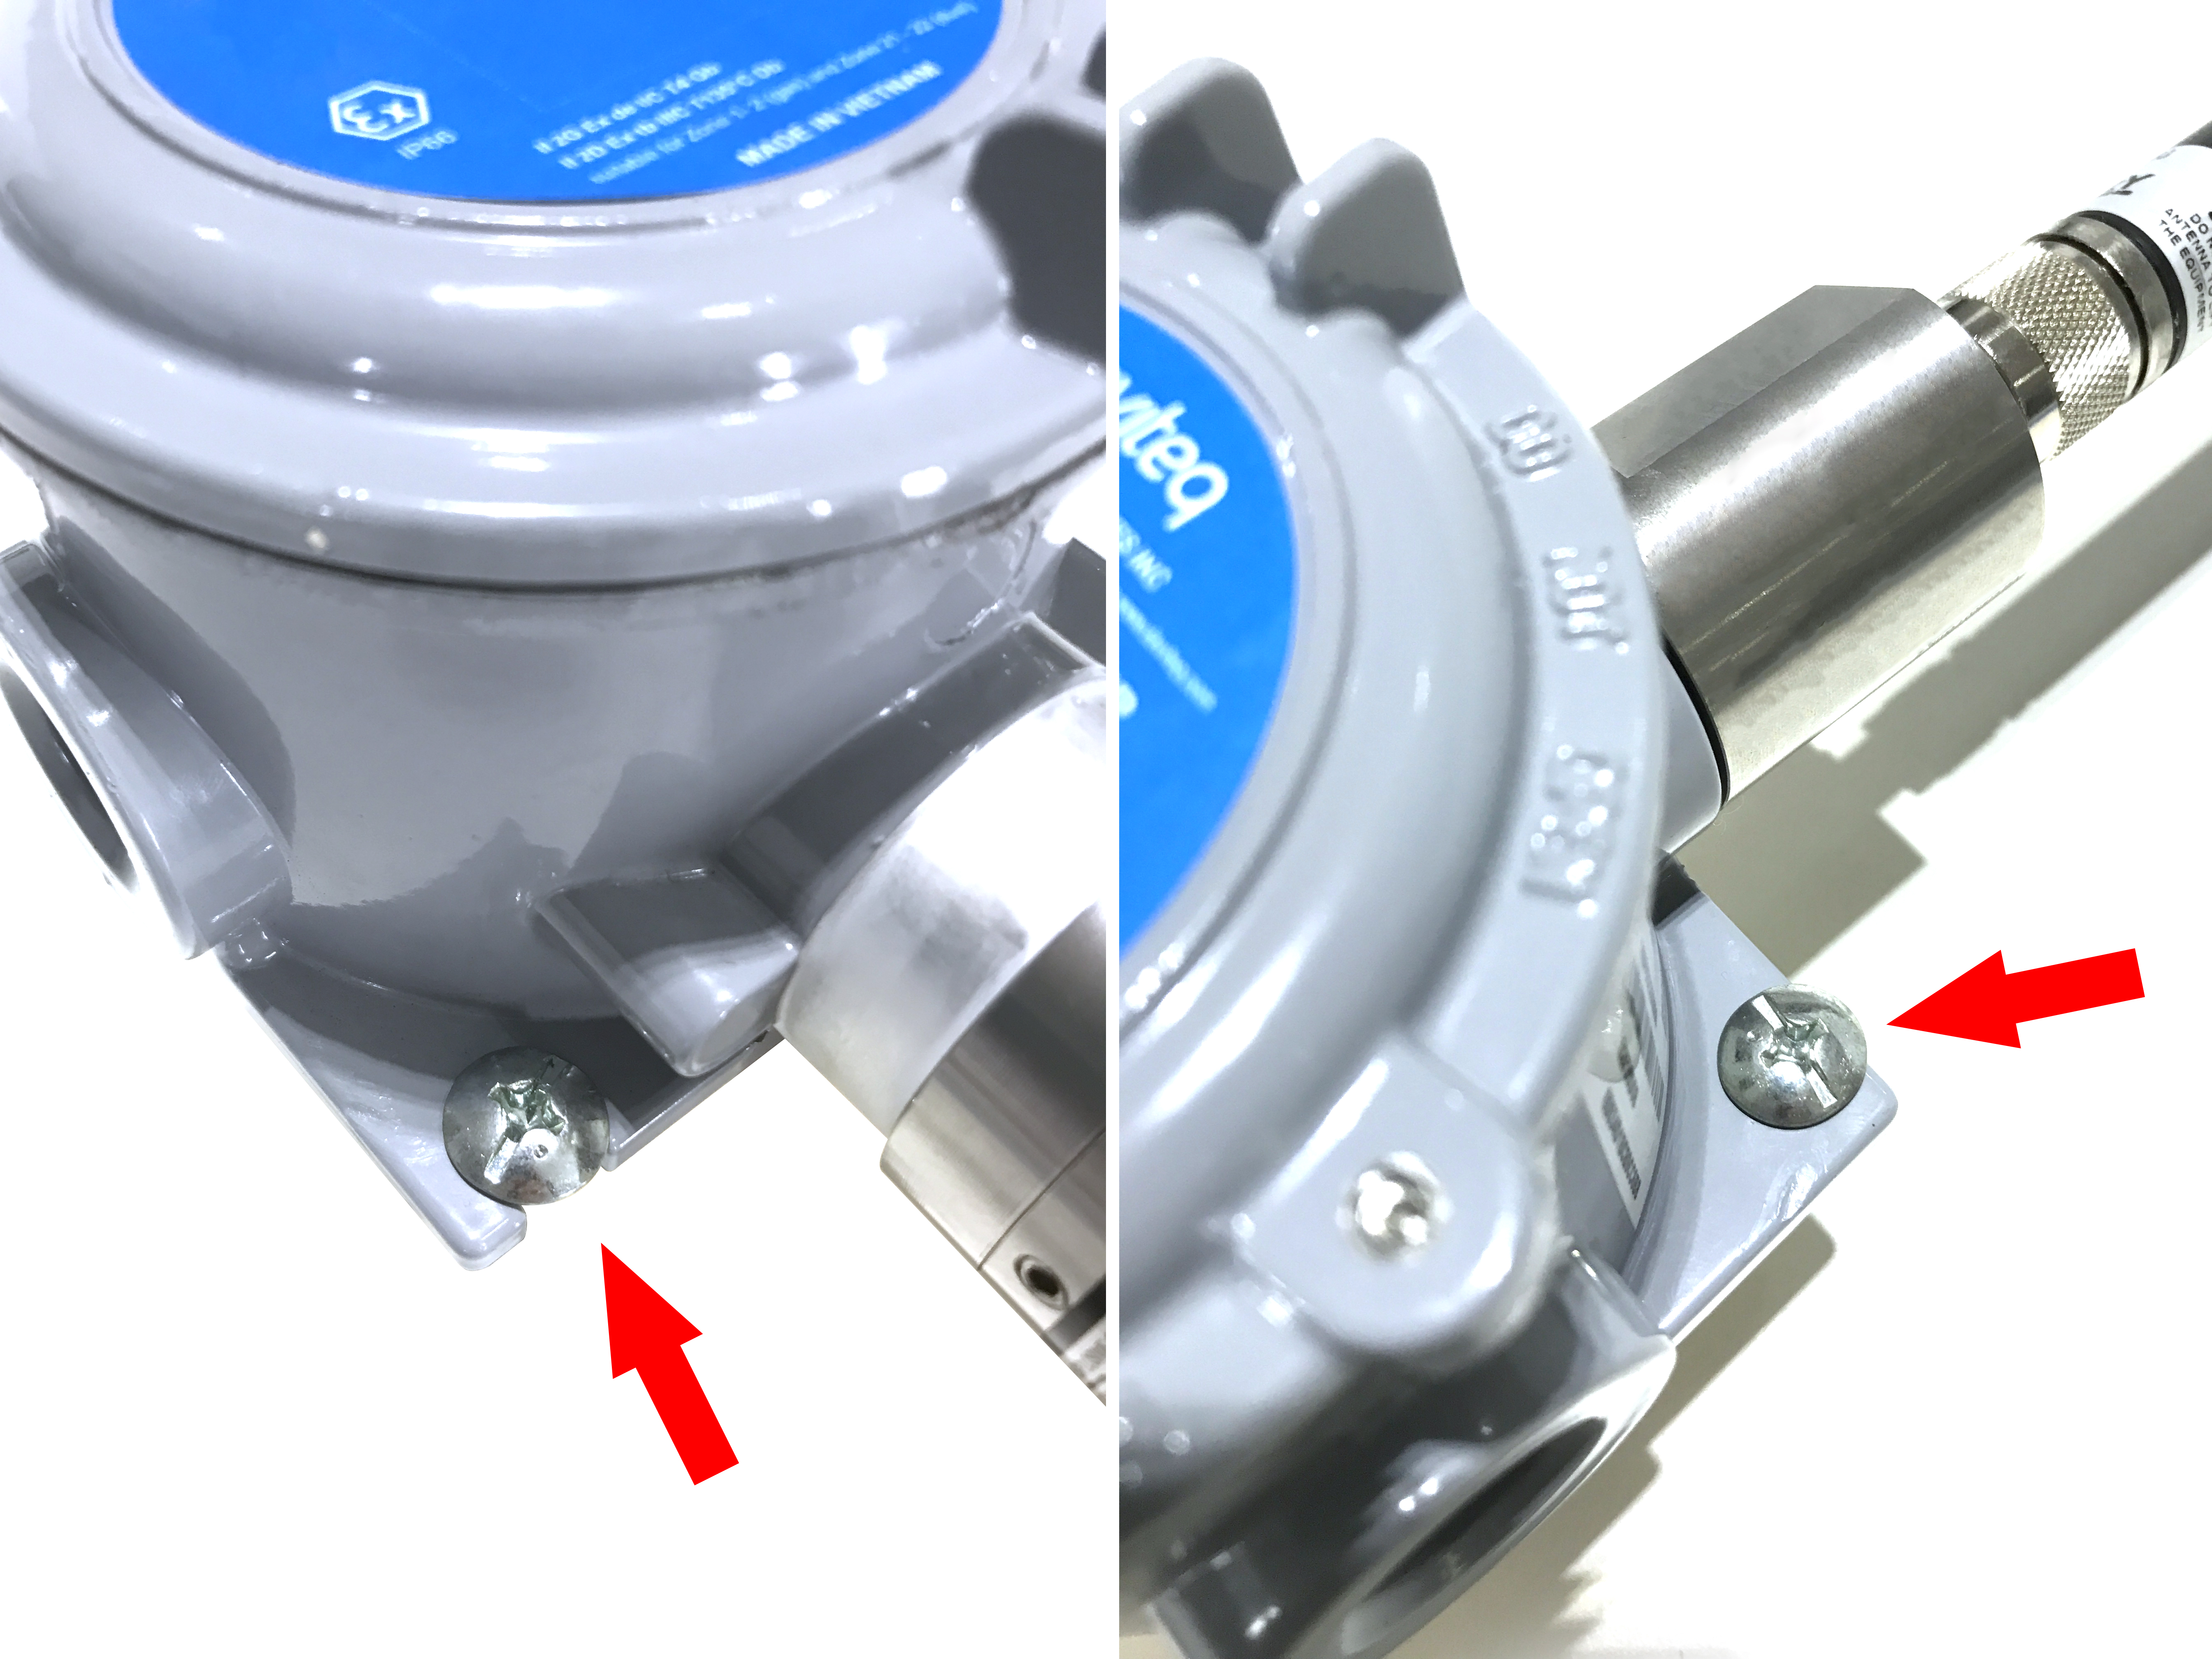
3.3 MOUNTING FOR SIGFOX-READY SENSOR WITH EXD-APPROVED HOUSING
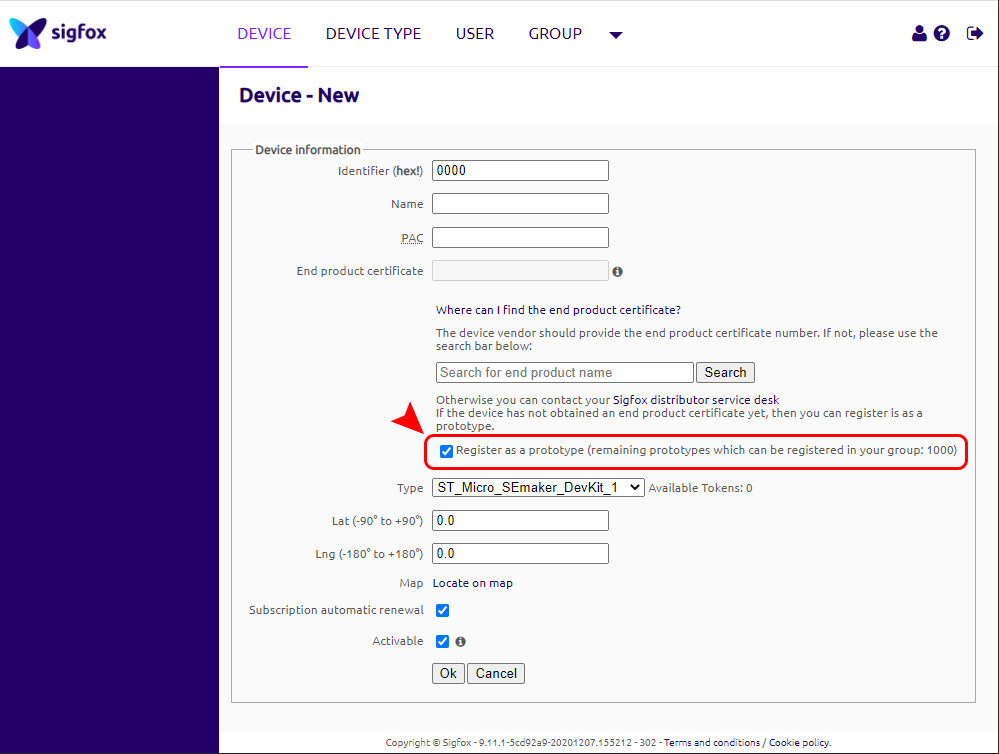
4. ADDING A SIGFOX-READY SENSOR TO SIGFOX BACK-END SYSTEM
This instruction is applied to all kinds of Sigfox-Ready sensors produced by Daviteq.
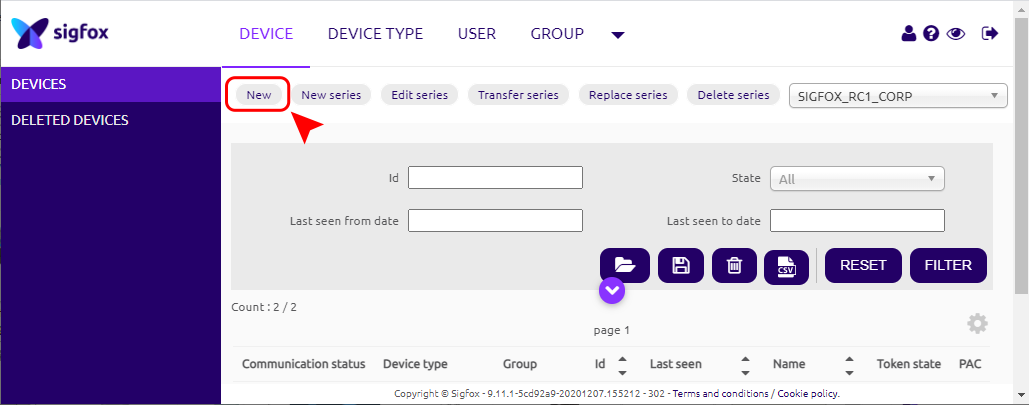
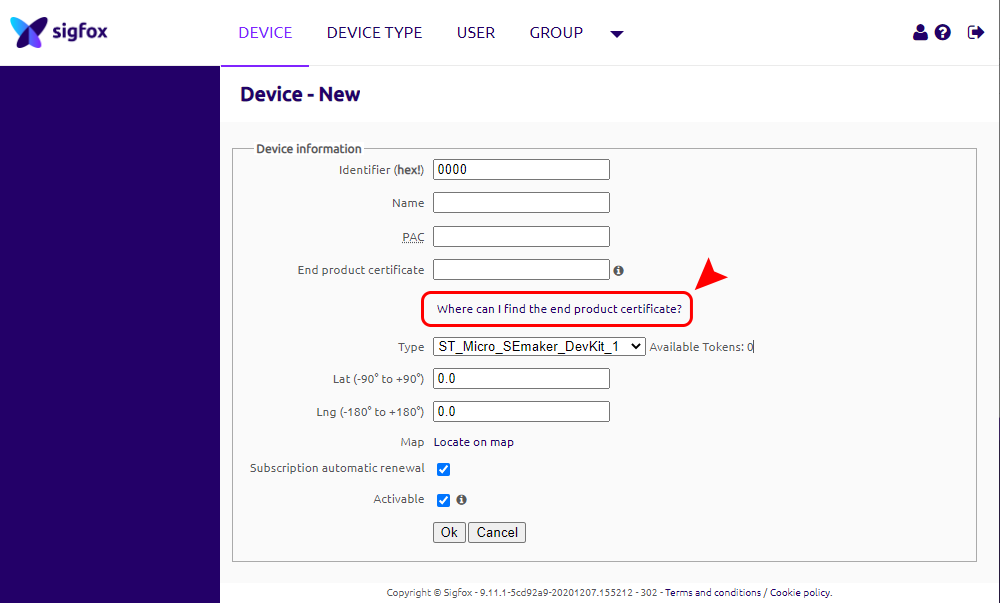
Step 1: Log in to the sigfox backend website

Step 2: Click on Device

Step 3: Click New → Select a group
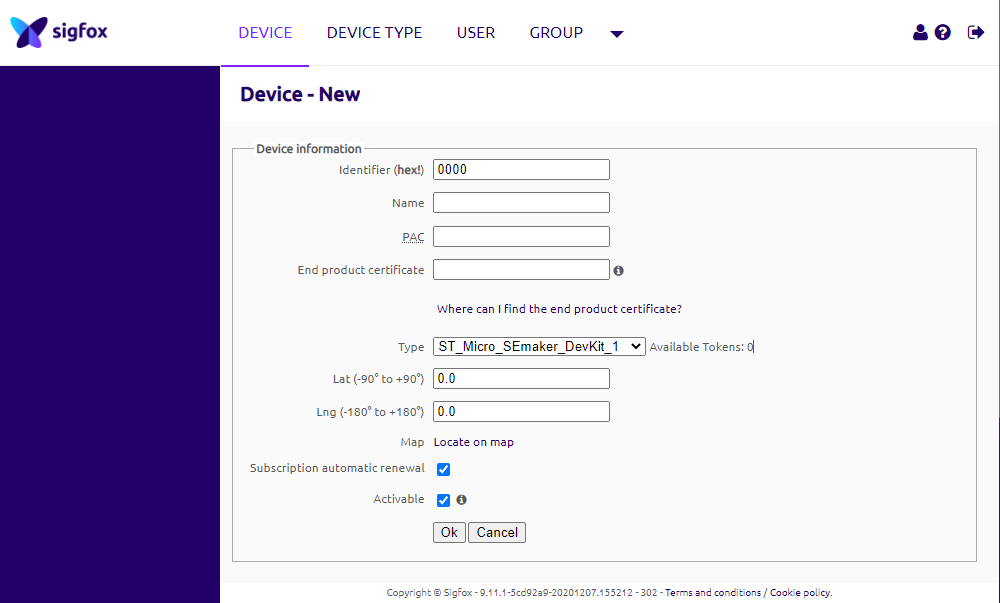
Step 4: Fill in the required information
Note: Some of our products may not have end product certification in time, to add the product to Backend Sigfox please follow the steps below.
Click on the text as shown below
Check the box as shown below to register as a prototype