USER GUIDE FOR TBRG400 TIPPING BUCKET RAIN GAUGE
|
TBRG400-01-MN-10 |
AUG-2020 |
This document is applied for the following products
|
SKU |
TBRG400 |
HW Ver. |
1.0 |
FW Ver. |
1.0 |
|
Item Code |
TBRG400-01 |
Tipping Bucket Rain Gauge, Dry-Contact Pulse Output, 304SS, Max 10mm/Min, 4% Accuracy |
|||
1. Introductions
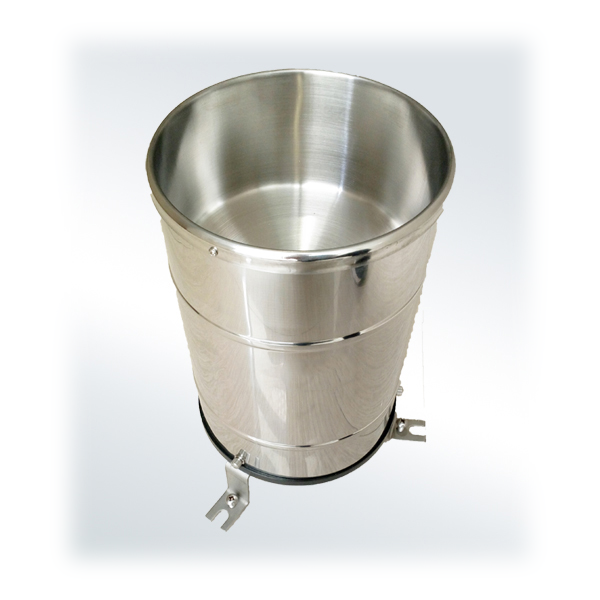
TBRG400 is Tipping Bucket Rain Gauge Sensor, an instrument for testing rainfall in nature. In order to meet the requirement of information transmission, processing, recording, and display, the amount of rainfall is converted to pulse output. It can be widely used in weather stations, hydrometric stations, agriculture & forestry, field monitoring stations. It can provide the original data for flood prevention, water-supply systems, and reservoir water management in plants.
2. Specification
|
Rainfall collector |
Diameter :φ200mm, height: 350mm |
|
Measured rainfall intensity |
Max: 4mm/min |
|
Allow rainfall intensity |
Max: 10mm/min |
|
Resolution |
0.1mm, 0.2mm |
|
Accuracy(2mm/min) |
±4% |
|
Maximum load voltage |
30VDC(pulse output) |
|
Maximum load current |
20mA(pulse output) |
|
Output |
Reed switch pulses |
|
Operating temperature(no freeze) |
-20-+80℃ |
|
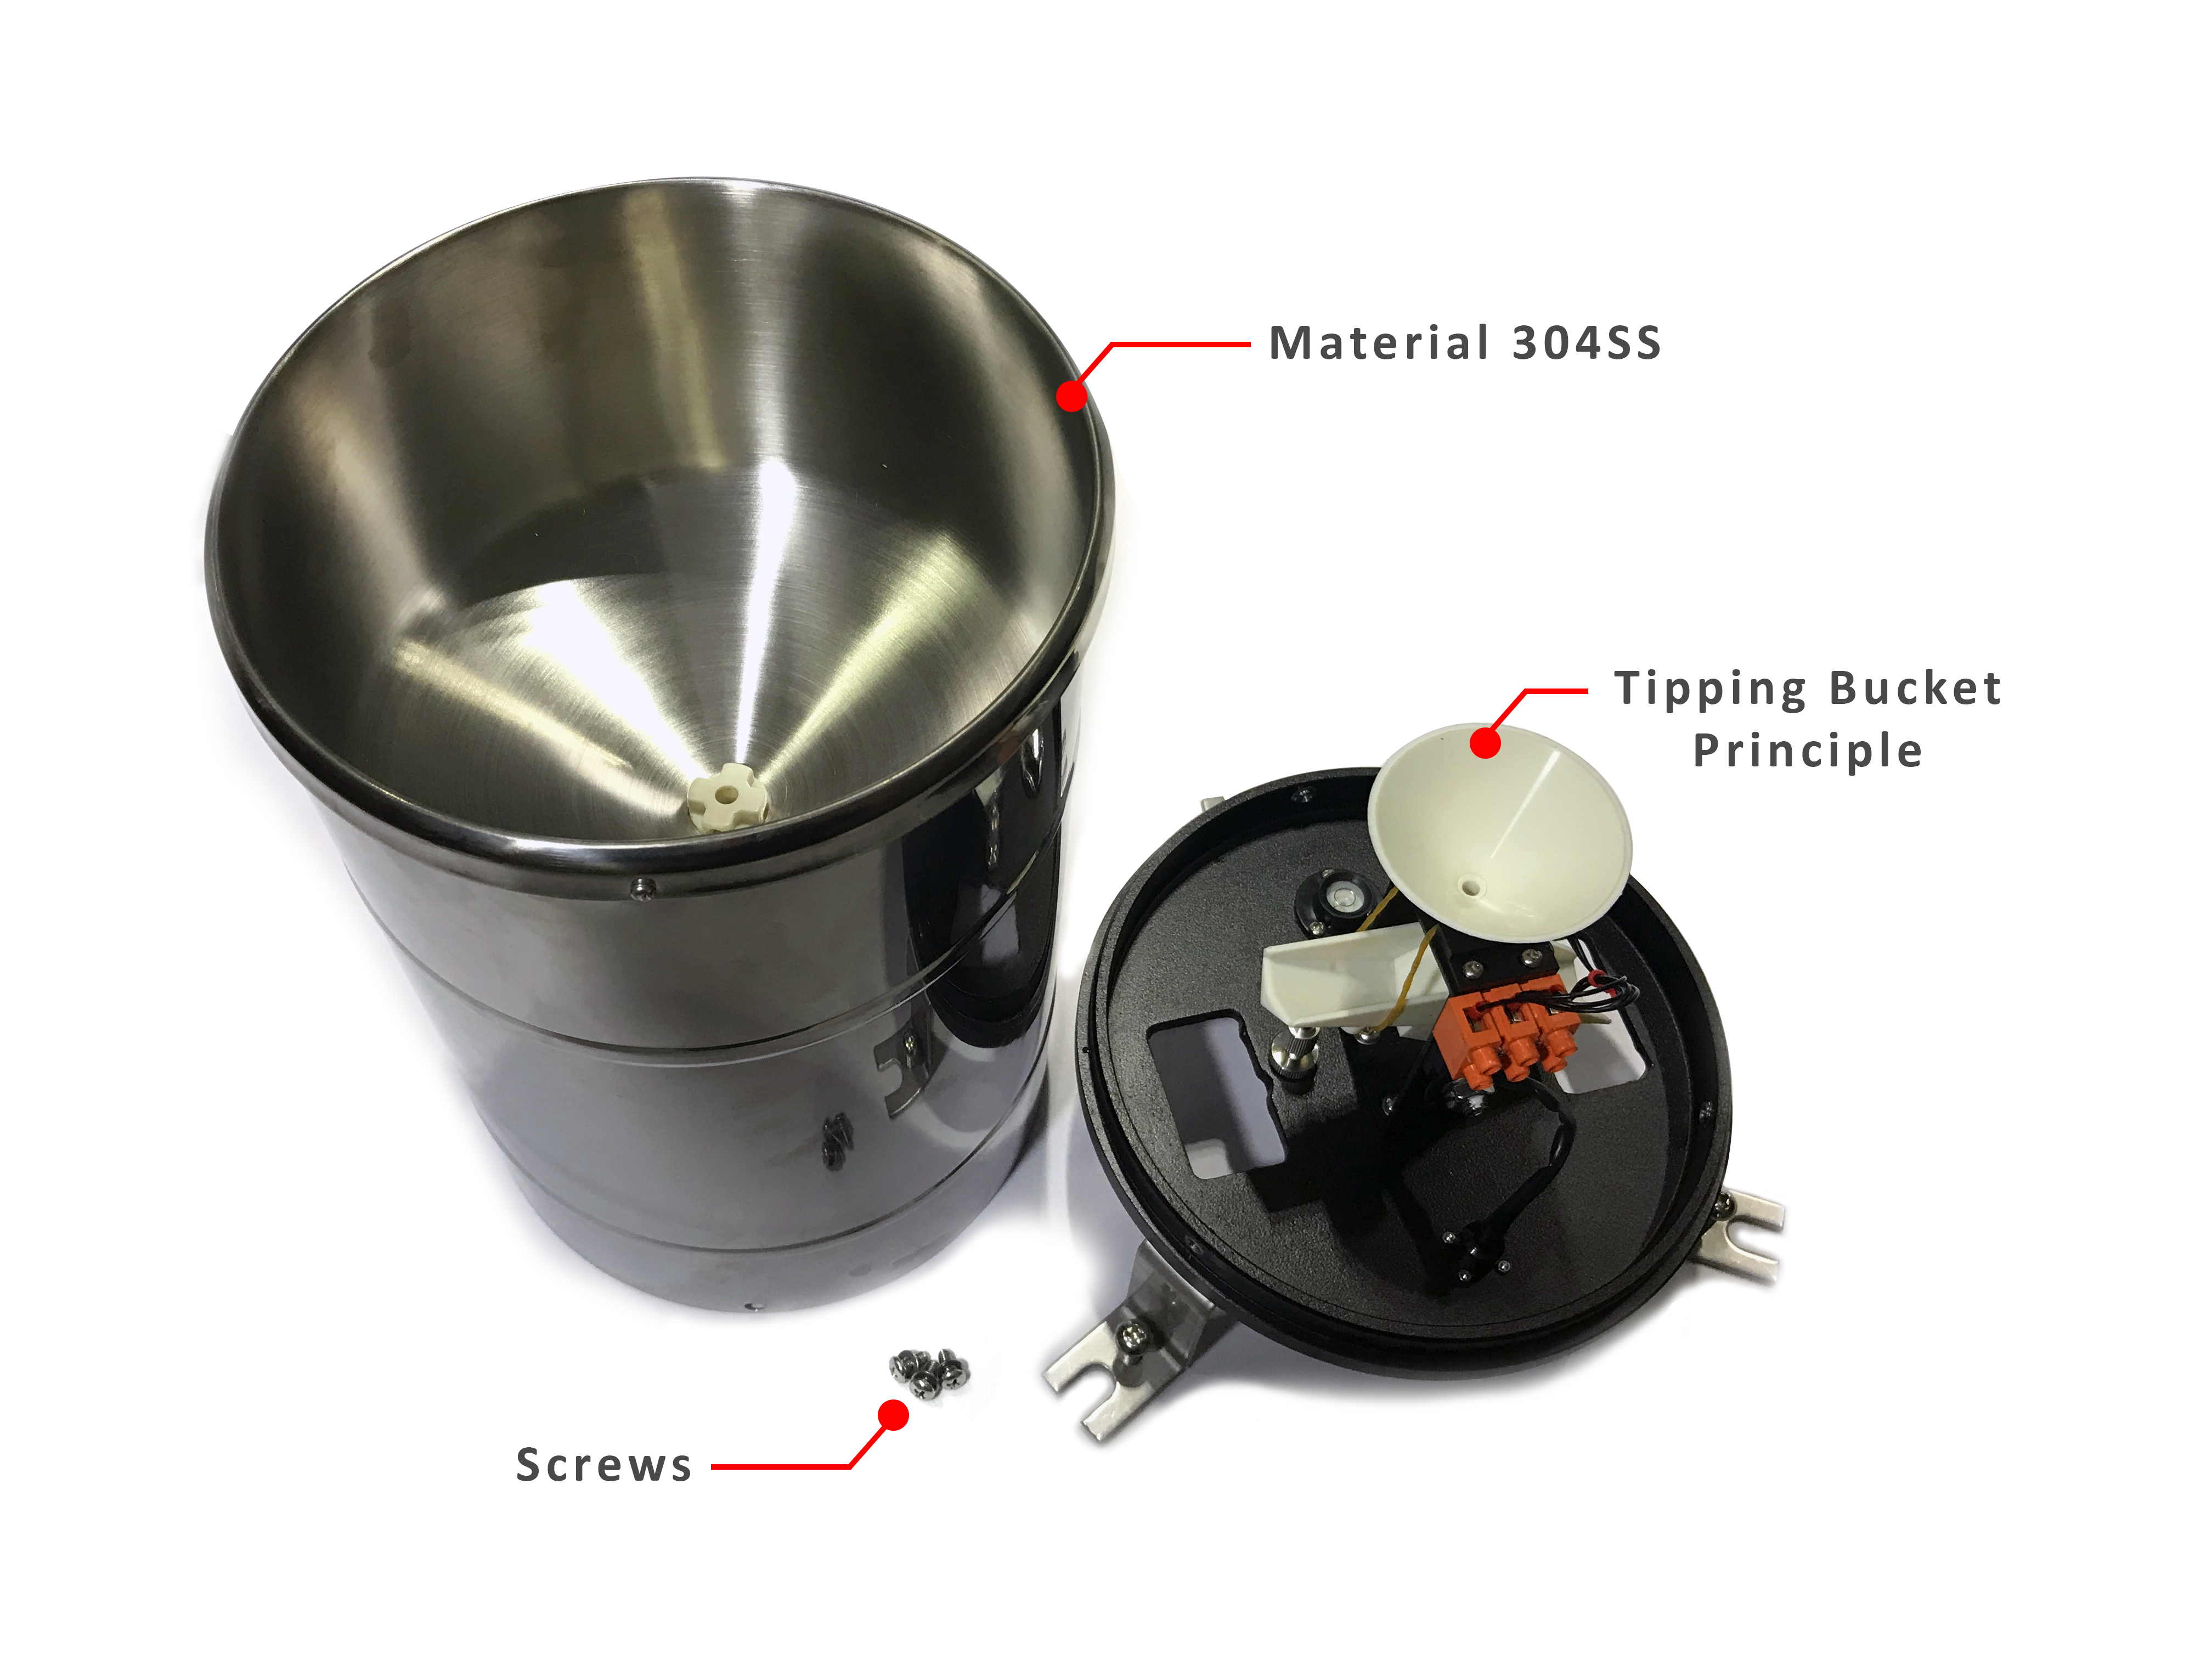
Main material |
Collector: 304SS, tipping bucket: ABS |
|
Tipping bucket |
Single |
|
Heating(optional) |
Heating power: approx.1000W |
|
Weight(unpacked) |
3.5kg |
3. Working Process
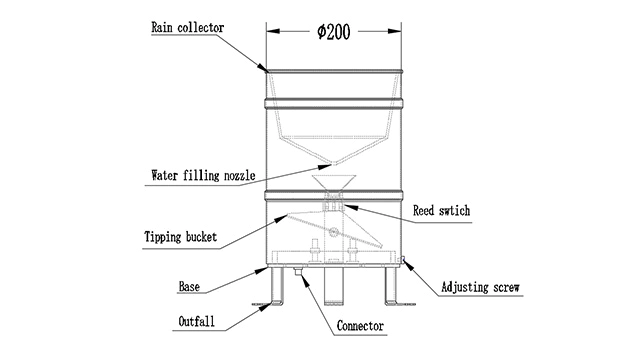
Rainfall is captured in the 200mm diameter collector funnel and is directed through a delivery pipe to fill a divided ABS injection molded tipping bucket device. The bucket is pivoted through its center and has a preset calibration to tip for 0.2 mm of rainfall. When the bucket is “full”, it pivots and empties - this action magnetically closes and opens a reed switch, sending a pulse signal to the data logger or electronic counter. Through this tipping “seesaw” action, the other side of the bucket is aligned to receive the flow from the delivery pipe. This recording and tipping cycle continues with rainfall.
4. Electrical Connections
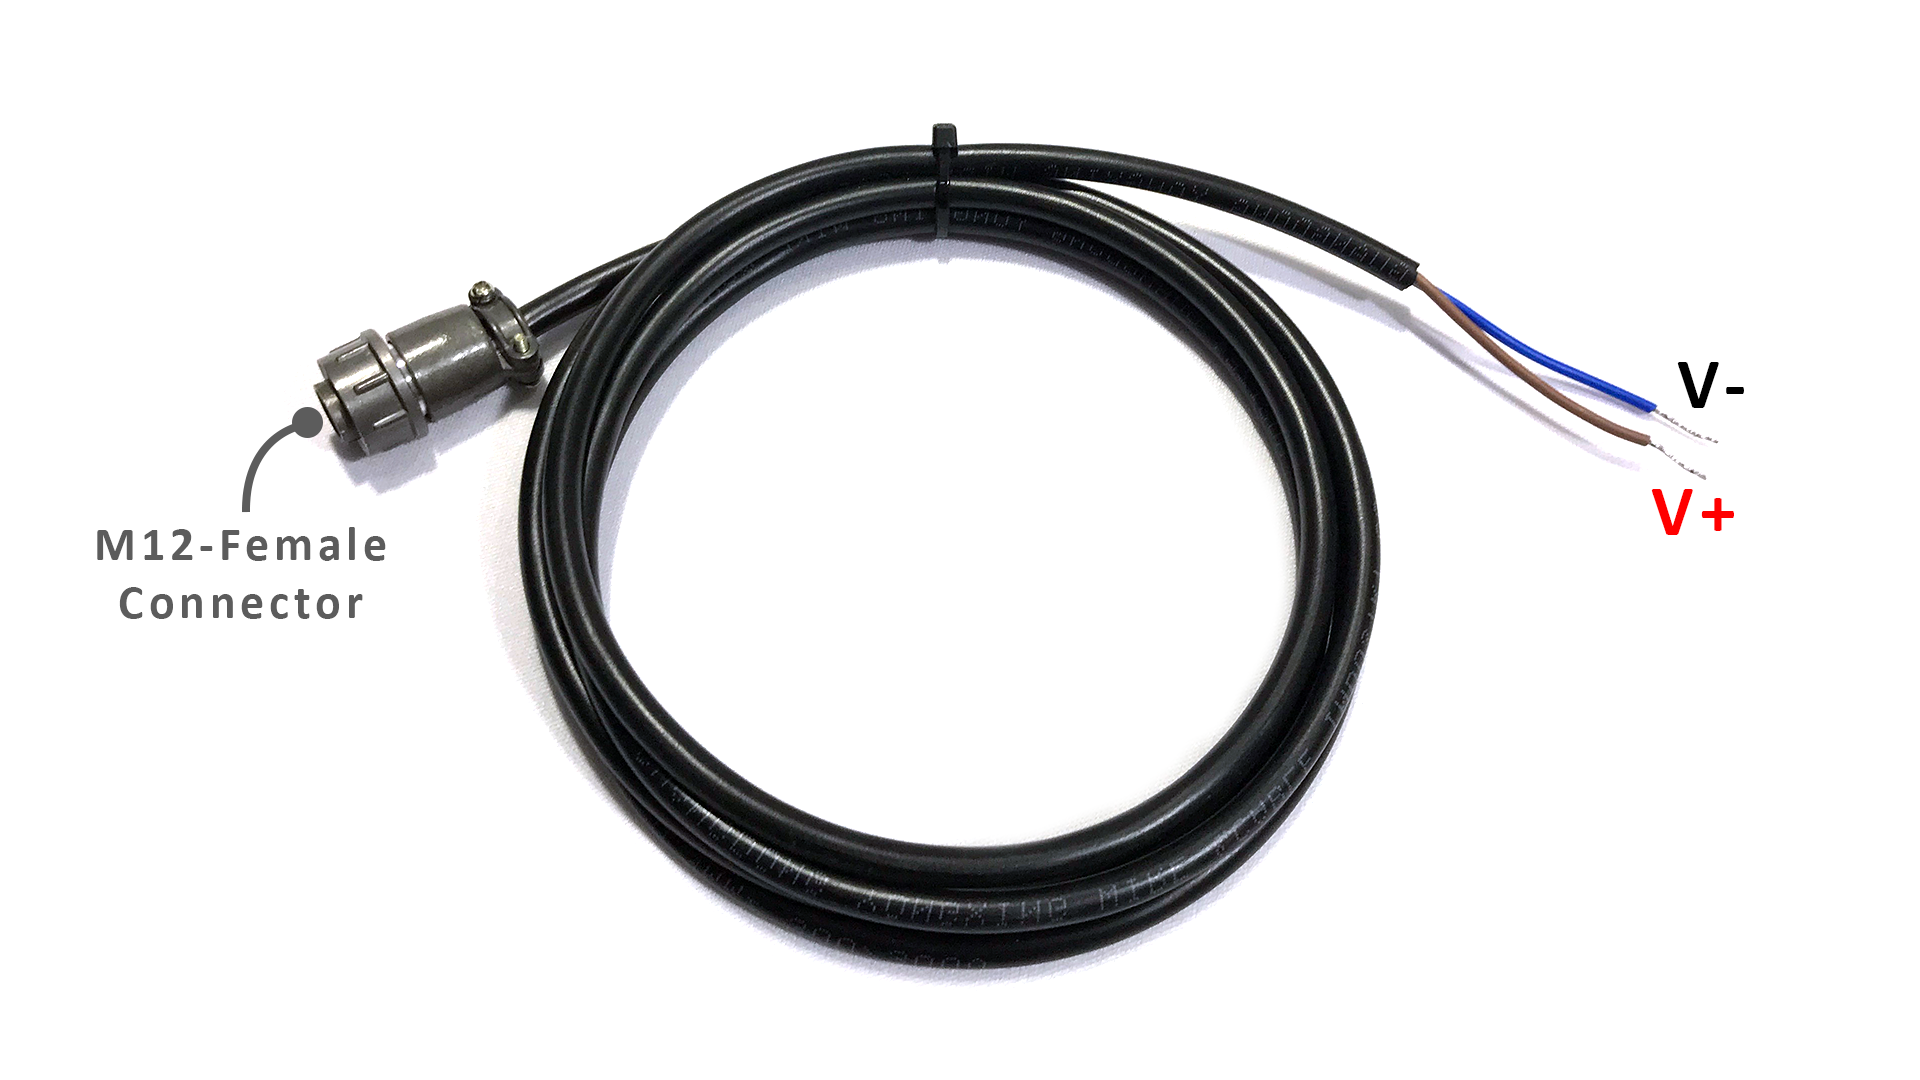
| Connector | Pulse |
| Pin 1 (Red/Brown) | V+ |
| Pin 2 (Black/Blue) | V- |
| Pin 3 (Yellow) | N/A |
| Pin 4 (Green) | N/A |
5. Dimensions

6. Installation
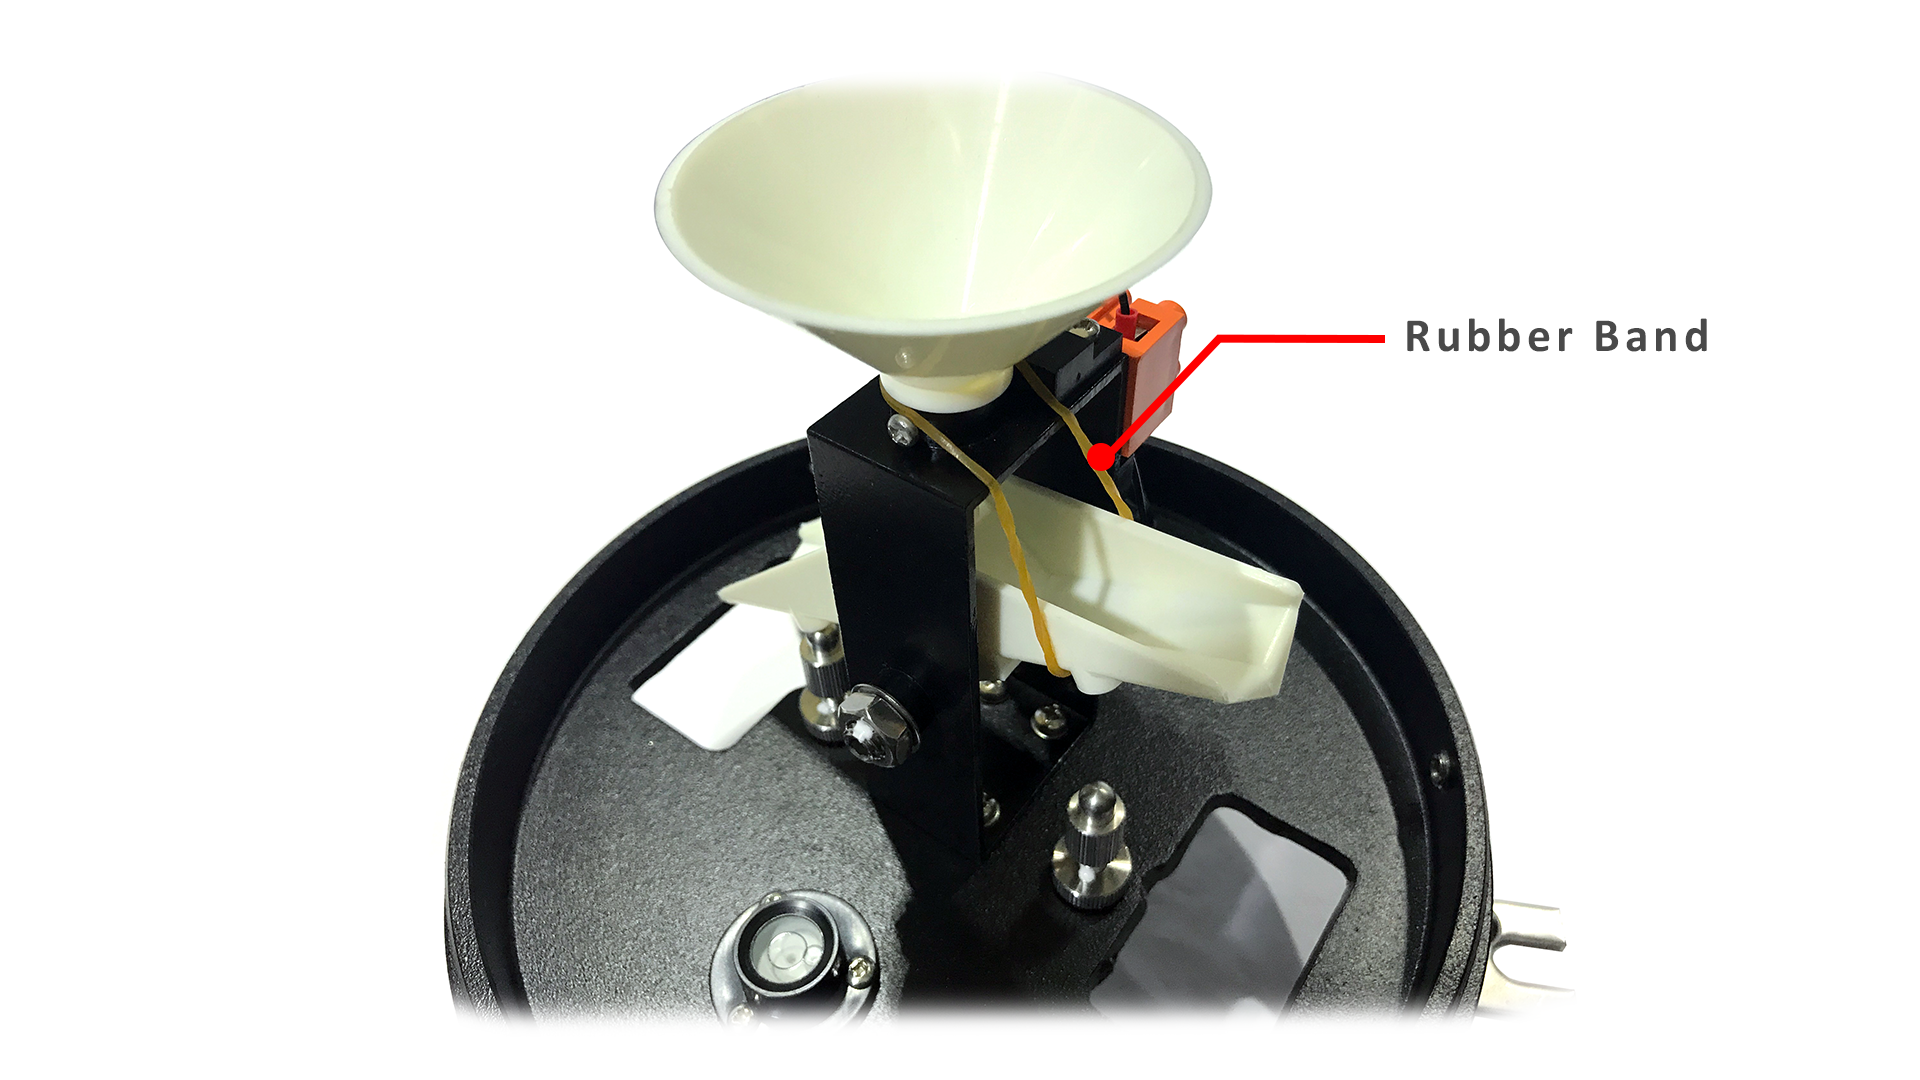
Step 1: Open the sensor cover with a Phillips screwdriver.
Step 2: Remove the rubber band (used to secure the tipping bucket for shipping) on the sensor.
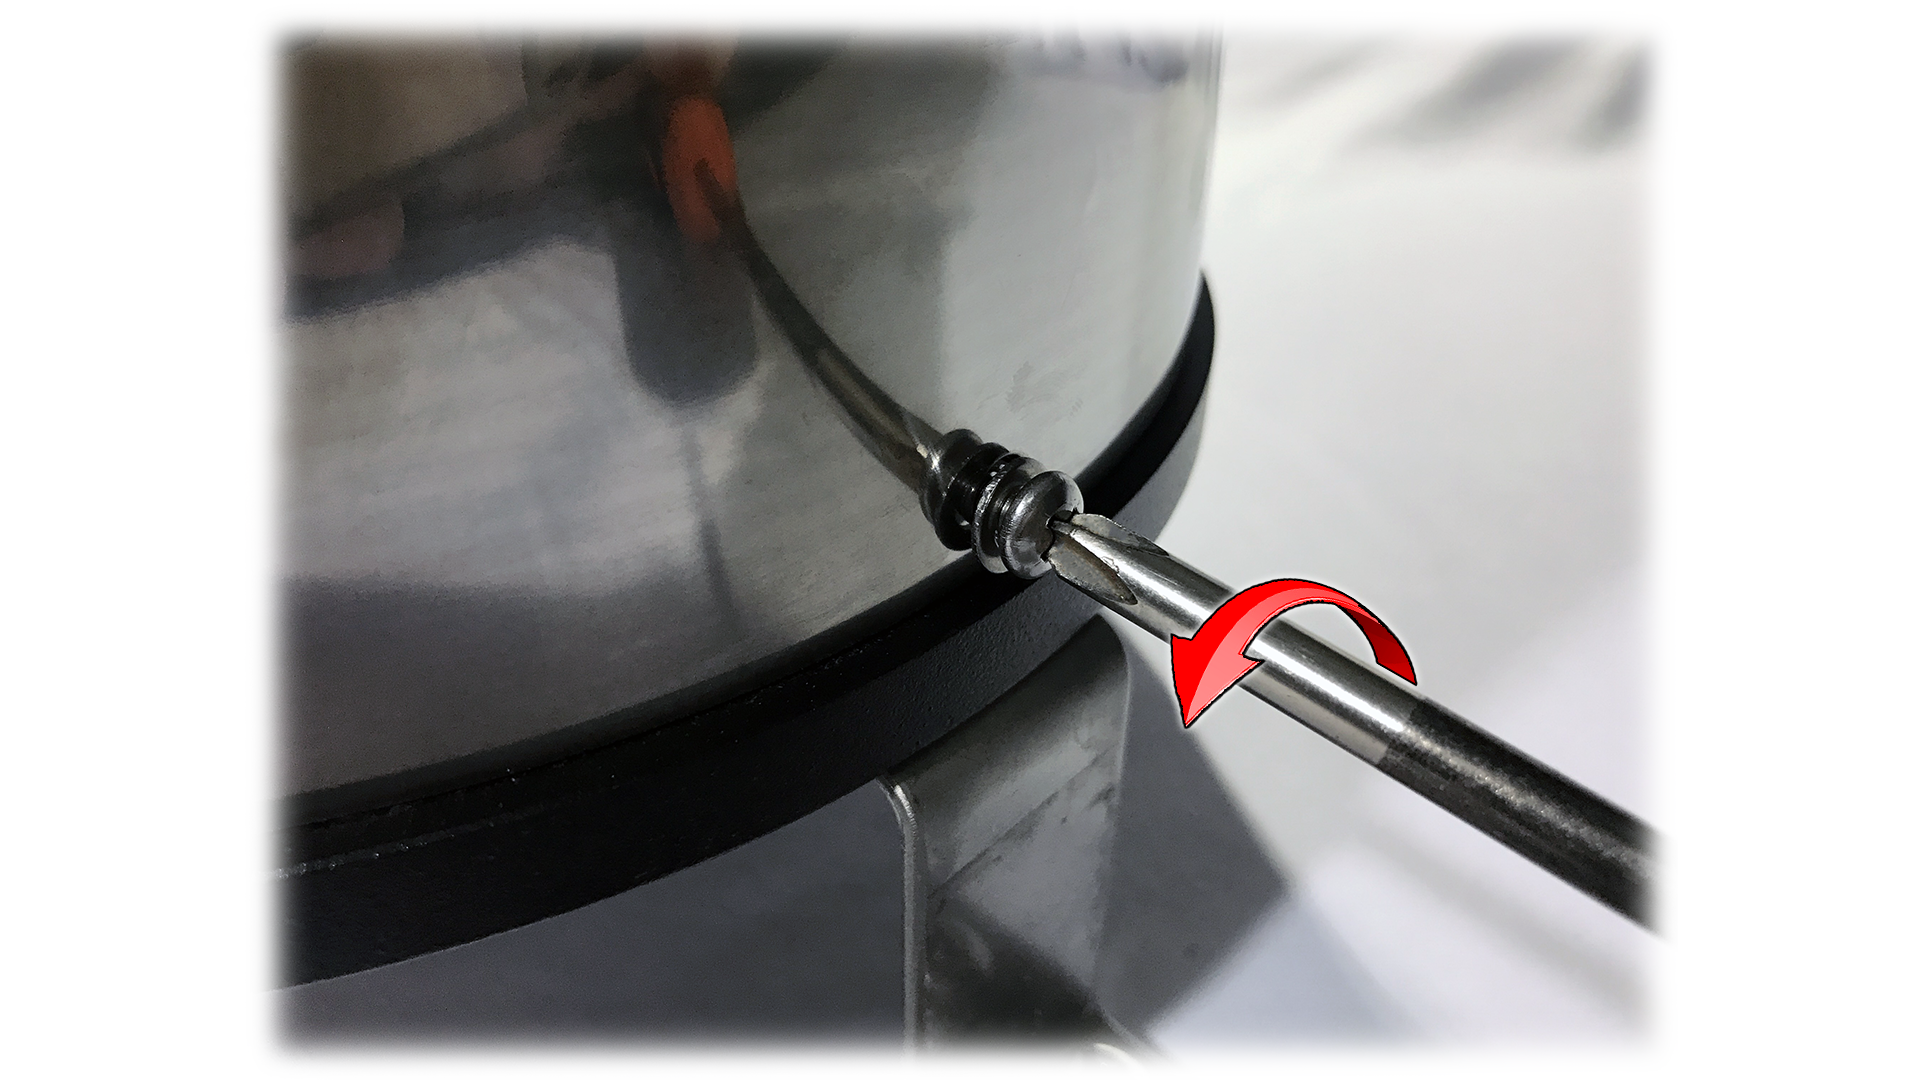
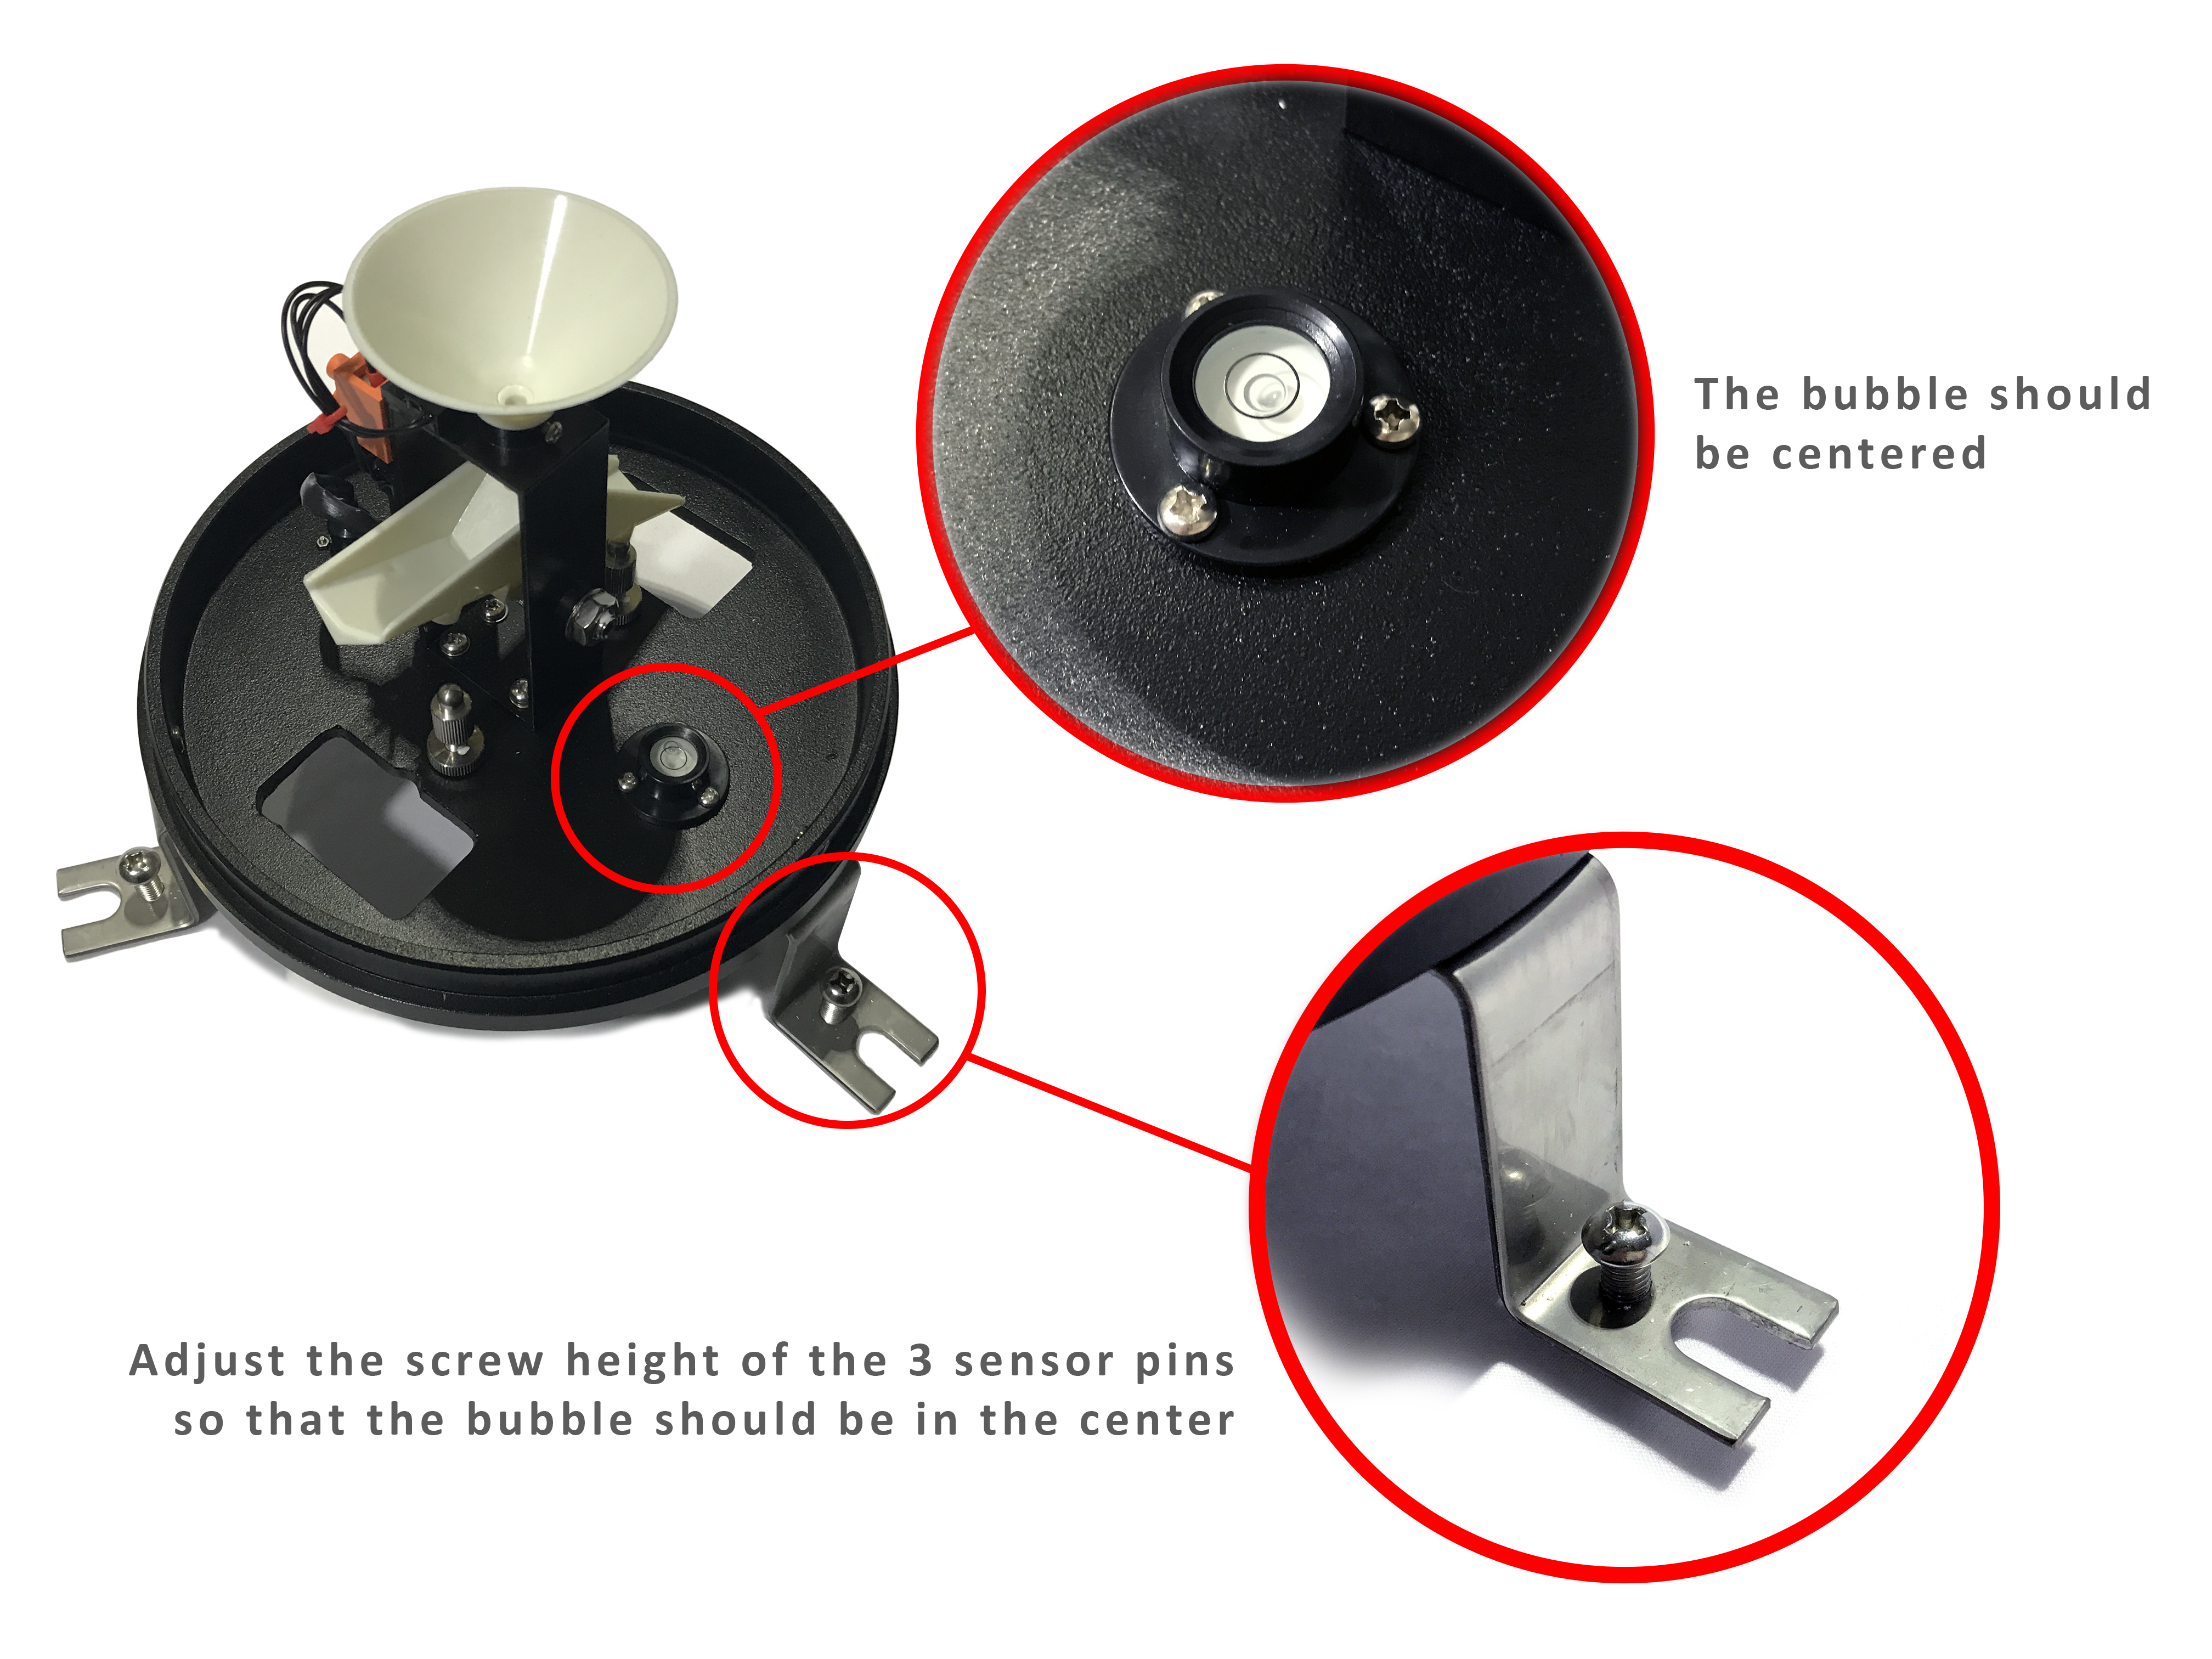
Step 3: Fix the sensor pins and adjust the height of the pins so that the bubble inside the sensor is centered.
(If the bubble is centered, it means the sensor is balanced)
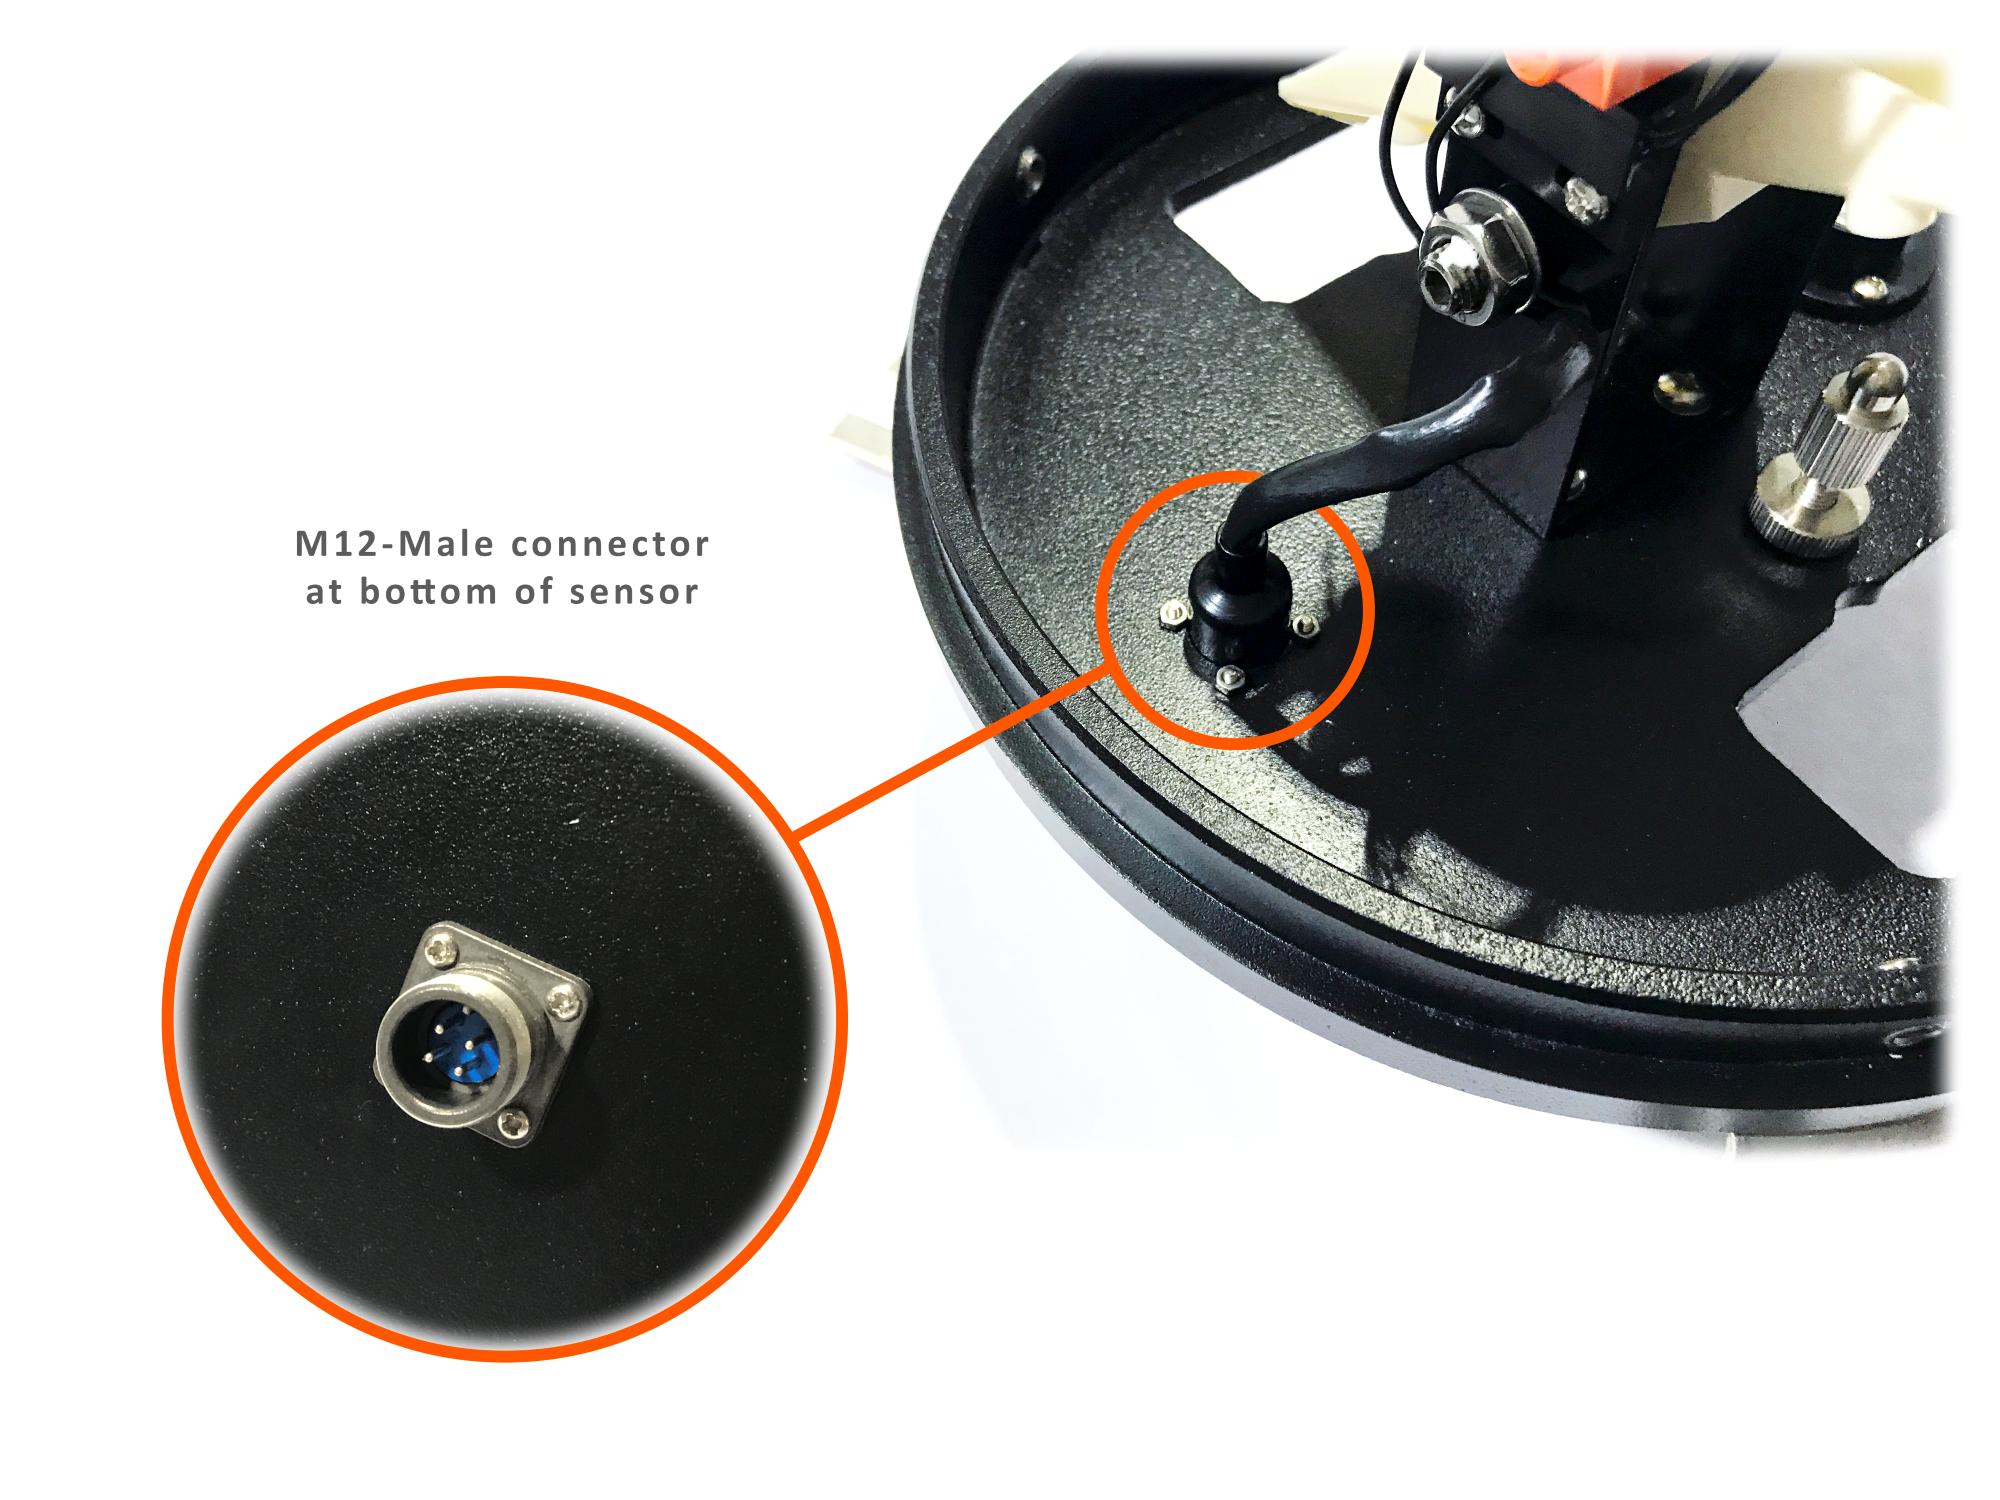
Step 4: Connect the M12-Female connector to the M12-Male connector of the sensor.
Step 5: Check the steps again (remove the rubber band, sensor bubble, fix and adjust the pins, wiring, ...), close the sensor cover and attach the screws.

7. Appendix
7.1 Rainfall Intensity Scale
| Scale | 24-hour rainfall (mm) |
| Light rain | 1-9.9 |
| Moderate rain | 10-24.9 |
| Heavy rain | 25-49.9 |
| Rainstorm | 50-99.9 |
| Torrential rain | 100-200 |
| Super-Torrential rain | >200 |
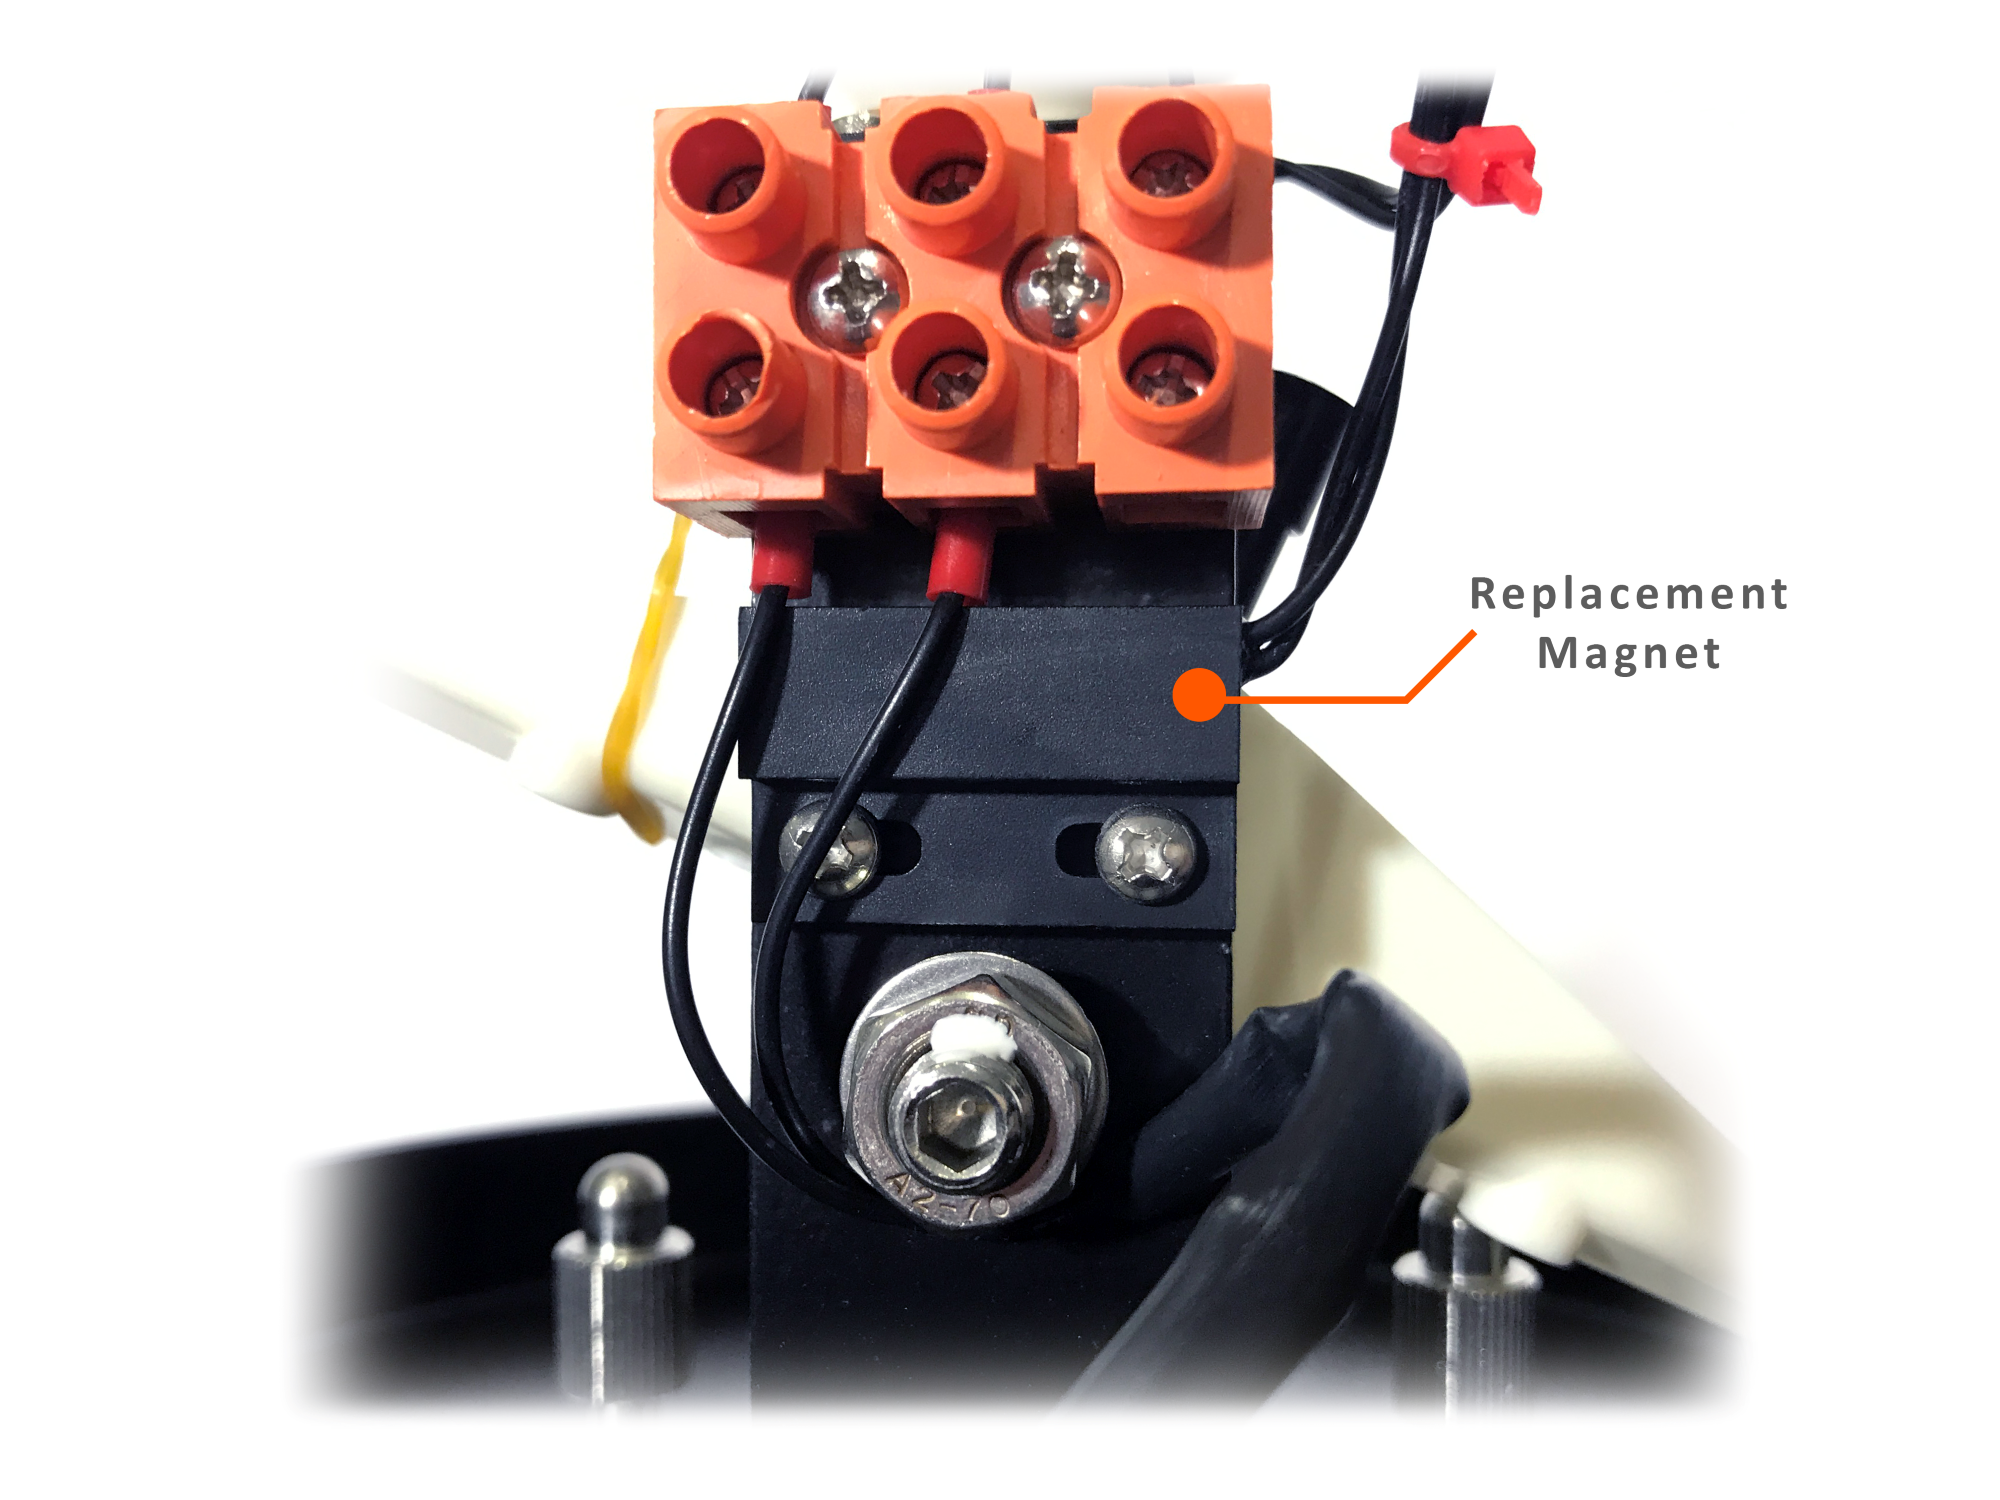
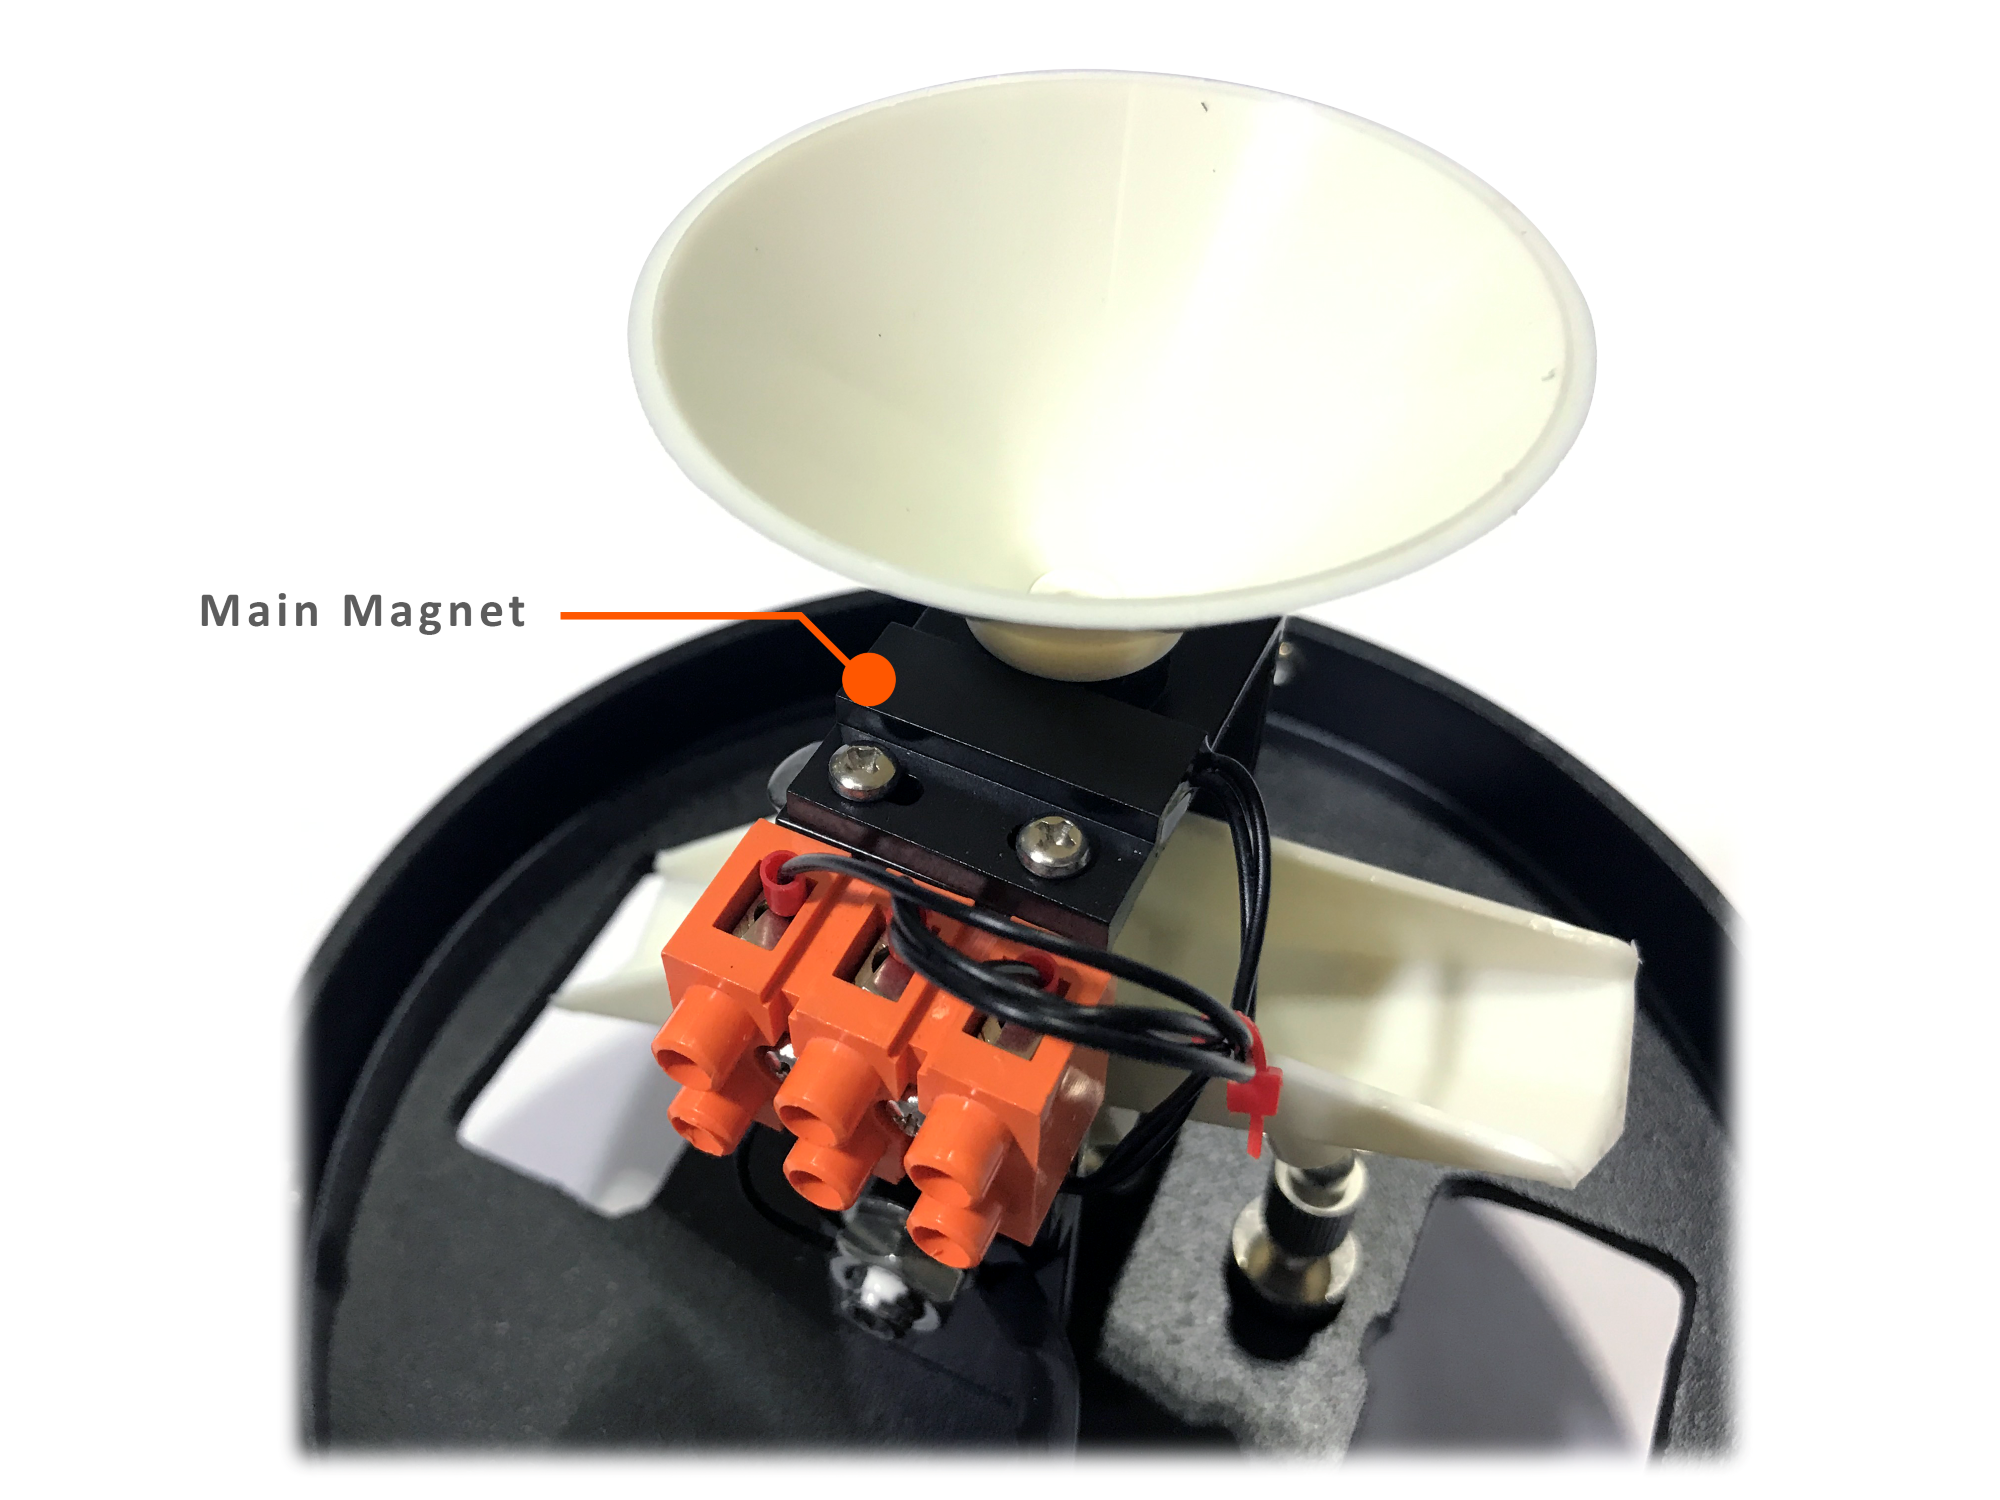
7.2 Replacement magnet
Below the sensor terminal block there is a pre-wired replacement magnet. If you need to replace the main magnet above just remove the screw, relocate the magnet and reverse the signal wires to use.
 |
 |
8. Troubleshooting
If some error occurs, such as no output or unreliable. Please disconnect the sensor first, then check if the sensor installation and connection is correct with the instruction manual.
If still not successful, please contact our company.
9. Support contacts:
|
Manufacturer
Daviteq Technologies Inc Email: info@daviteq.com | www.daviteq.com |
Distributor in Australia and New Zealand
Templogger Pty Ltd Tel: 1800 LOGGER Email: contact@templogger.net |

No Comments