II. iConnector Installation and Wiring
2.1 Installation location
Depend on what kind of iConnector, the location of installation will be considered carefully.
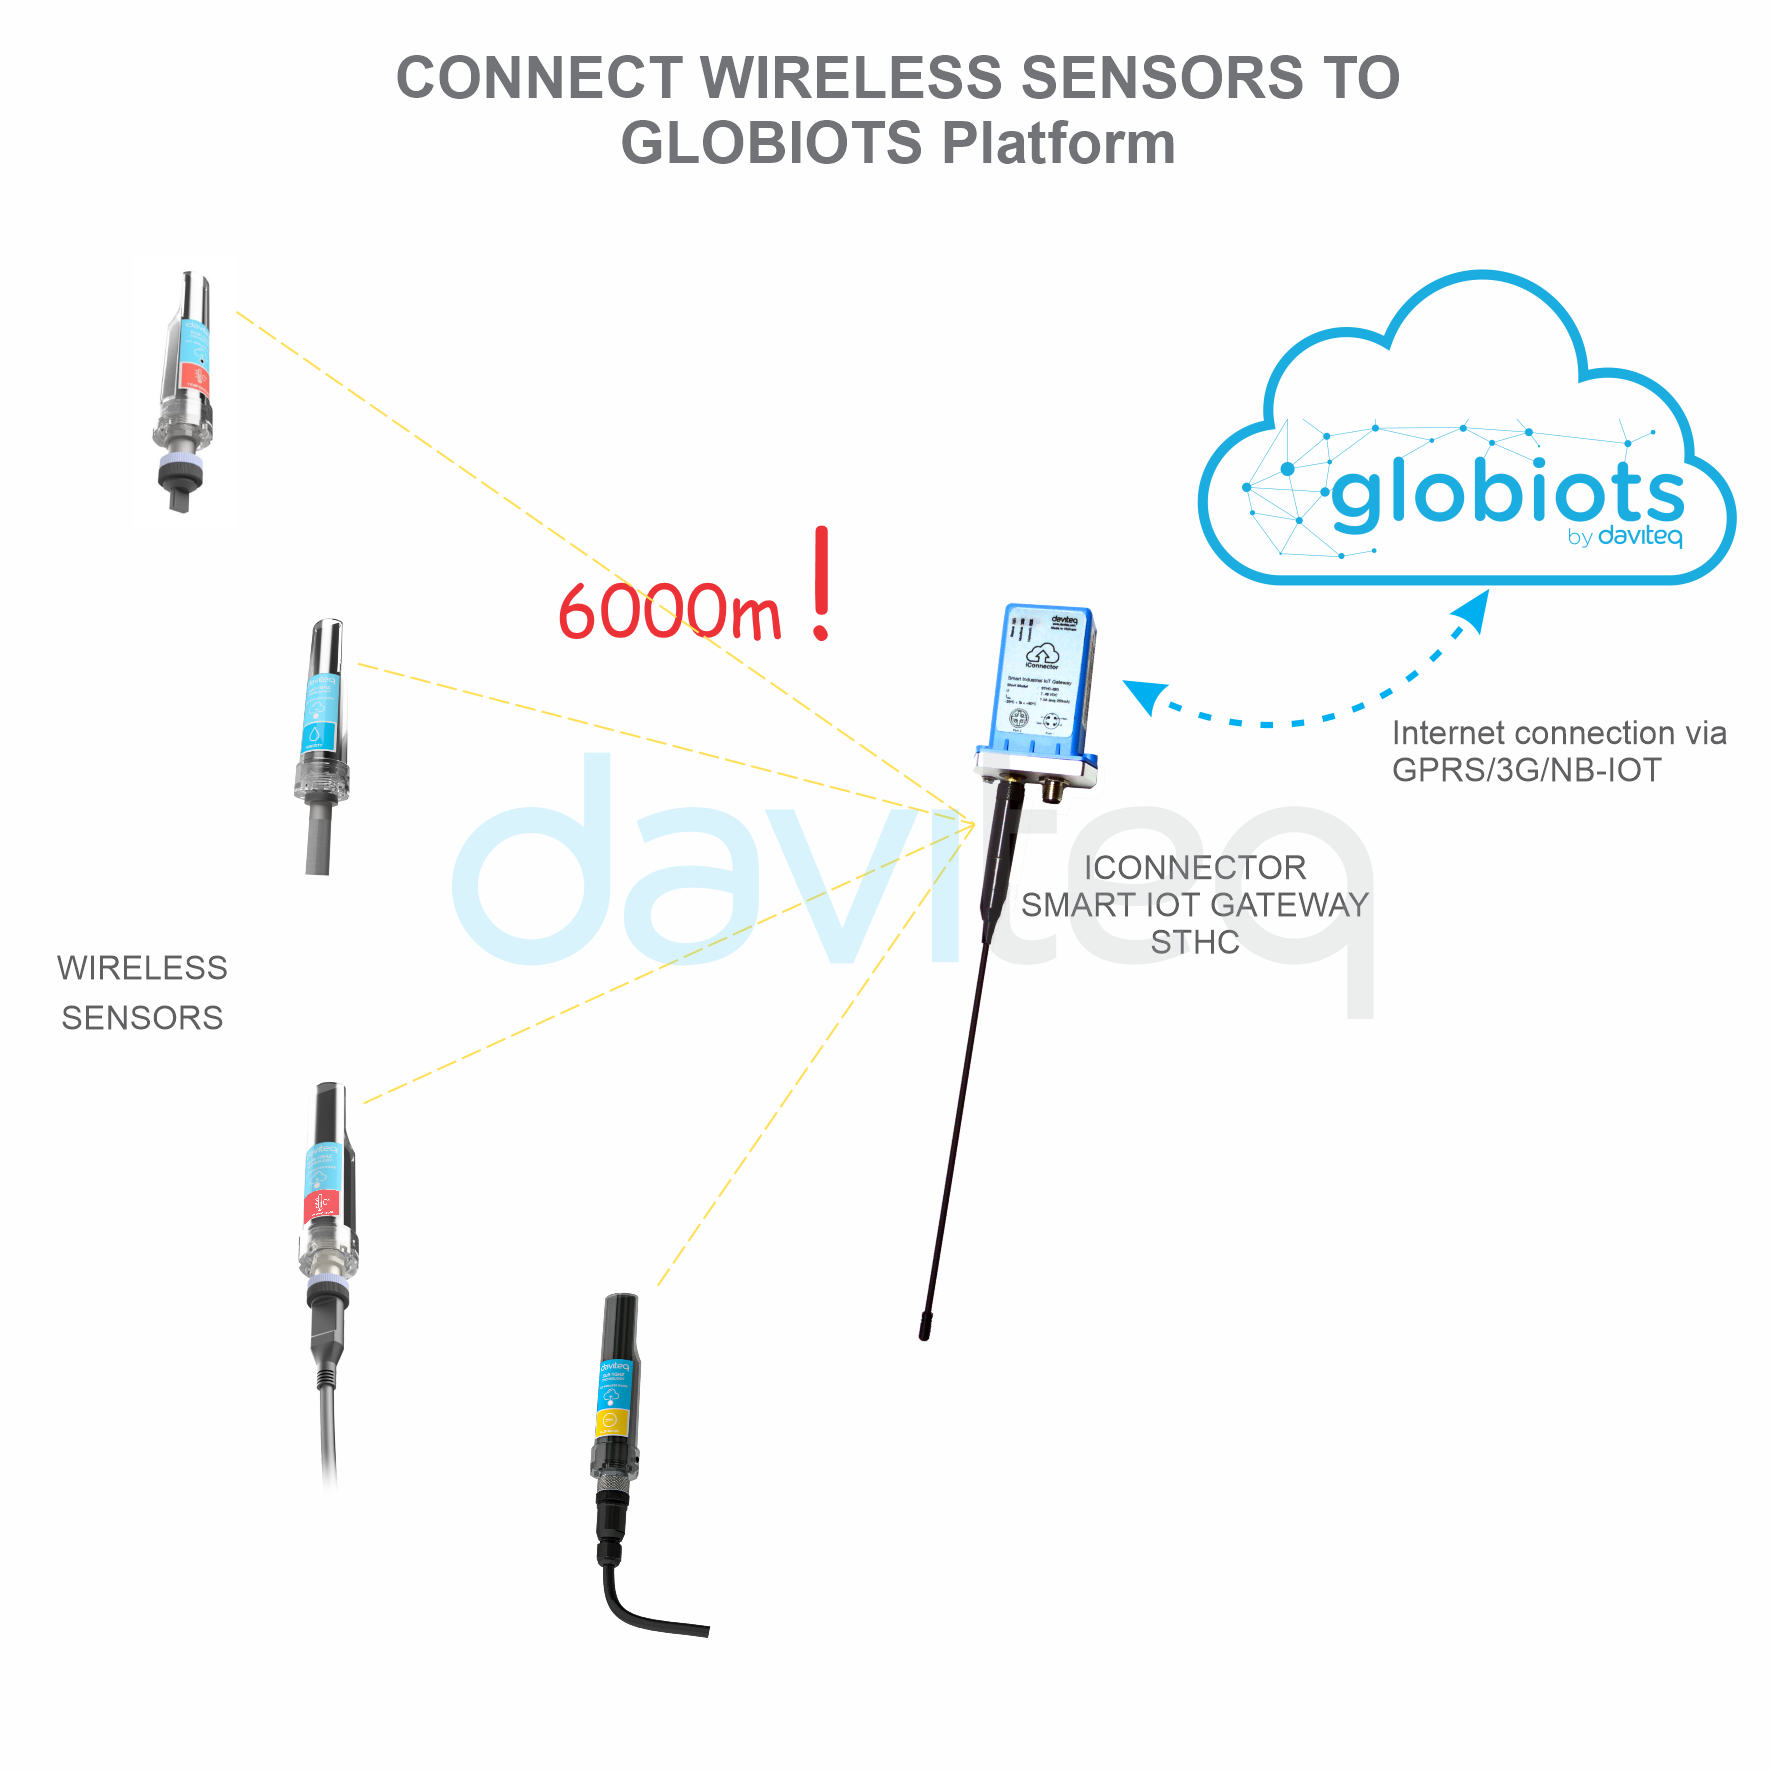
2.1.1 if the iConnector has built-in Sub-GHz Wireless Co-ordinator or Wireless Bridge:
To maximize the distance of transmission between Sub-GHz wireless sensor and iConnector, the ideal condition is Line-of-sight (LOS) between the Wireless sensor and iConnector. In real life, there may be no LOS condition. However, the Wireless sensor still communicates with iConnector, but the distance will be reduced significantly.
- The antenna of Sub-GHz Wireless Co-ordinator of Wireless Bridge must be placed above ground as high as possible, not lower than 2m. We recommend the minimum is 4m;
- It's better to place the antenna outdoor, on top of the roof of building, house, warehouse...;
- It's not good if the antenna is place indoor but the wireless sensor is outdoor;
- Only when all the wireless sensors are indoor, then you can place the antenna of wireless co-ordinator indoor, too;
ATTENTION:
DO NOT install the Wireless sensor or its antenna inside a completed metallic box or housing, because the RF signal can not pass through the metallic wall. The housing is made from Non-metallic materials like plastic, glass, wood, leather, concrete, cement…is acceptable.
2.1.2 if the iConnector has Cellular connectivity like 2G, 3G or 4G:
- We highly recommend to install the iConnector outdoor or outside of the cabinet so that it can have strong signal of cellular;
- Do not put iConnector inside a metallic box as the cellular can not go thru the metal sheets;
- Incase the iConnector must be place inside a box for better protection, please use the box with plastic materials like ABS, ASA, Polycarbonate, Fiber Glass...
2.1.3 if the iConnector has WiFi connectivity:
- We highly recommend to install the iConnector at the place has strong coverage of WiFi signal;
- Do not put iConnector inside a metallic box as the WiFi signal can not go thru the metal sheets;
- Incase the iConnector must be place inside a box for better protection, please use the box with plastic materials like ABS, ASA, Polycarbonate, Fiber Glass...
2.1.4 if the iConnector has Ethernet connectivity:
- We highly recommend to install the iConnector at the place for easy access and check LED status
2.2 Mounting bracket for installation
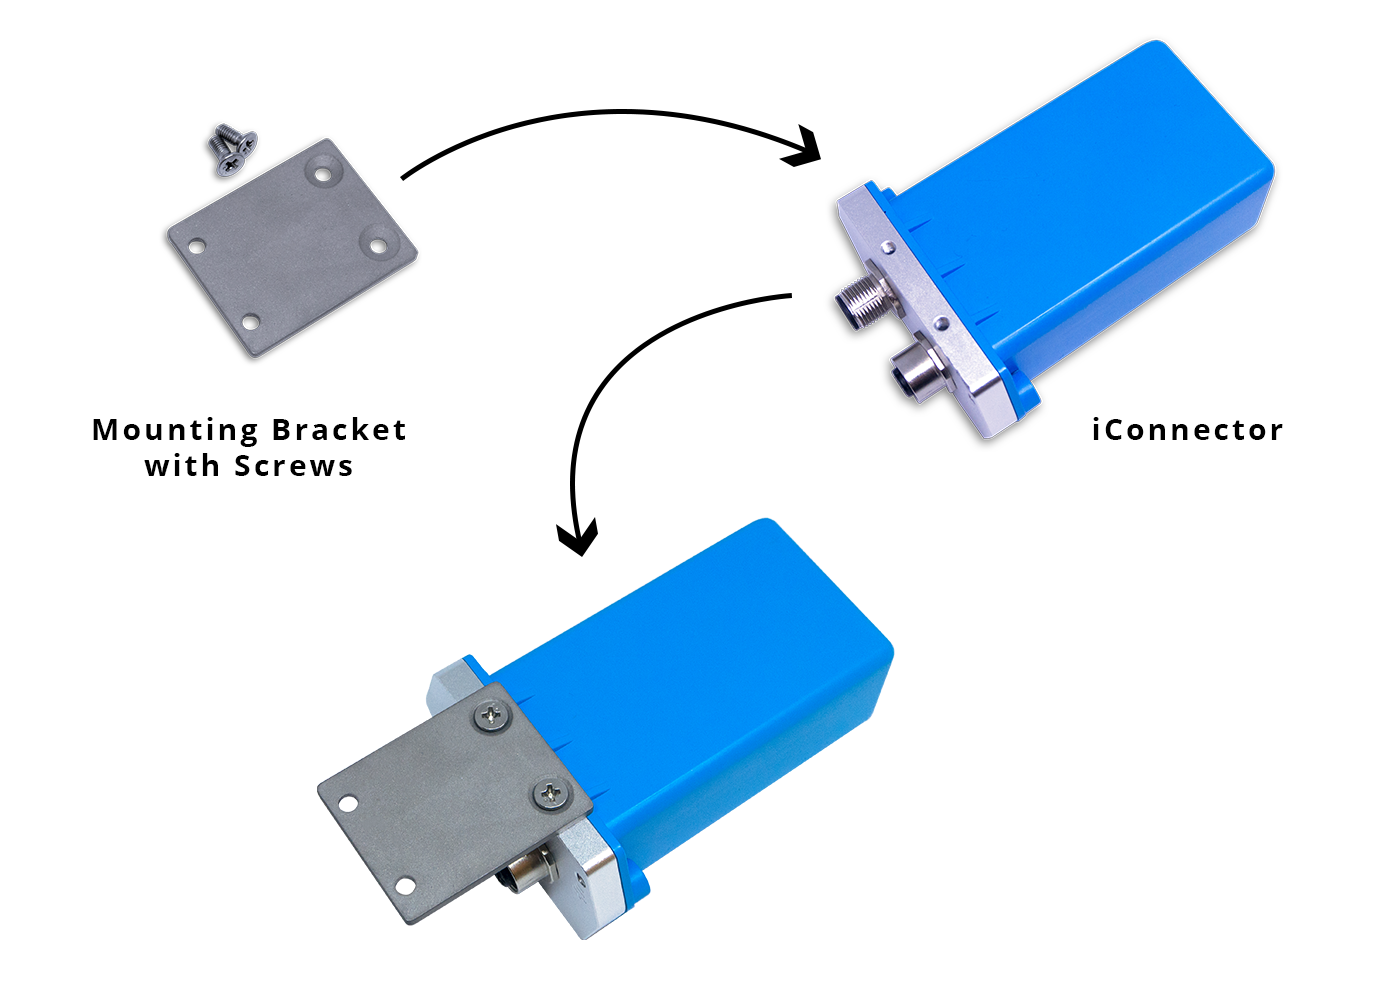
2.2.1 Cellular iConnector:
- The mounting bracket is made from hard metallic material. Following to these steps as the below picture
2.2.2 WIFI and Ethernet iConnector:
- There are 02 holes for screwing at the left and right of housing.
- These holes are covered by the cover.
- Open the cover, you can access the hole for screwing.
- Using screw with size 4mm diameter maximum.

2.3 Wiring
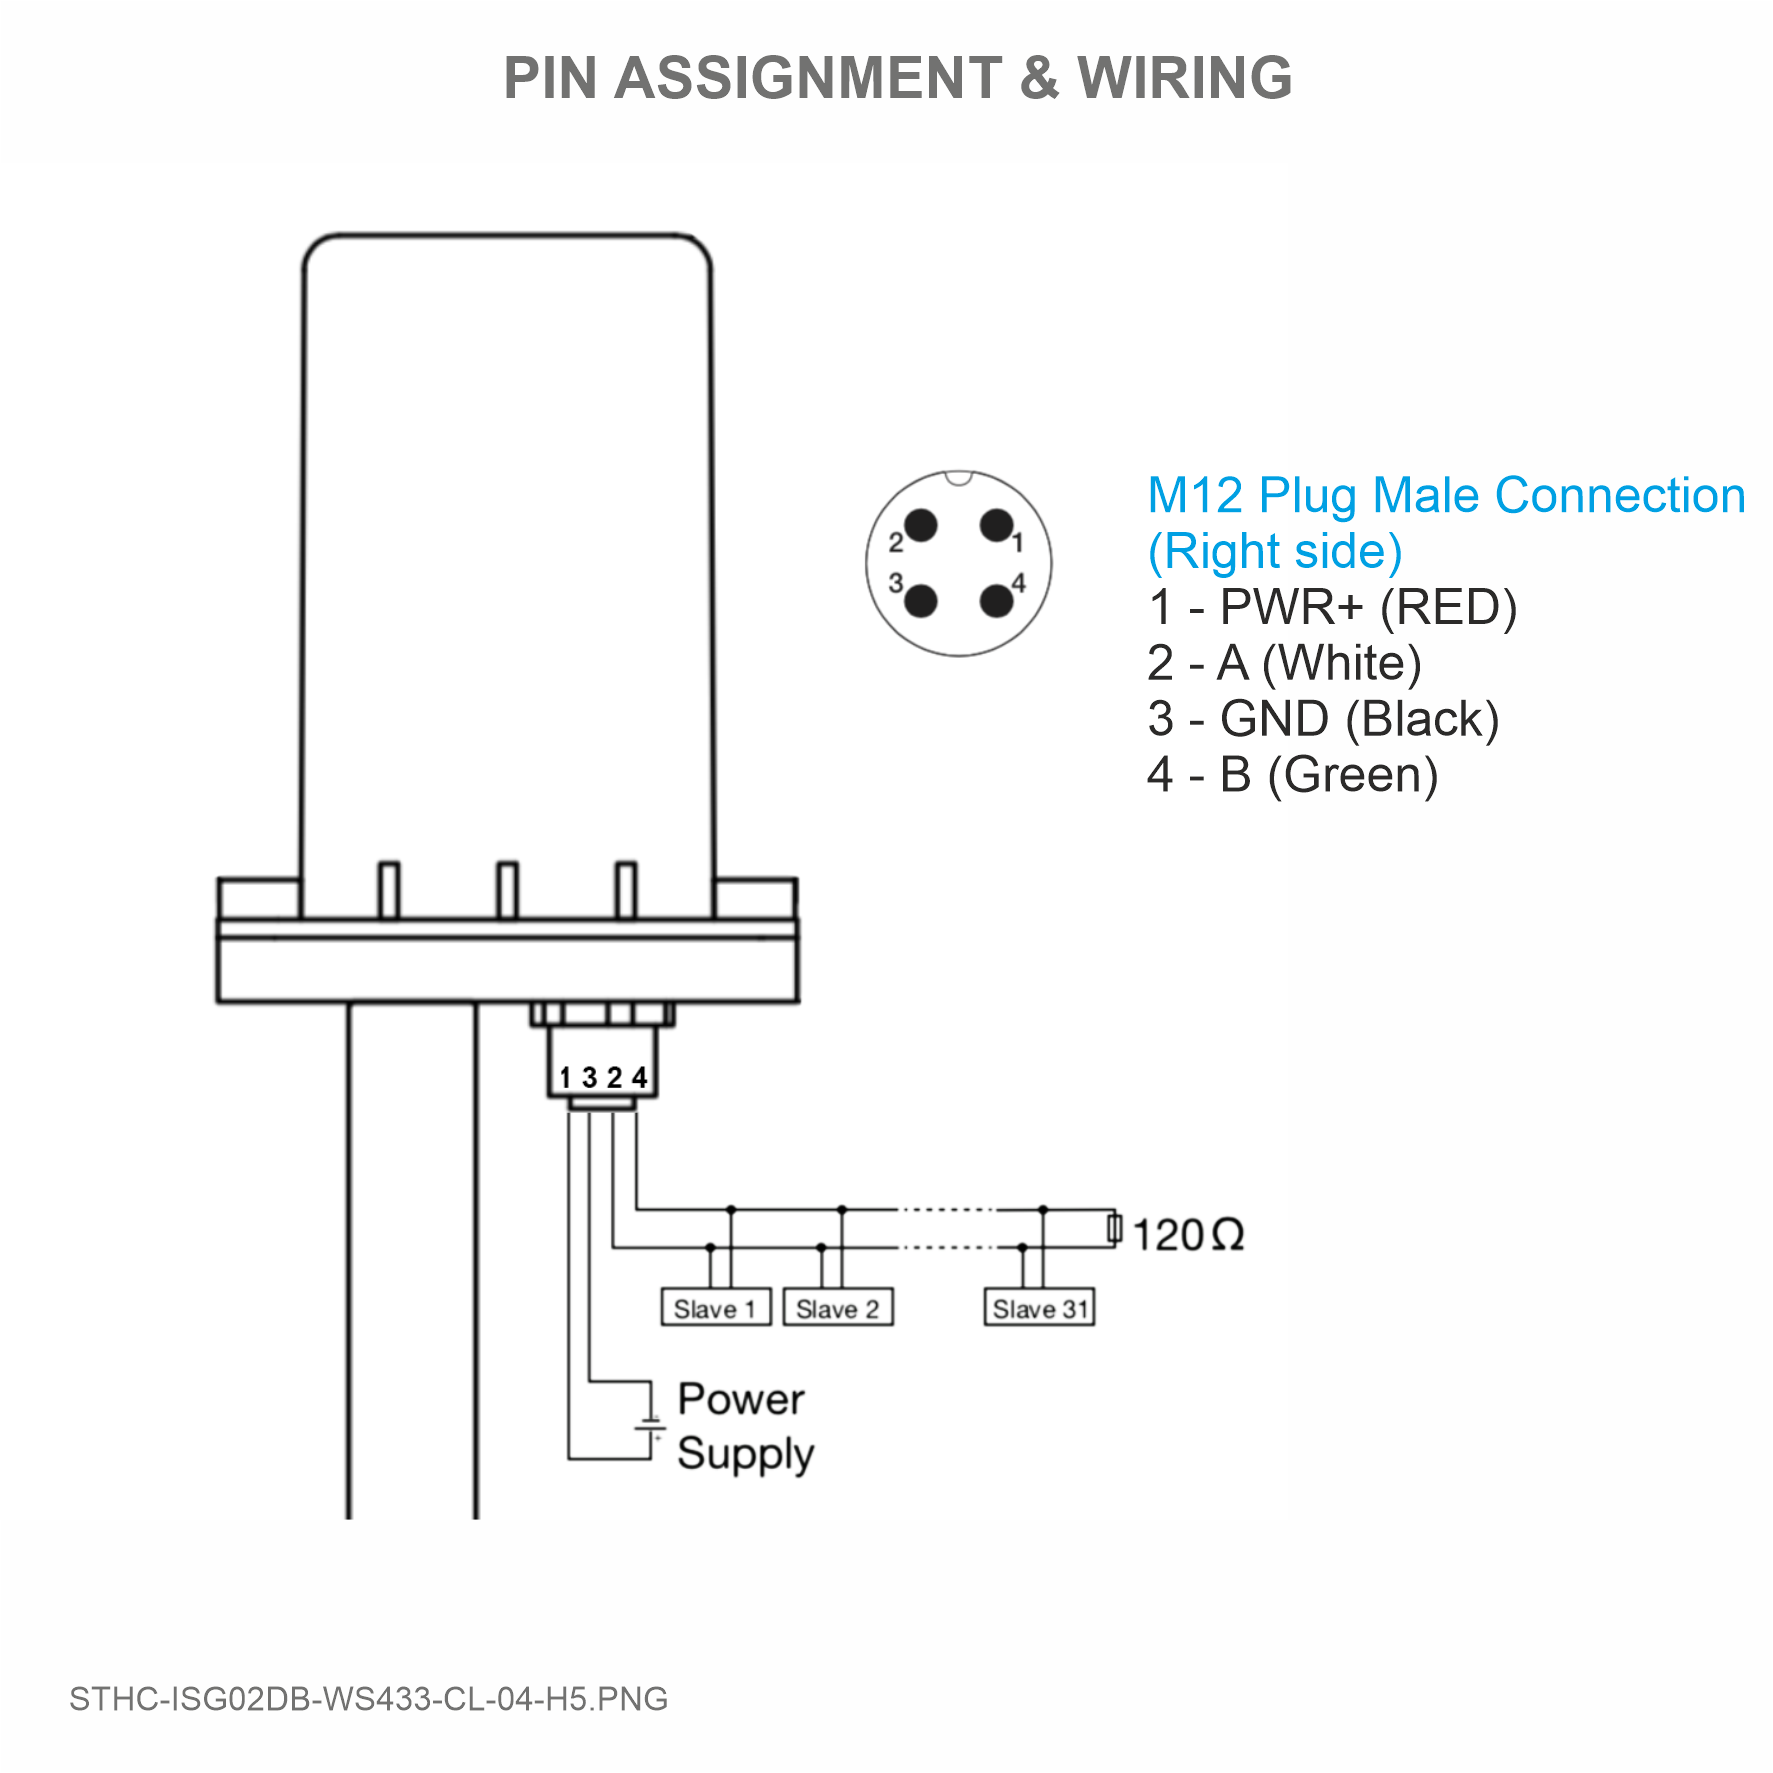
2.3.1 Wiring for wired slave device
Connect the modbus RTU slaves to the iConnector via RS485 protocol. Pin 2 is RS485+ (A), Pin 4 is RS485- (B)
No Comments