Common notes in installation of LoRaWAN Sensors
The common instructions for all kinds of Daviteq LoRaWAN Sensor. Please see below.
1. HOW DO YOU GET A STRONG RF SIGNAL?
To maximize the distance of transmission, the ideal condition is Line-of-sight (LOS) between the LoRaWAN sensor and the Base station (LoRaWAN Gateway). In real life, there may be no LOS condition. However, the LoRaWAN sensor still communicates with the Base station, but the distance will be reduced significantly.
DO NOT install the wireless sensor or its antenna inside a completed metallic box or housing, because the RF signal can not pass through the metallic wall. The housing is made from Non-metallic materials like plastic, glass, wood, leather, concrete, and cement…is acceptable.
2. INSTALL BATTERIES FOR LORAWAN SENSORS
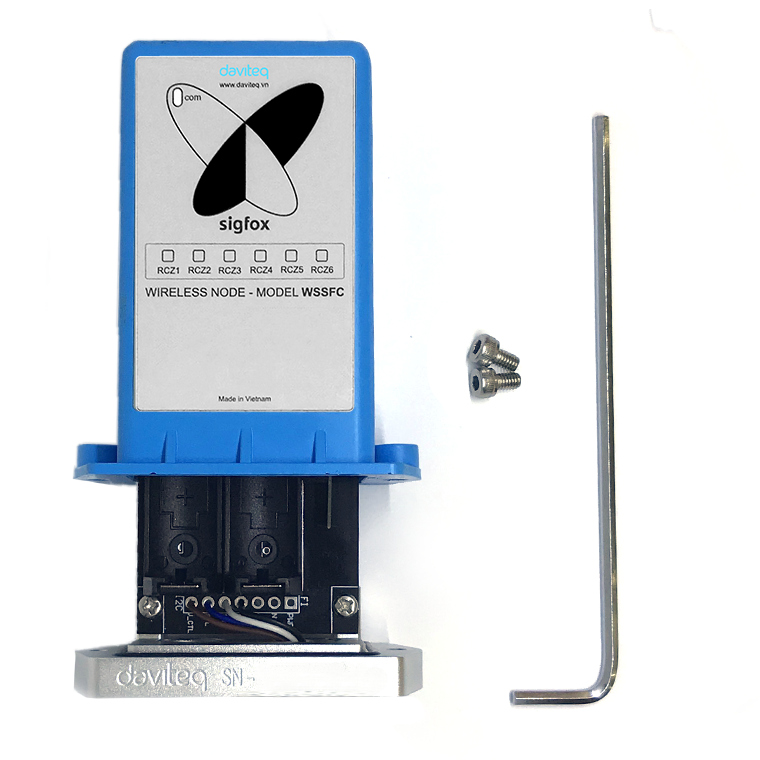
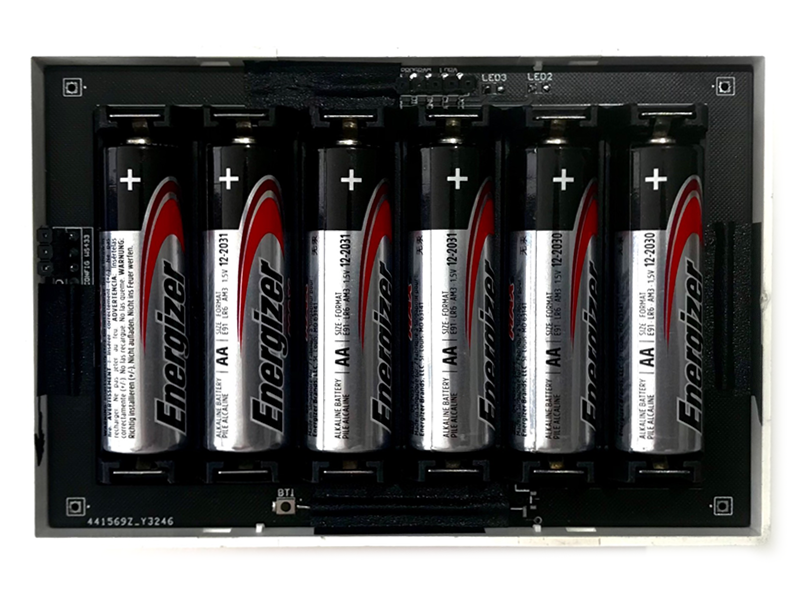
2.1 INSTALL BATTERIES FOR LORAWAN SENSOR WITH BLUE BOX DESIGN

Steps for battery installation:
Step 1: Using L hex key to unscrew M4 screws at the side of the housing and carefully pull out the top plastic housing in the vertical direction
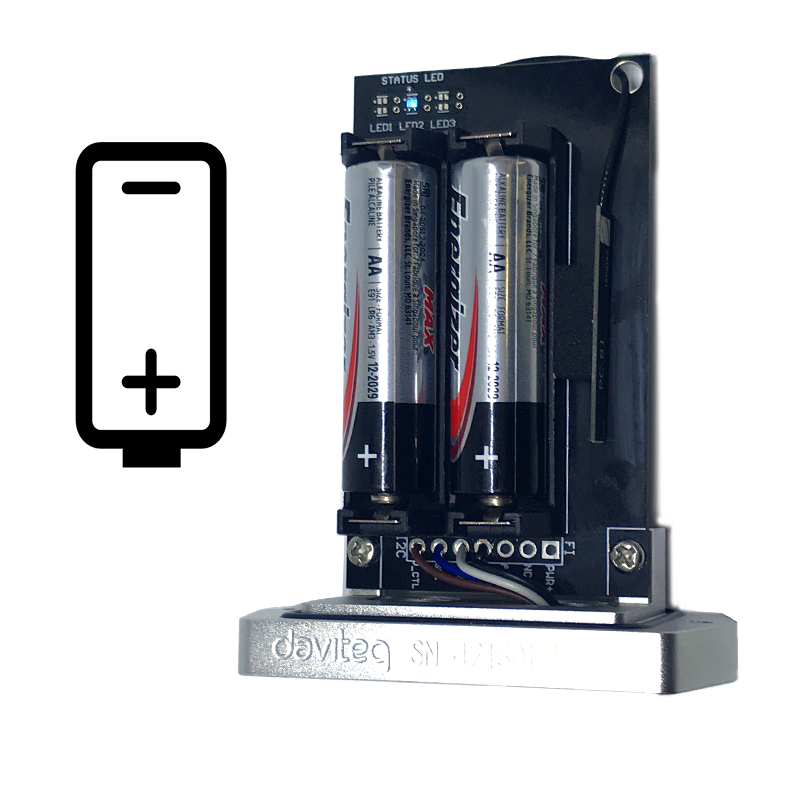
Step 2: Insert 02 x AA 1.5VDC battery, please take note the poles of the battery
ATTENTION:
REVERSED POLARITY OF BATTERIES IN 10 SECONDS CAN DAMAGE THE SENSOR CIRCUIT!!!
ATTENTION:
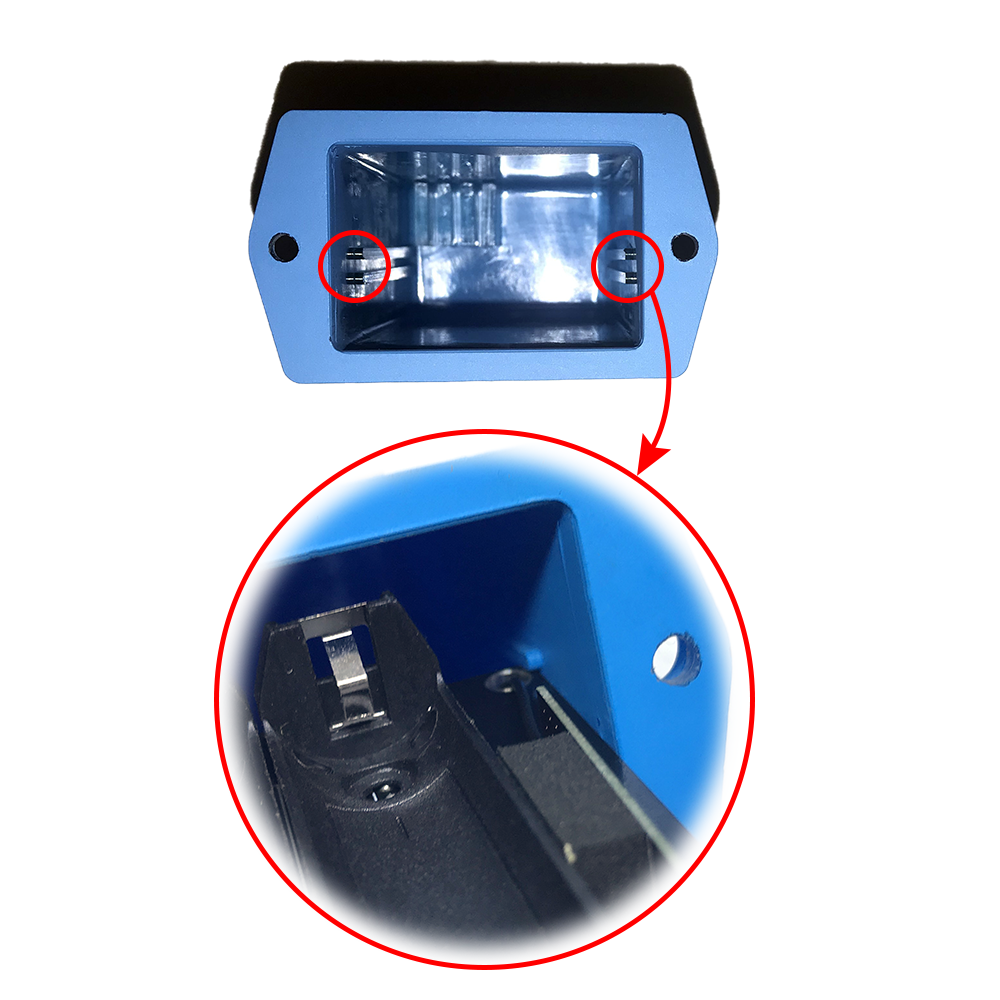
When reinstalling the cover, pay attention to put the PCB edge into the middle slot of the box inside as shown below)
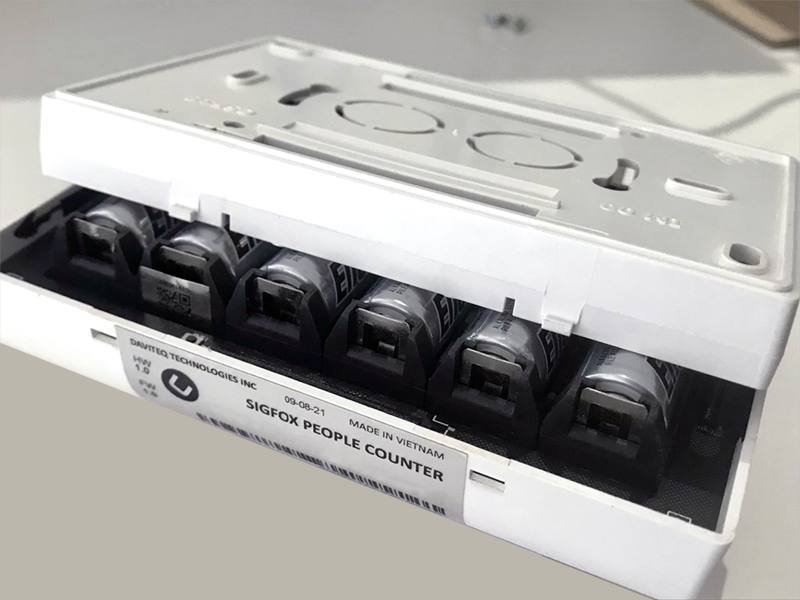
2.2 INSTALL BATTERIES FOR LORAWAN SENSOR WITH RECTANGULAR WHITE PLASTIC HOUSING DESIGN

Steps for battery installation:
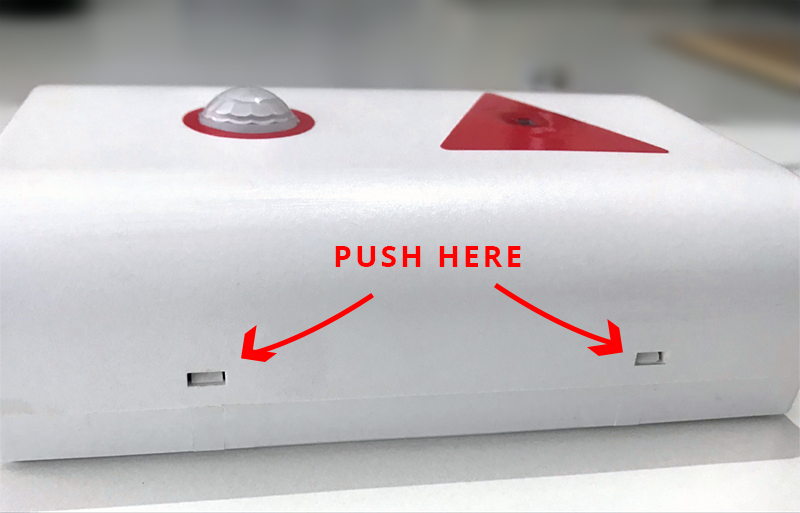
Step 1: Use flat head screws to push into 2 reed joints
Step 2: Open the housing, then insert 06 x AA 1.5VDC battery, please take note of the poles of the battery
ATTENTION: REVERSED POLARITY OF BATTERIES IN 10 SECONDS CAN DAMAGE THE SENSOR CIRCUIT!!!

Step 3: Insert the top plastic housing (Please note the 2 reed joints)
2.3 INSTALL BATTERIES FOR LORAWAN SENSOR WITH CIRCULAR WHITE PLASTIC HOUSING DESIGN
3. MOUNTING FOR LORAWAN SENSOR WITH BLUE BOX HOUSING
3.1 MOUNTING FOR LORAWAN SENSOR WITH BLUE BOX DESIGN
The following are the steps for the LoRaWAN sensor with a Blue box housing design.
Step 1: Install bracket on the sensor

Step 2: Determine the mounting position and secure the sensor with the included screws
Step 3:Grounding the sensor
3.2 MOUNTING FOR LORAWAN SENSOR WITH RECTANGULAR WHITE PLASTIC HOUSING DESIGN
Step 1: Determine the direction of the sensor
- If the sensor has a direction, for example, the LoRaWAN Lidar People Counter, please take note of the direction of the sensor before installation

Step 2: Mount the bottom housing of the sensor to the ceiling by fastening the 2 screws to the ceiling located at the 2 diagonal corners of the bottom cover.
- Use the 2 screws that are included to be used to attach the sensor to surfaces such as Wood, and composite plastic.
- If the ceiling surface is made of plaster, it is recommended to use a special insert so that the device can firmly adhere to the ceiling surface. Avoid dropping the device.

Step 3: Attach the top and bottom housings (note the 2 reed joints)
- Fit the main body to the bottom cover in the correct direction: the 2 reed joints on the bottom cover should fit into the main body on the side labeled with the device.
- Make sure that the main body is fully engaged with the bottom cover, then release the hand.
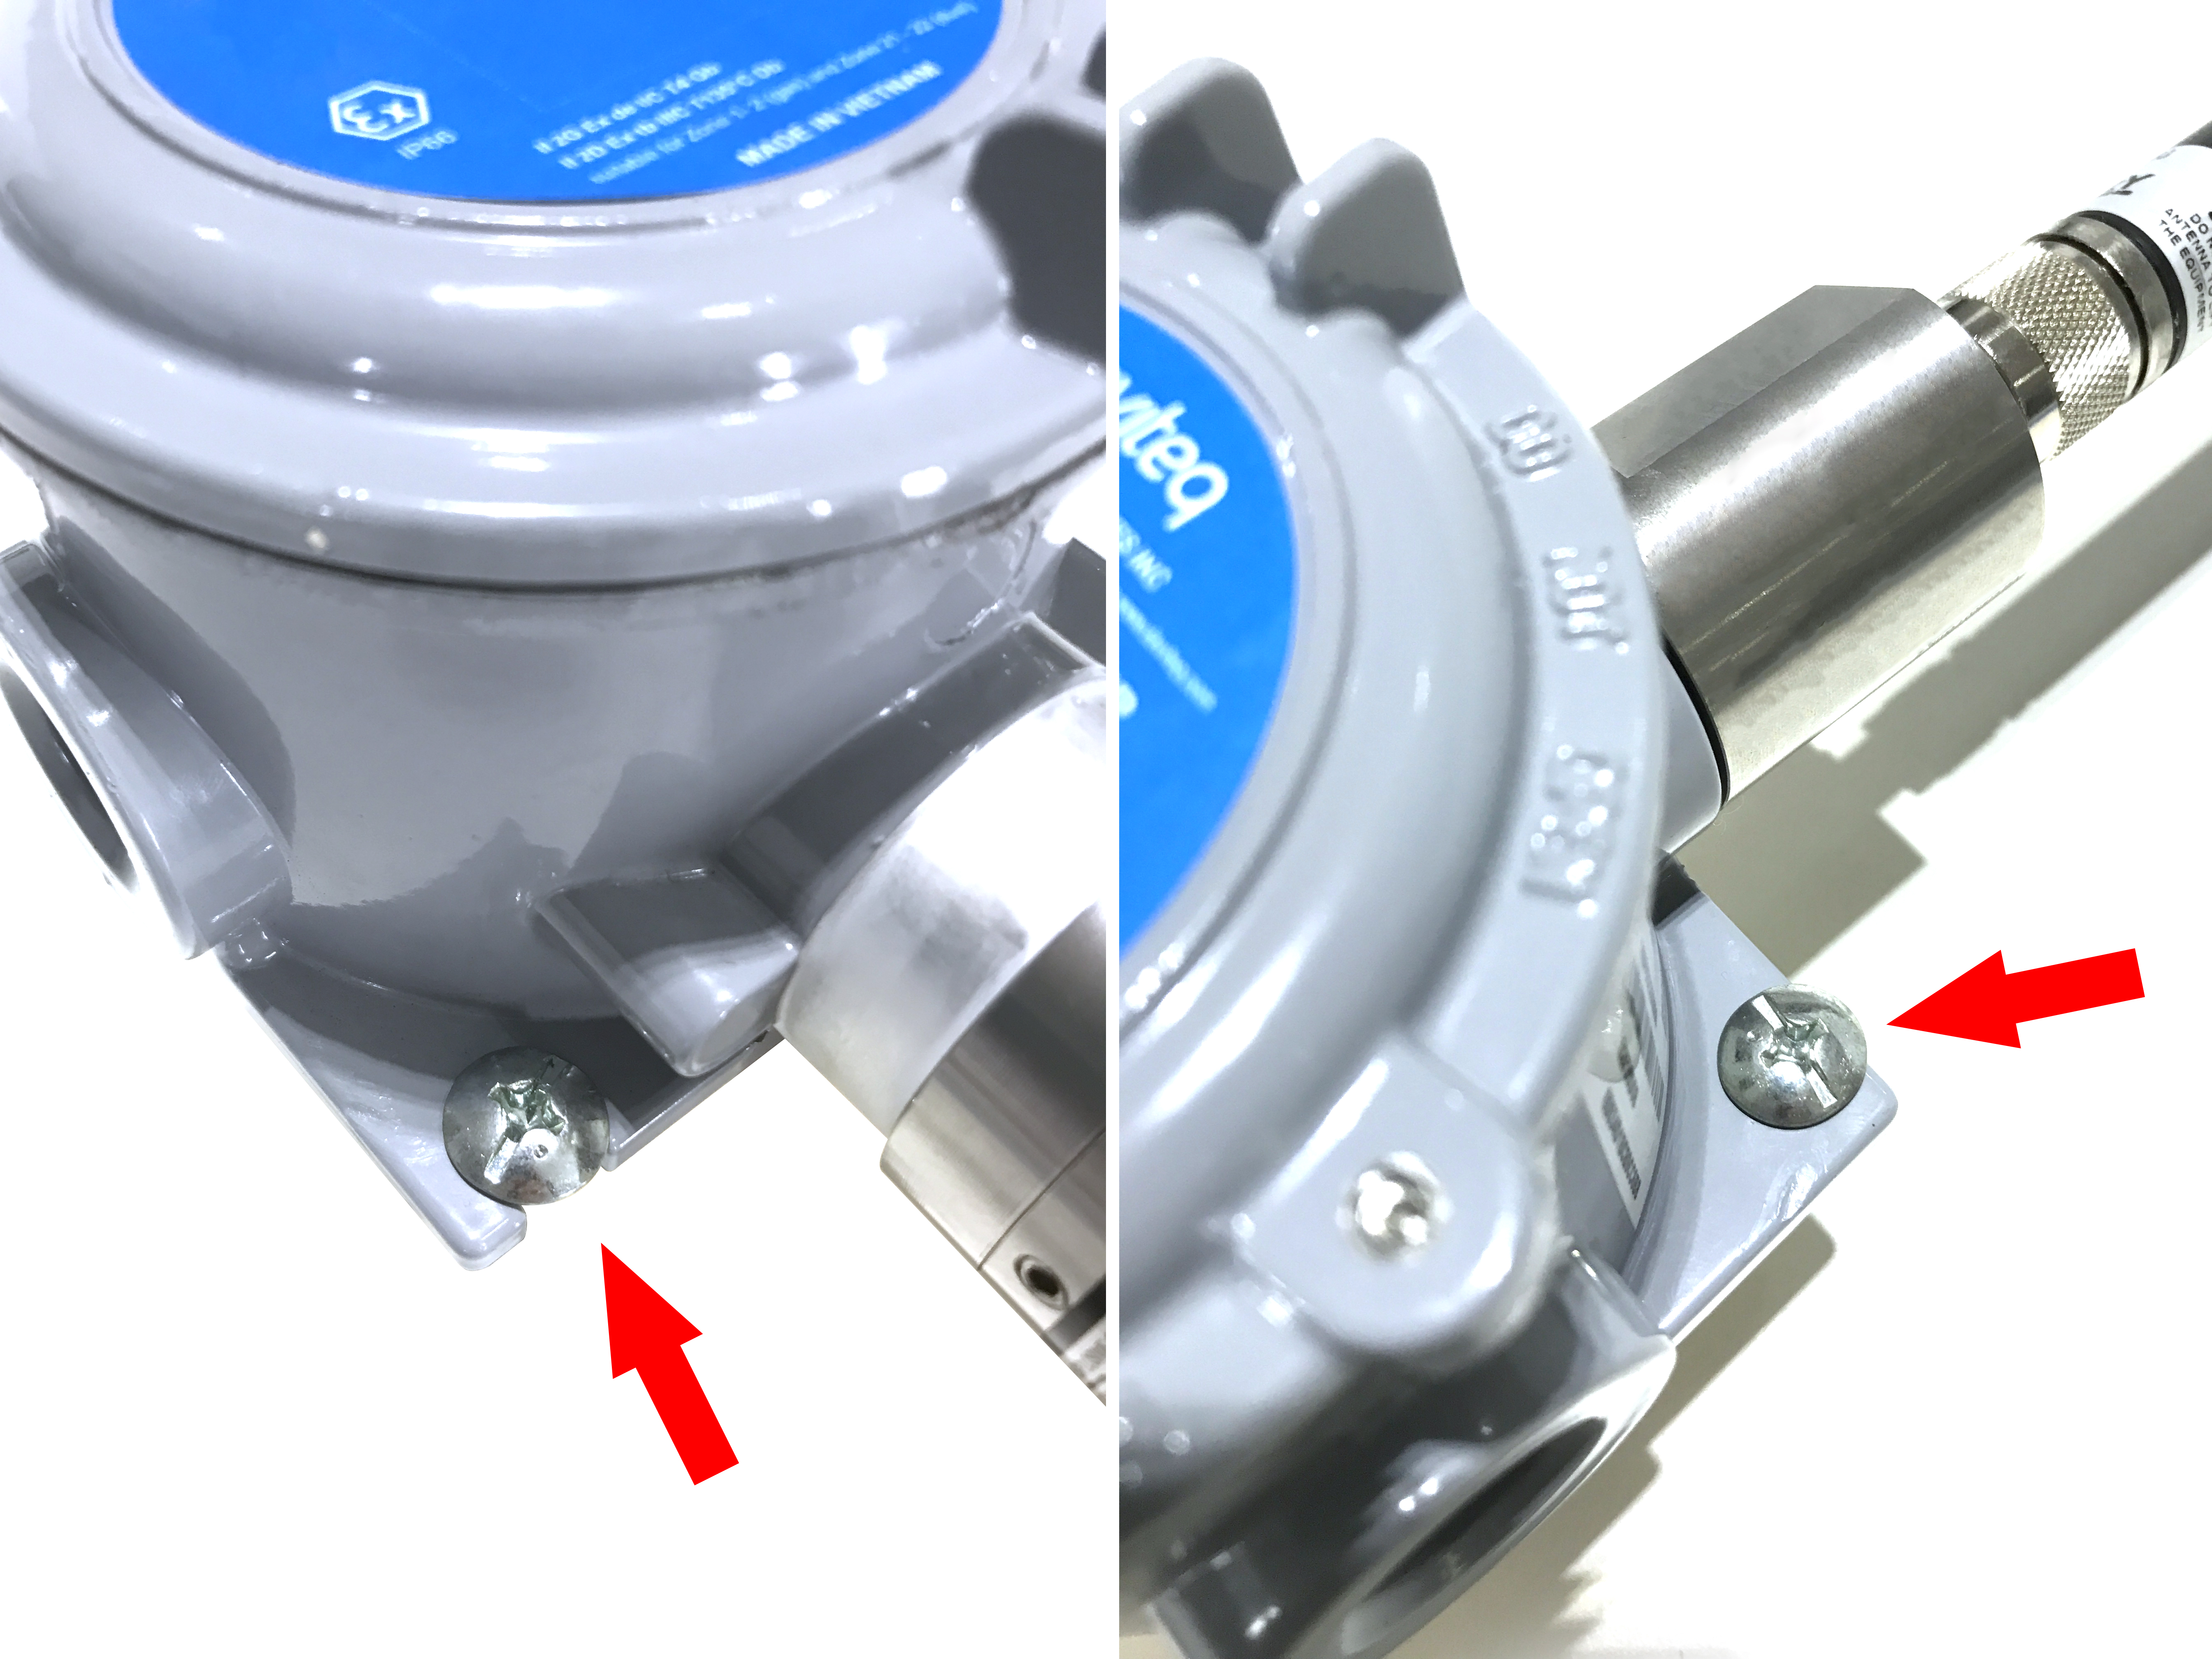
3.3 MOUNTING FOR LORAWAN SENSOR WITH EXD-APPROVED HOUSING
3.4 MOUNTING FOR LORAWAN SENSOR WITH CIRCULAR WHITE PLASTIC HOUSING DESIGN
No Comments