2. QUICK GUIDE
Reading time: 15 minutes
Finish this part so you can understand and put the device in operation with the default configuration from the factory.
2.1. What is the PINEX?
PineX is an industrial-grade outdoor LoRaWAN® Gateway, designed to operate reliably in the harshest environments—from scorching deserts to freezing Arctic conditions, and even hurricane-force winds up to 200 km/h. With IP67-rated waterproof and dustproof protection, an extended temperature range of -40°C to +70°C, and Dual LoRa Antennas for extended coverage, PineX ensures uninterrupted, long-range connectivity even in extreme weather conditions. Supporting all global LoRaWAN frequency bands, PineX integrates a built-in Network Server, Node-RED, and VPN security, enabling fast, cost-efficient, and secure IoT deployments. Its integrated 4G Router with PoE (802.3at) support allows for seamless Internet access and power supply for IP cameras, sensors, and other connected devices. Designed for Smart Cities, Industrial Facilities, Smart Agriculture, and remote IoT applications, PineX is the ultimate rugged, high-performance LoRaWAN Gateway for mission-critical operations.
2.2. What's in the package?
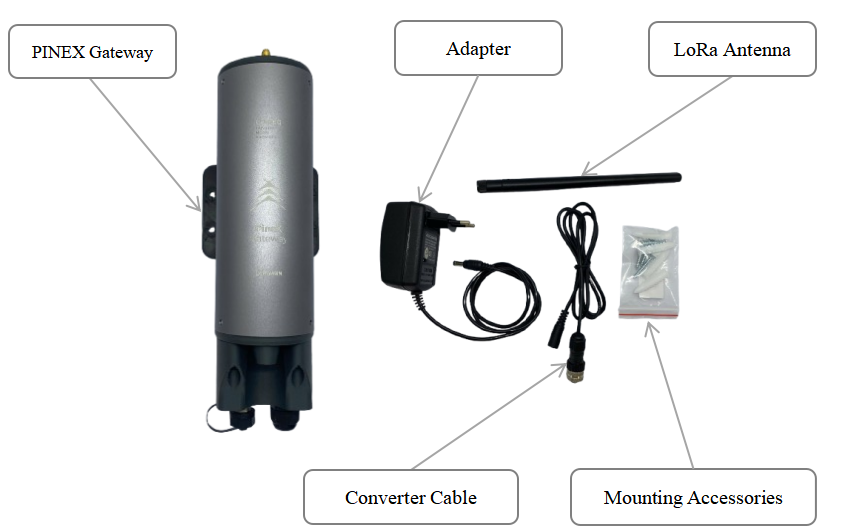
The package includes:
01 x LoraWAN PINEX Gateway
01 x Lora Antenna
01 x Power Adapter
01 x Converter cable
01 x Mounting Accessories
2.3. Product Overview
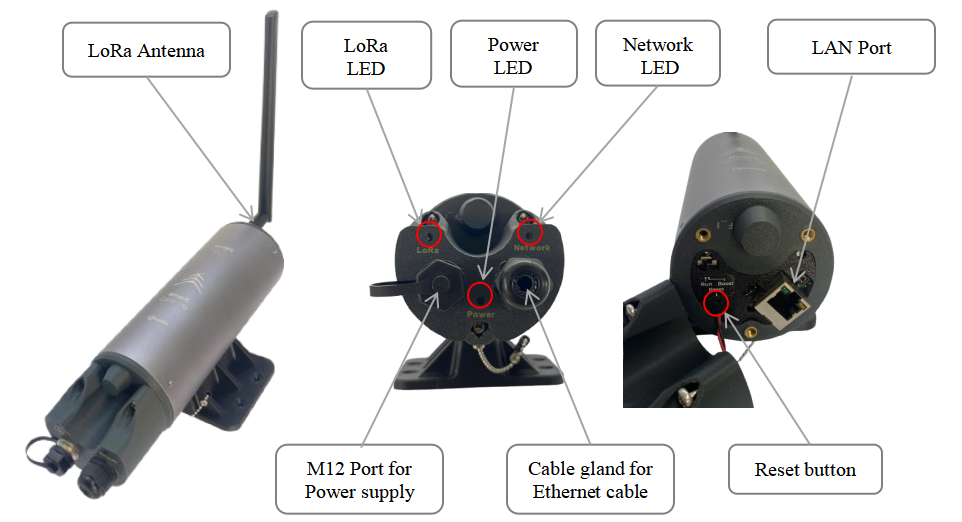
- LED Functions
| LED Functions | Constant | Flashing | Off |
| Power | Power On | None | OFF |
| Network | Initializing | Internet Available | Disconnected |
| LoRa | LoRa Working | Initializing | LoRa Not Working |
The button is deactivated in firmware 3
2.4. Installation
Startup the LoraWAN Gateway through the following steps
Step 1: Install the antenna of the LoRaWAN Gateway
Install the Lora antenna in the correct position. Make sure the antenna and Gateway are tightly connected.

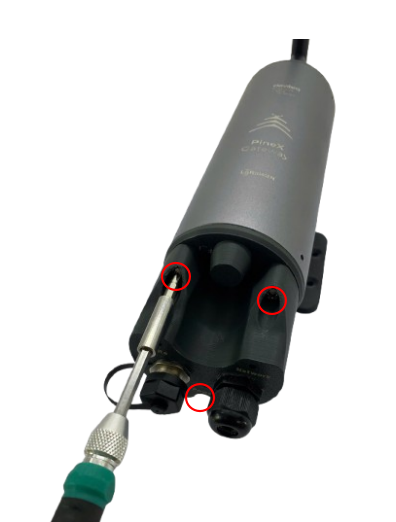
Step 2 : Use the screw driver to remove the three screws, then open the gateway cover.
Step 3: Connect the Ethernet cable to the Gateway
Connect the Ethernet cable into LAN port.
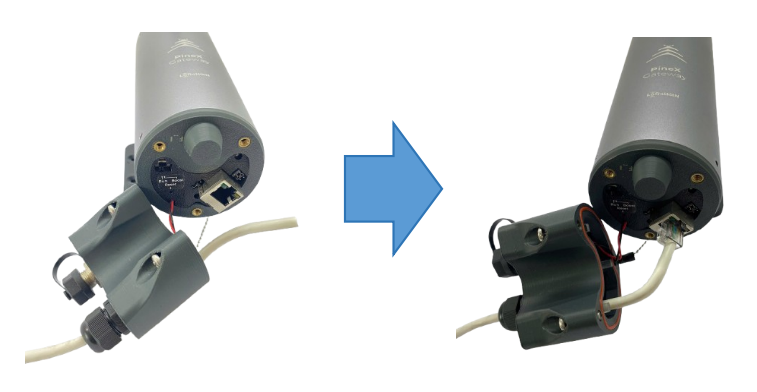
Step 4 : Close the gateway's cover, then use the screw driver to lock the 3 screws.
Step 5 : Power up the Gateway through M12 port

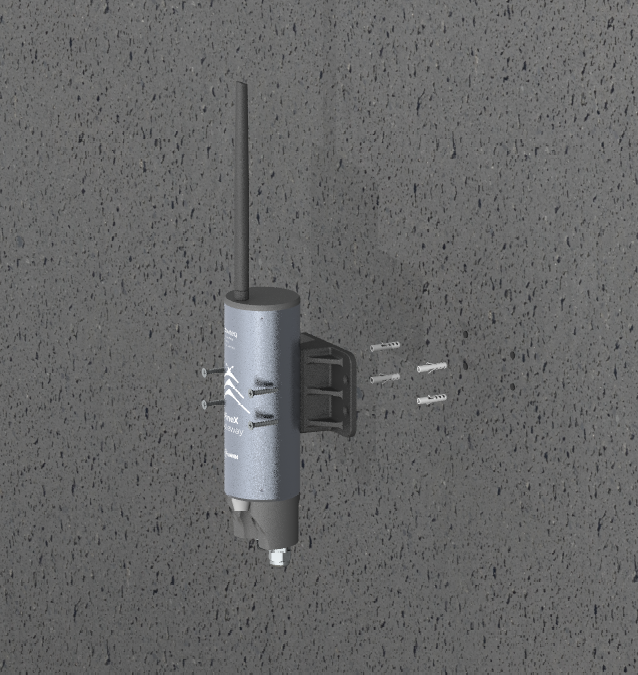
2.5. Mounting
Step 1: Select the installation location. The surface must be flat.
Step 2: Based on the dimensions of the gateway's base, drill four holes into the wall. Then, insert wall anchors into the drilled holes.
Step 3: Use screws to secure the gateway onto the drilled surface.
2.6. Configure the LoRaWAN Gateway
2.6.1 GUI Access
Default mode of Daviteq Gateway is DHCP. Once gateway is turned on through plugging in the DC adapter, it will automatically link to available servers. Gateway’s IP address can be found from the DHCP server. Access Gateway Web UI via the DHCP IP on browser. The default username is “admin”, and the password can be found on the inside label.
By default, the gateway is configured to use DHCP. Therefore, it must be connected to a network with an active DHCP server in order to access the Web GUI.
If the gateway is to be used in a static IP network without DHCP, it must firstly be connected to another active DHCP server to access the configuration interface to configure static IP for the gateway. Once the initial configuration is complete, the gateway can then be moved to the static IP network. Details of static IP configuration for the gateway are in sub-section of WAN SETTINGS in section of 2.2.6.2 Network WAN configuration
In some company with strict IT regulations, the gateway MAC address must be added to company network white list for proper connection.
To access the GUI, follow these steps:
Step 1: Use a computer to connect to the network that the gateway is connected. The computer can connect to that network via WiFi or Ethernet.
Step 2: Use the IP scanning software to find the IP address of the gateway based on its Mac address that can be found on the back label.
Access this link to get a free IP scanning software on the internet
The gateway's default ethernet mode is DHCP. Before scanning its IP address, ensure the network is in active DHCP mode.
Therefore, if you want to use a static IP for the gateway, you must first connect it to a network with an active DHCP server to access the gateway's GUI. After that, you can configure a static IP address for it.
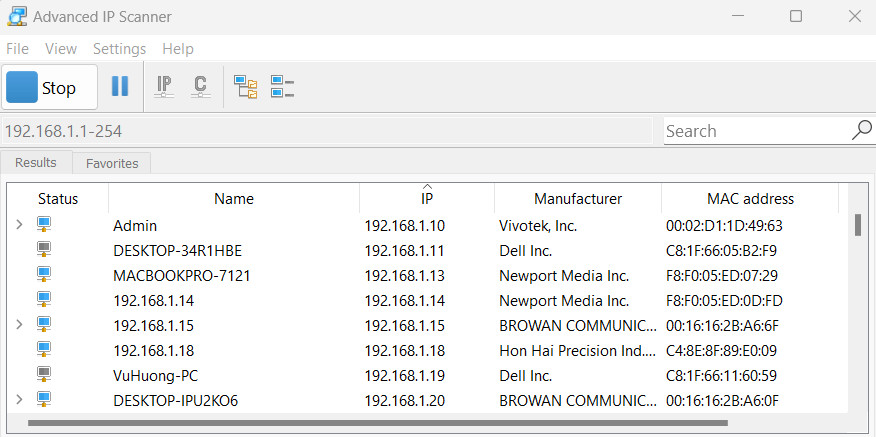
Step 3: Enter the IP address of the gateway in the web browser to access the configuration interface.
Must add port 4050 after the IP address. For example, If the IP address of the Gateway is 192.168.1.21 , you have to enter 192.168.1.21:4050 in web browser, then the GUI will be displayed.
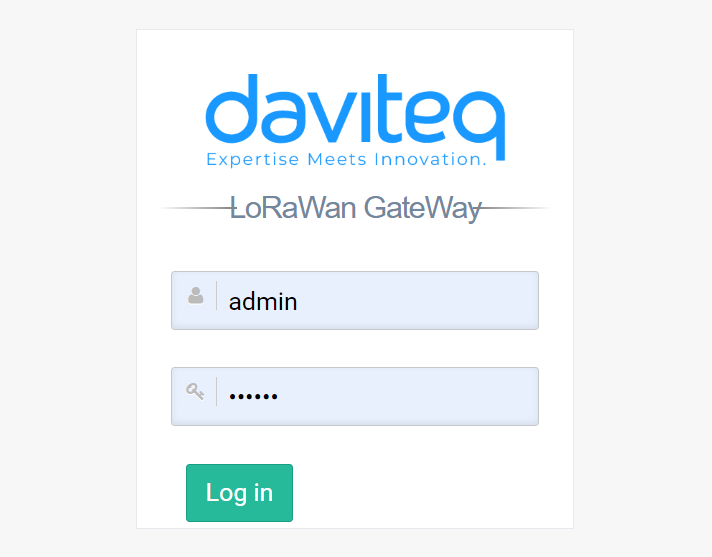
The default username is admin and default password is public
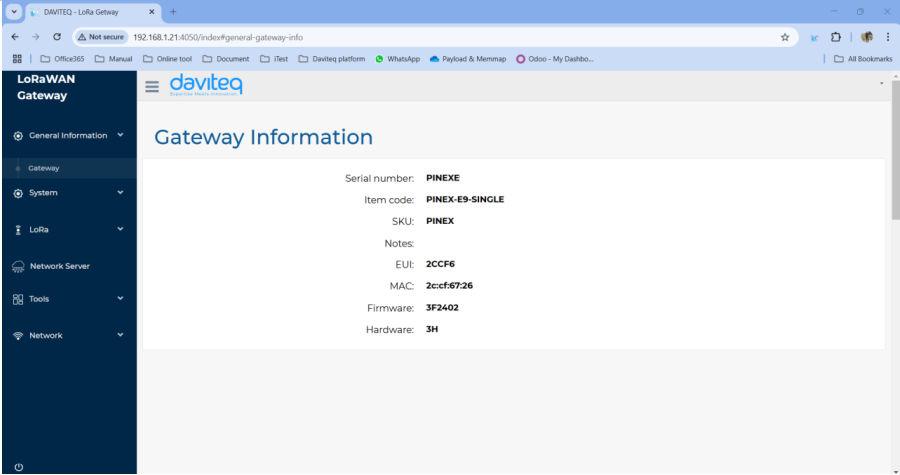
After login successfully, the general information of the gateway will be display at general information tab.
2.6.2 Network WAN configuration
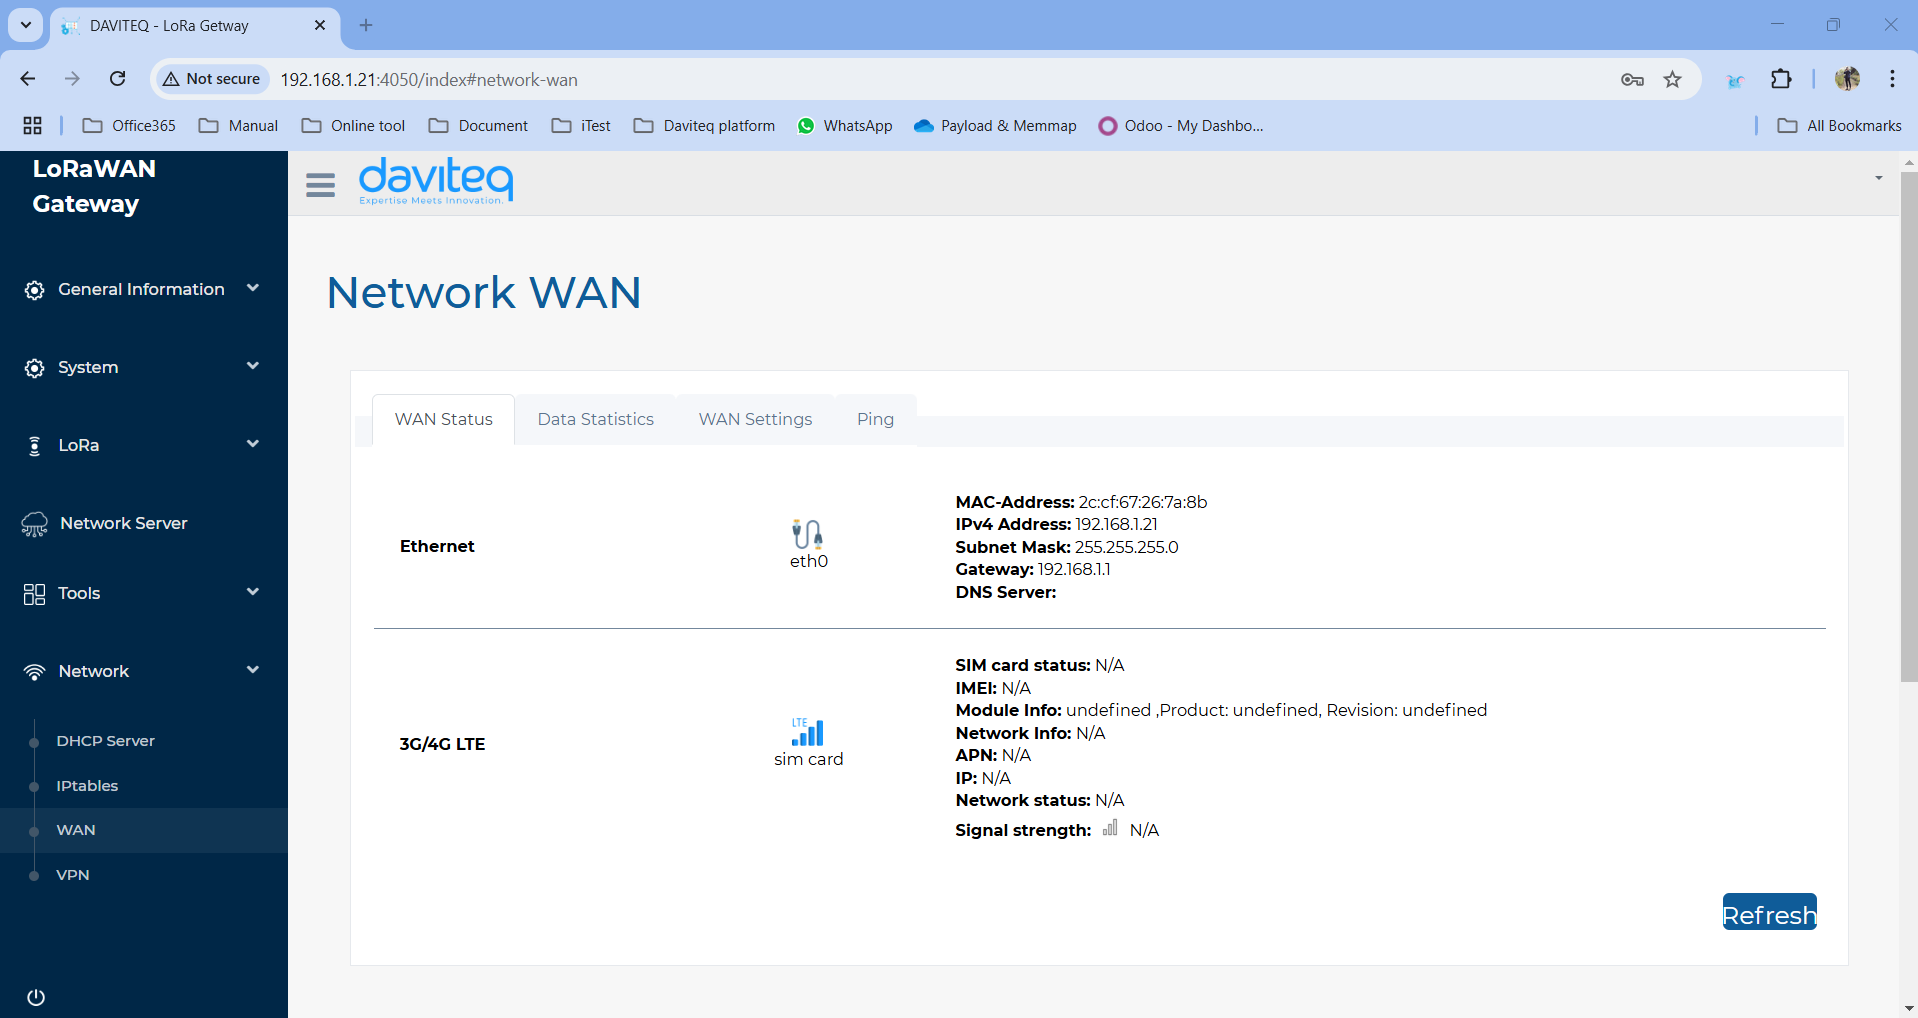
This category shows current WAN settings. This category is further divided into three sectors: WAN Status, Data Statistics and WAN Settings.
-
WAN Status
The current network status will be shown on this page.
-
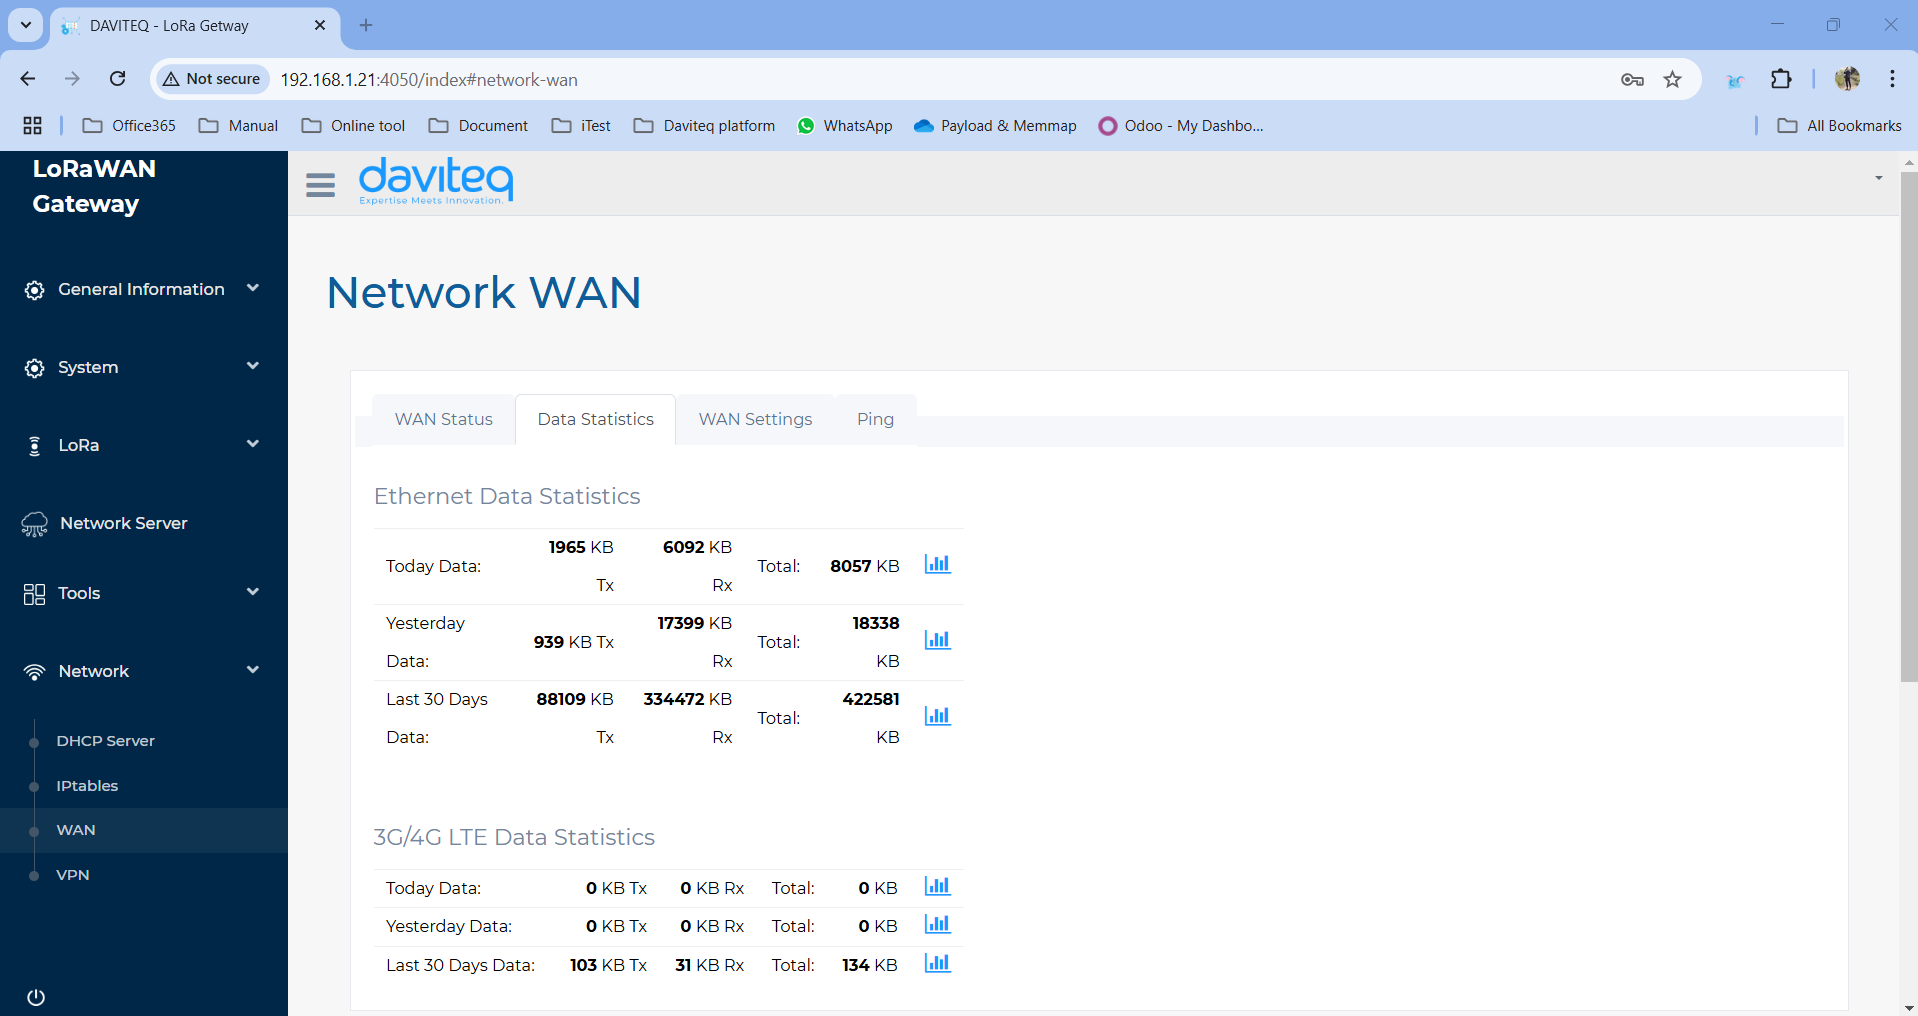
WAN Statistics
Statistics on the gateway's used data capacity are shown in this section.
-
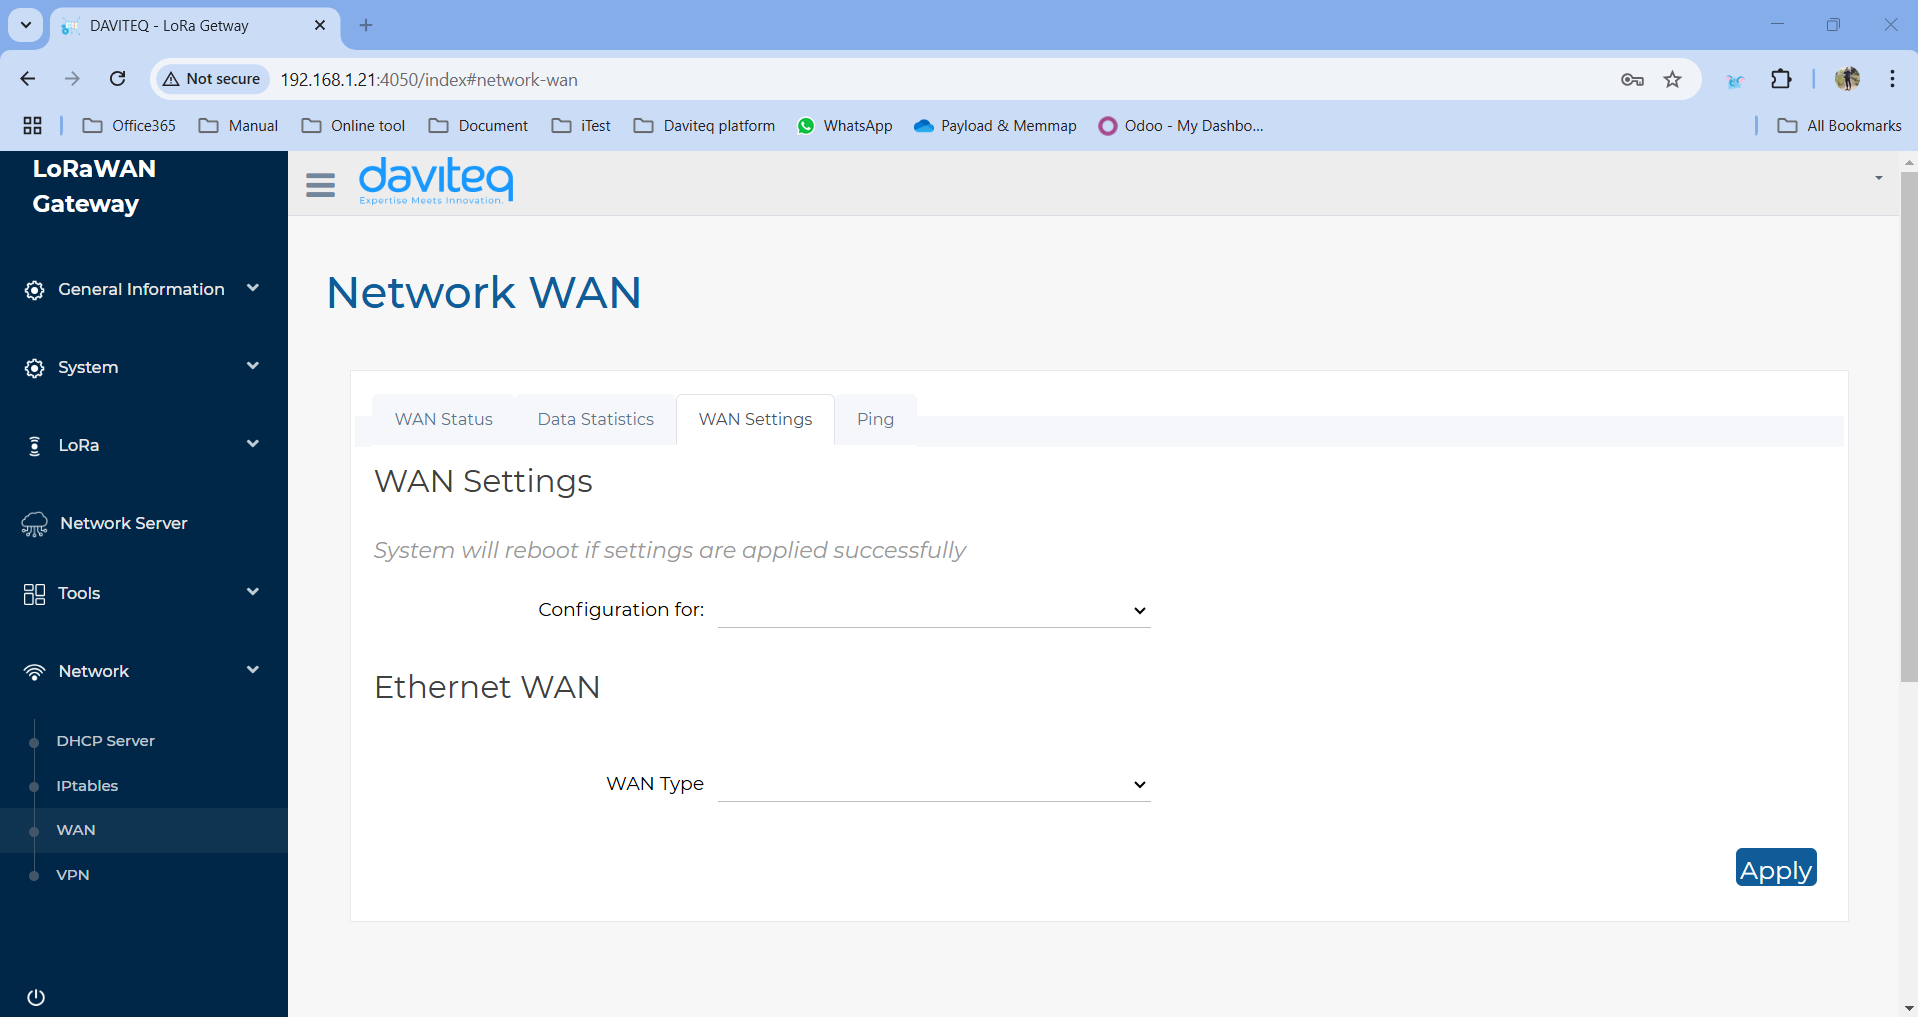
WAN Settings
Daviteq Gateway supports Ethernet WAN mode .
2.6.3. Lora Settings
-
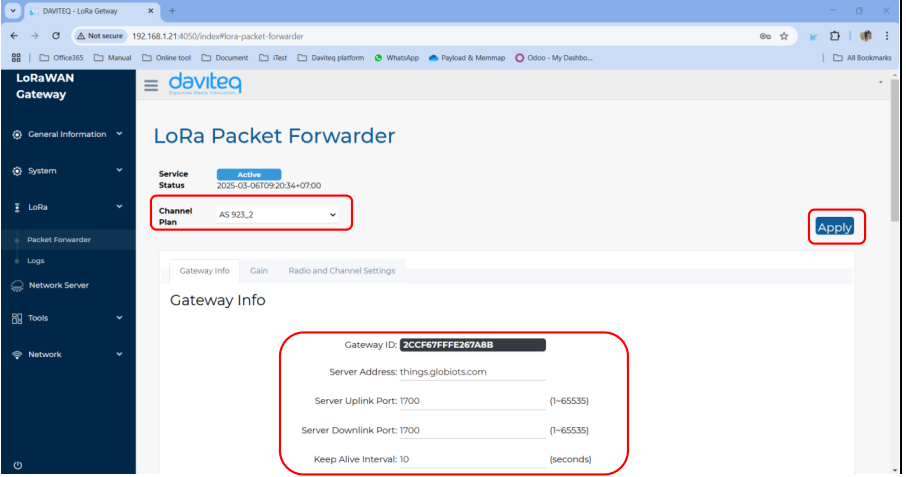
Package Forwarder
Select Packet Forwarder in the left menu, then choose Gateway Info. This page is for setting up the LoRa configuration including Gateway ID, Server Address, Server Uplink Port, Server Downlink Port, Keep-Alive Interval, Statistics Display Interval, and Push Timeout.
Need to properly configure the Server Address, Server Uplink Port, and Server Downlink Port fields. These information depend on the Network server.
Choose the channel plan for the gateway, then choose the Apply button at the bottom right to save the current configuration
-
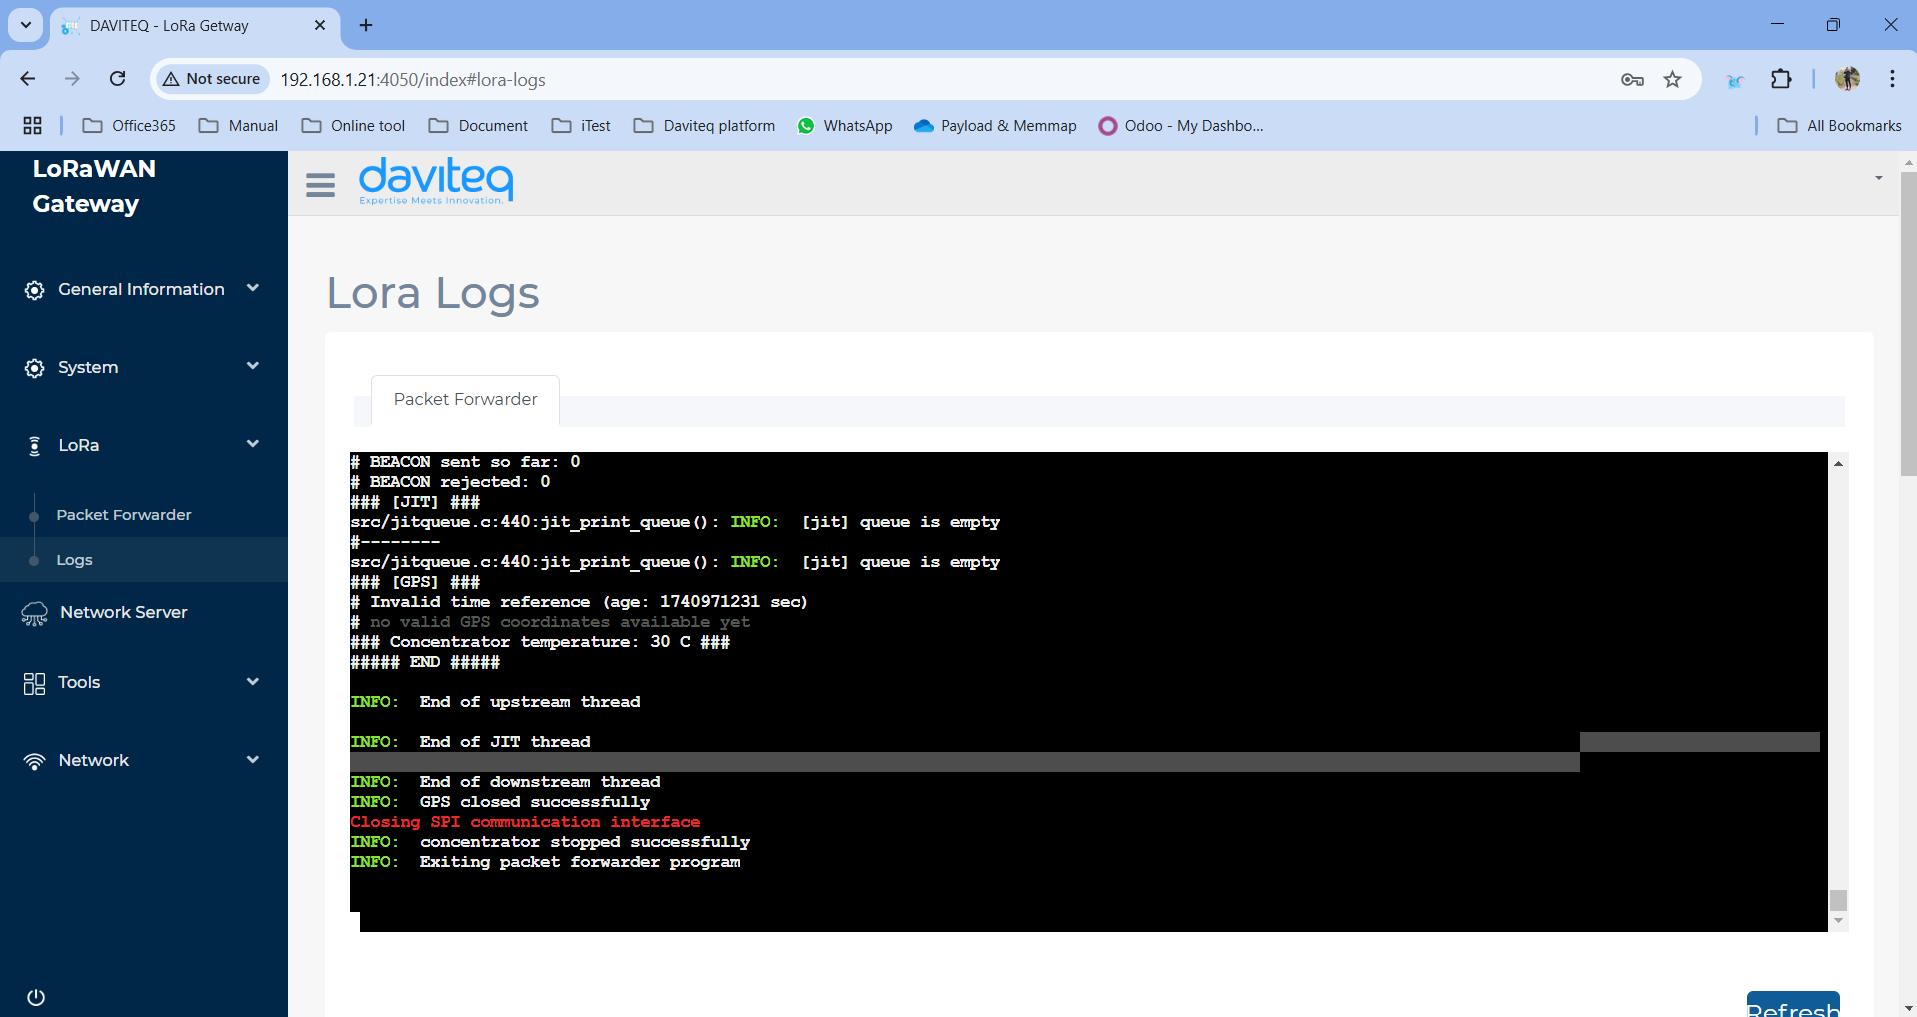
Logs
This is the function of monitoring the loRaWAN network.
2.7 Add the LoraWAN Gateway to Network Server
To give an example, please follow the instructions in this link to add LoraWAN gateway to The things Stack network server.
No Comments