Instructions for converting Daviteq Sigfox Exd-Pressure device to Daviteq LoraWAN Exd-Pressure device.
1. Prepare tools:
- 1 pc x Screwdriver
- 1 pc x 12” Wrench
- 1 tube x Thread Lock Glue
- 1 bottle x Cleaning alcohol
- 1 pc x Cleaning cloth
- 1 pc x Grinding tool
- 1 pc x Heat gun
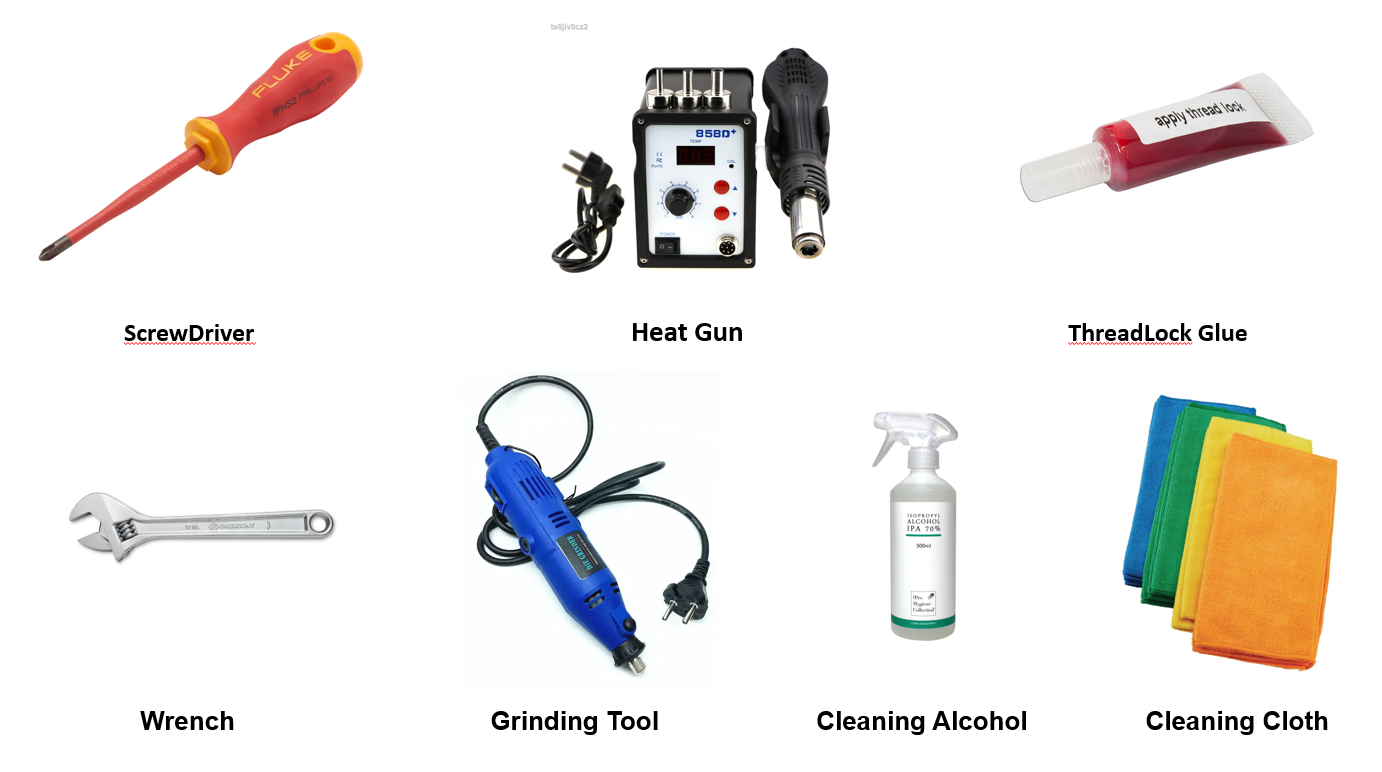 Figure 1.1: Tool list
2. Disassemble the Daviteq Sigfox Exd Pressure device:
- Step 1: Unscrew the antenna by turning the antenna counter-clockwise and open the device housing cover by turning the upper housing cover counter-clockwise as a below figure.
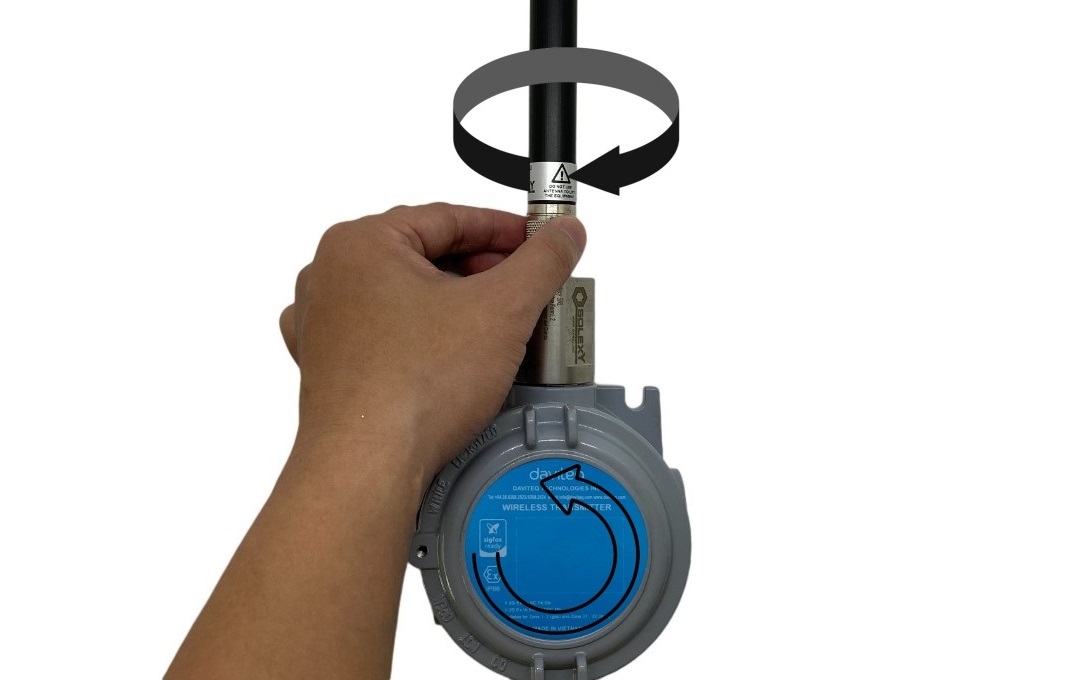 Figure 2.1: Unscrew the antenna and open the housing cover of Daviteq Sigfox Exd Pressure device.
- Step 2: Grind the excess part inside the housing cover to fit with new LoraWAN main board by grinding tool.
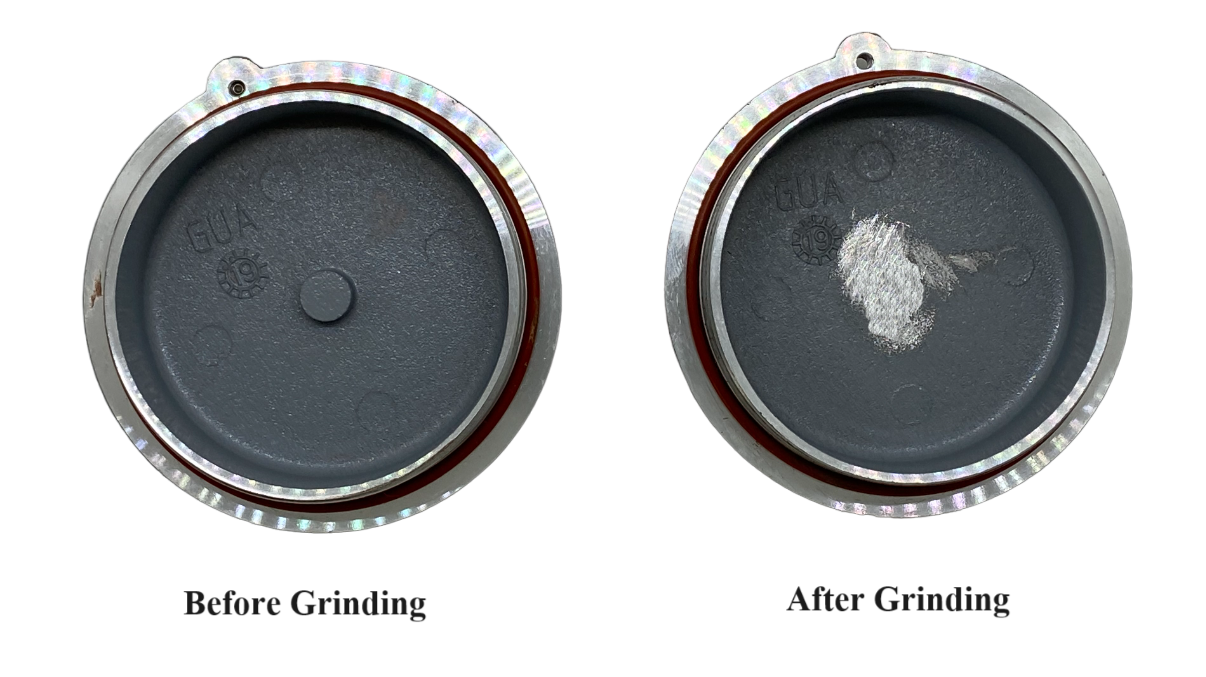
Figure 2.2: Grind the excess part inside the housing cover.
- Step 3: Remove the Sigfox mainboard by screwdriver. The position of 3 screws is marked as Figure 2.3.
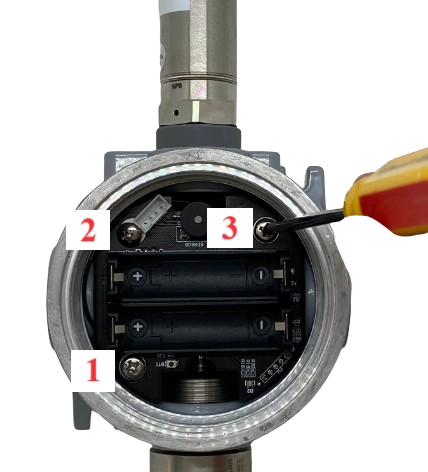
Figure 2.3: Remove the Sigfox mainboard by screwdriver.
- Step 4: Unscrew the antenna cable and cut out the 2 wires connecting the pressure sensor and Sigfox mainboard.
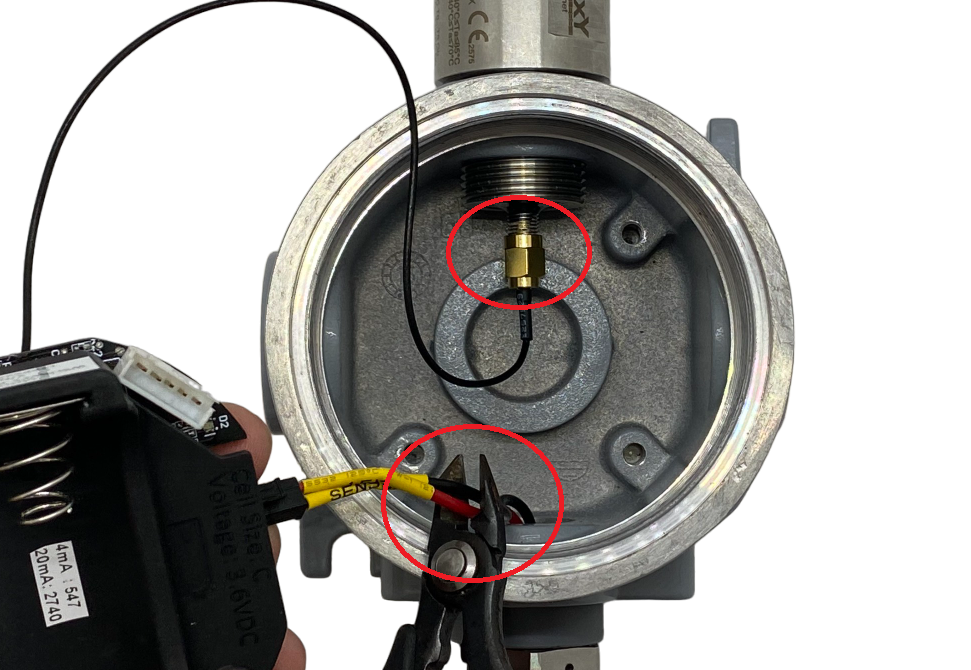
Figure 2.4: Unscrew the antenna cable and cut out the connecting the 2 wires.
- Step 5: Heat up the connecting thread between the pressure sensor and housing by heat gun (recommended heat with temperature of 300 oC in 20-30 minutes) to melt the thread lock glue for easy disassembling. Then unscrew the sensor by turning counterclockwise using wrench.
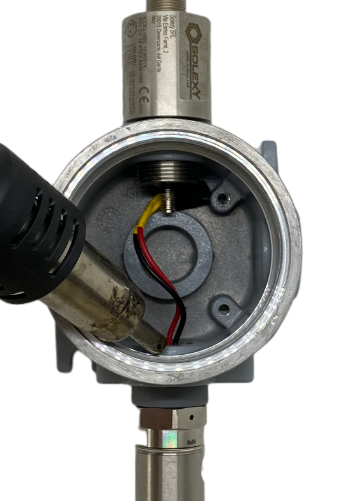
Figure 2.5: Heat up the connecting thread.
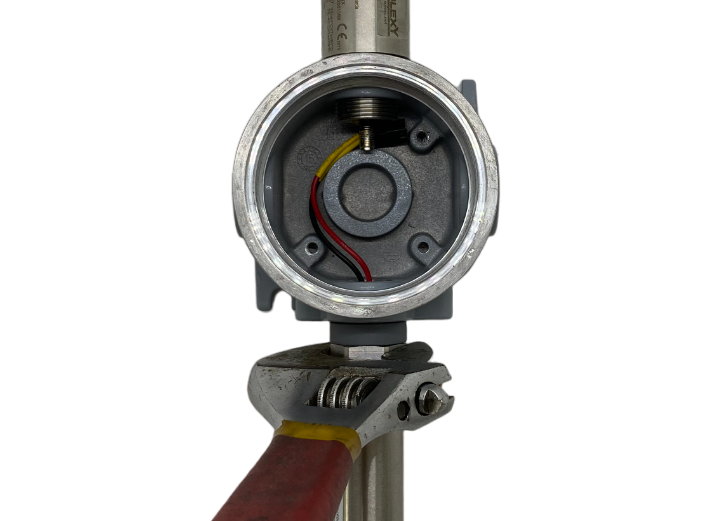
Figure 2.6: Unscrew the sensor by turning counterclockwise using wrench.
- Step 6: Peel off all labels on the housing of Sigfox device.
- Step 7: Clean the housing and thread by alcohol and cloth.
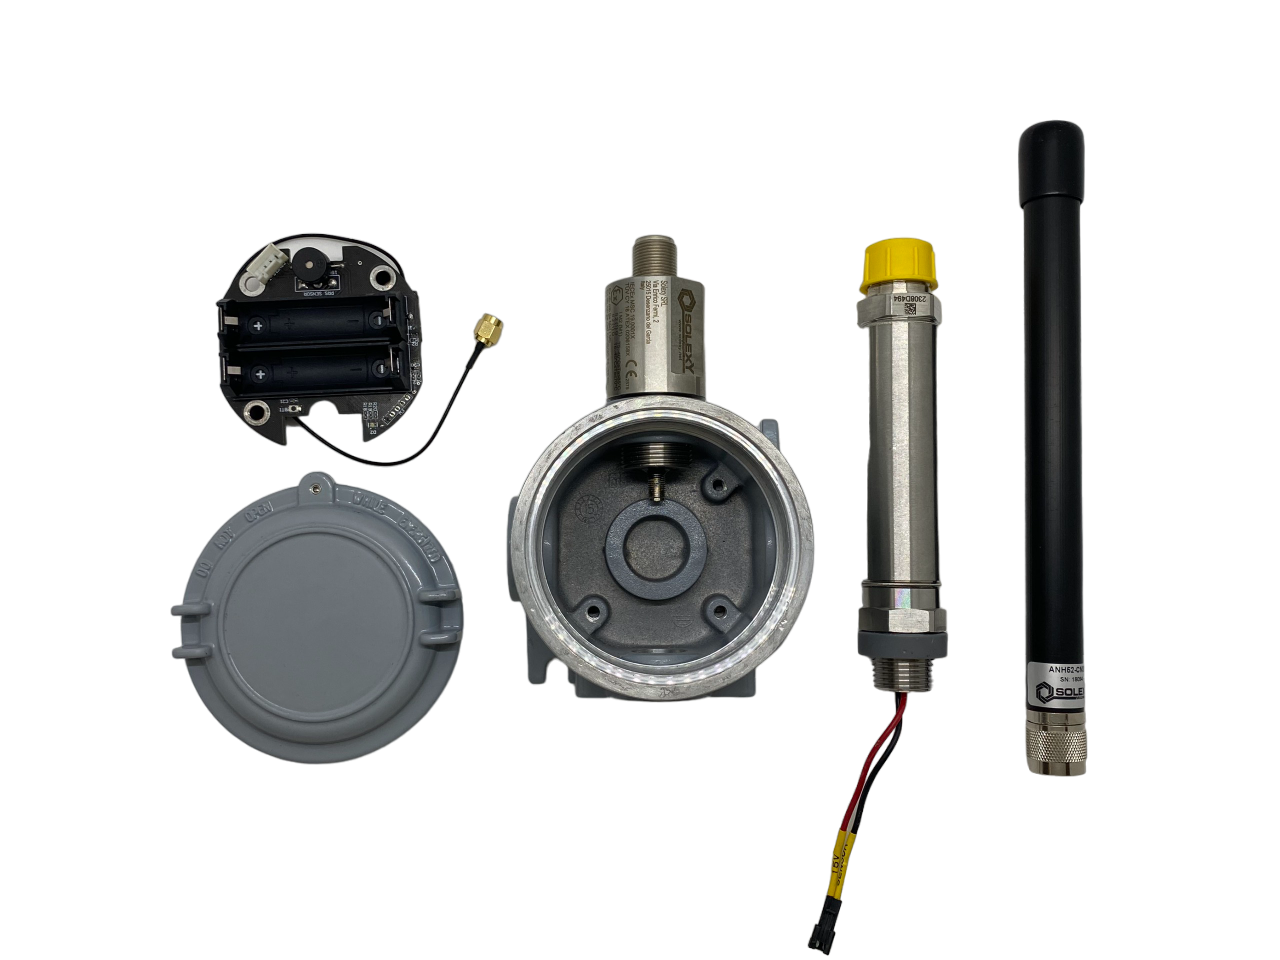 Figure 2.7: Components of Daviteq Sigfox Exd Pressure device after disassembly.
3. Assemble the Daviteq LoraWAN Exd Pressure device:
Note: Only re-use housing, antenna for converting from Sigfox device to LoraWAN device. DON’T re-use the Sigfox mainboard and pressure sensor.
- Step 1: Apply thread lock glue to the connection thread and screw the new pressure sensor to the housing by turn clockwise.
Warning: Do not use to too much glue as it will take too long to dry and leak to the mainboard. Recommend using 2-3 drops of glue.
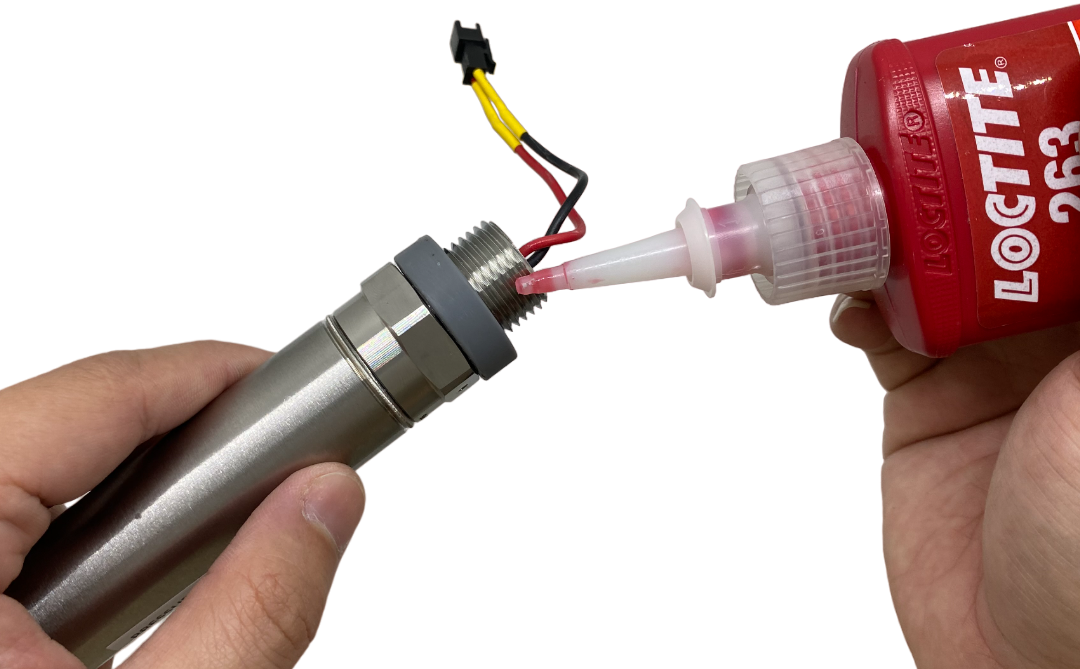
Figure 3.1: Apply thread lock glue to the connection thread of sensor.
Figure 3.2: Screw the sensor to the housing by turning clockwise using wrench
- Step 2: Select correct LoraWAN mainboard for the sensor in the step 1:
- 10 bar new sensor will be installed with LoraWAN mainboard having item code on the main board label of WSLRWEX-PPS-10-01
- 100 bar new sensor will be installed with LoraWAN mainboard having item code on the main board label of WSLRWEX-PPS-100-01 - Step 3: Note out the serial number on the selected LoraWAN mainboard label for later usage in labelling step.
- Step 4: Screw the antenna cable on the LoraWAN mainboard to antenna and plug socket of sensor cable to the socket on the LoraWan mainboard.
Warning: Arrange the wires neatly to avoid the wires being stuck.
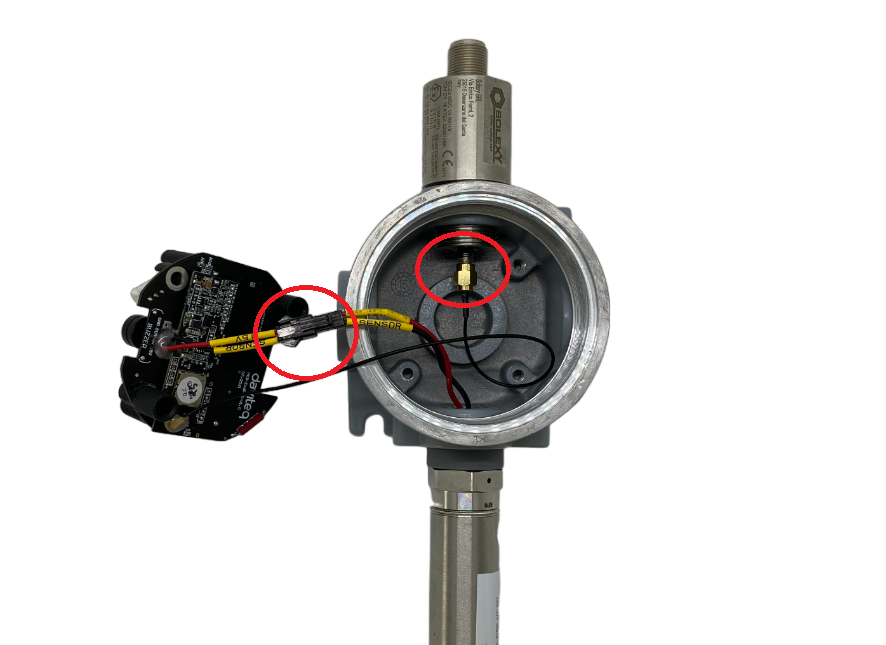 Figure 3.3: Screw the antenna cable and plug socket of sensor cable.
- Step 5: Fix the LoraWan mainboard to the housing in the position as shown by screwdriver. The position of 2 screws is marked as Figure 3.4.

Figure 3.4: Position of 2 screws on to screw the LoraWan mainboard to the housing.
- Step 6: Stick the sensor manual QRCode label inside the housing cover as Figure 3.5.
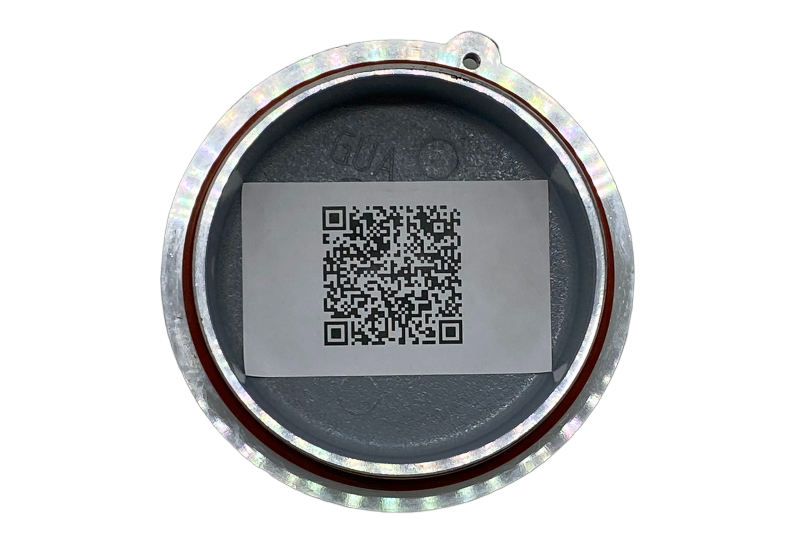
Figure 3.5: Position of the manual QRCode label inside the housing cover.
- Step 7: Screw the housing cover and antenna. Make sure Oring is available on housing cover.
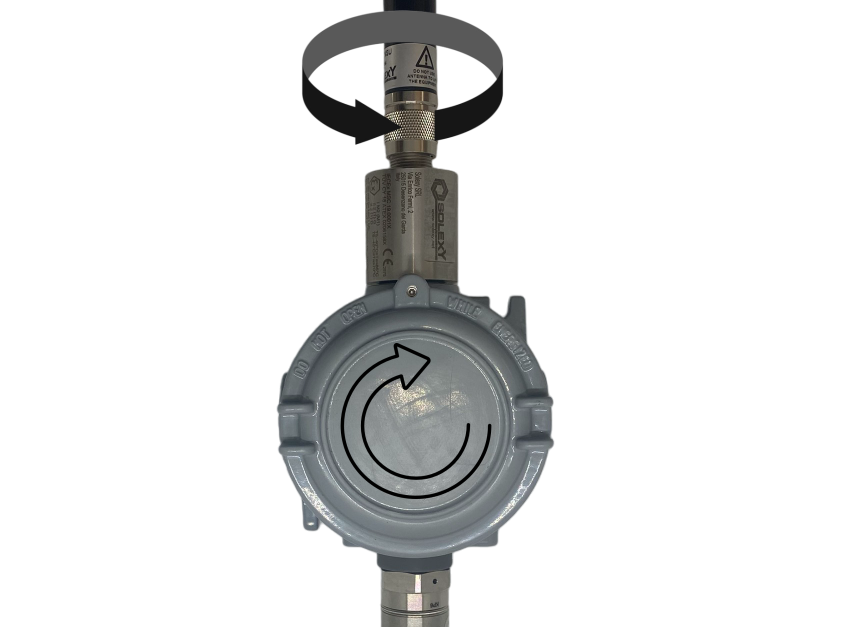 Figure 3.6: Screw the housing cover and antenna.
4. Stick labels on the housing of Daviteq LoraWAN Exd Pressure device:
There are 4 types of labels for the LoraWAN Exd Pressure device:
1 x LoraWAN label,
1 x Device information label
1 x Magnet reed-switch label
1 x Manual QRCode of Daviteq LoraWAN Exd Pressure firmware3 device label
And 4 types of label and LoraWAN mainboard in the package.
- Step 1: Screw the housing cover tighty then stick the LoraWAN label vertically. The direction of the label as Figure 4.1.
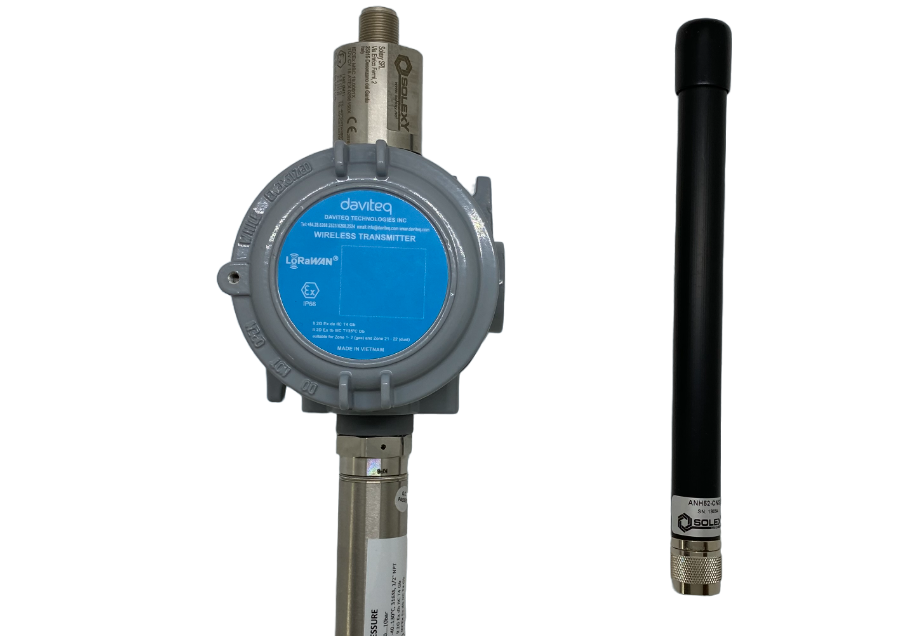 Figure 4.1: Position and direction of the LoraWAN label on the housing cover.
- Step 2: Stick the device information label at the position at Figure 4.2.
Note: Make sure the serial number on the label is the same as one on the main board label. The serial number on the mainboard label is noted out in step 3 of section “3. Assemble the Daviteq LoraWAN Exd Pressure device”
The the device information label is next to sensor mounting semi-circular hole.
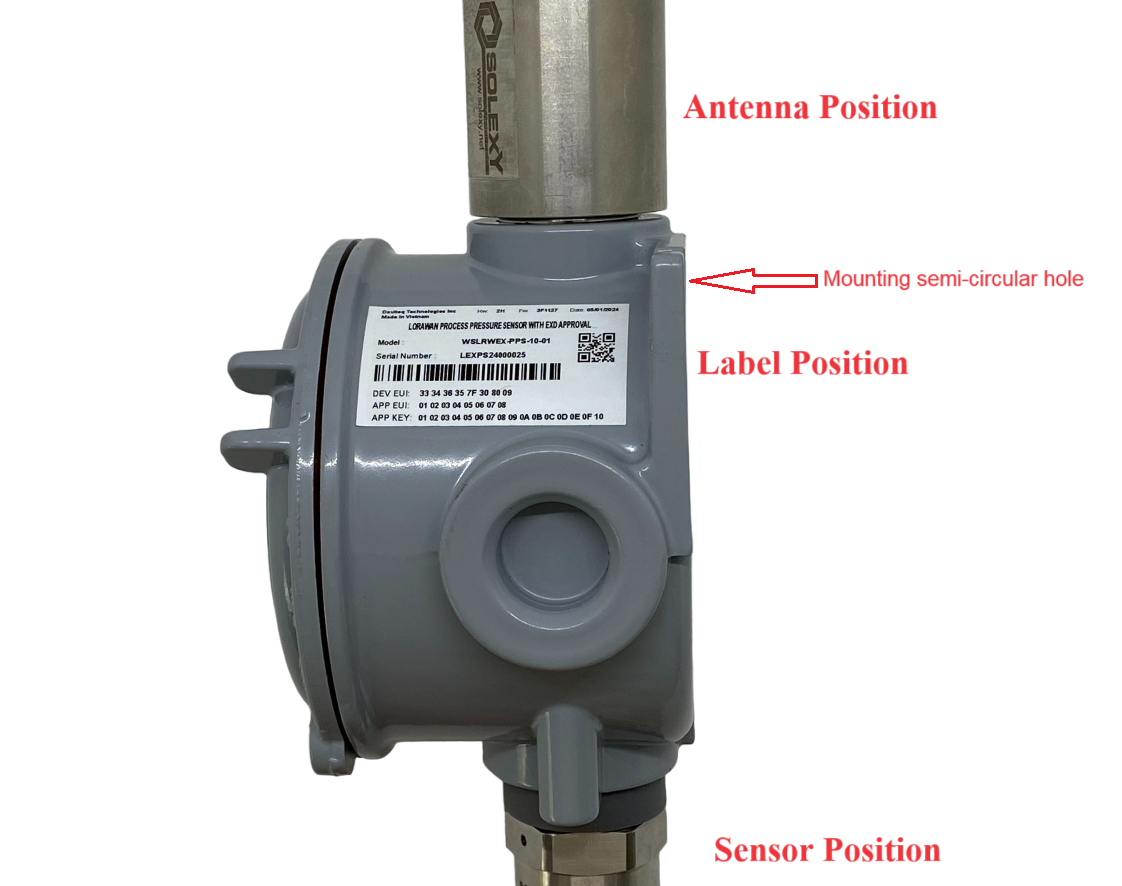
Figure 4.2: Position and directon of the device information label on the housing
- Step 3: Stick the magnet reed-switch label as position as Figure 4.3.
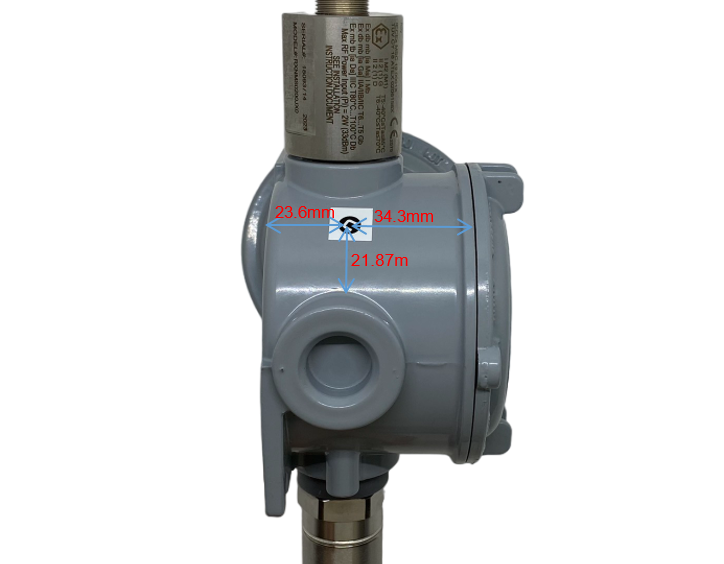
Figure 4.3: Position of the magnet reed-switch label on the housing
- After completing labelling, the sensor will be as below figure 4.4.
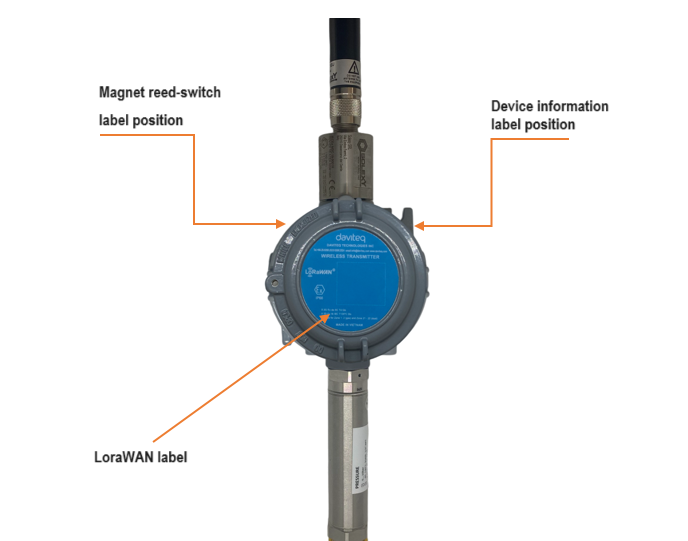
Figure 4.4: Position of labels after labeling process is completed
5. Check operation of the LoraWAN device after converting
- Follow instruction at section 1.7 Guide for Quick Test of WSLRWEX-PPS firmware manual.
Link of online manual: https://www.iot.daviteq.com//manual-for-wireless-sensors/manual-for-wslrwex-pps-%7C-fw3
Please note that, log in is required to access the online manual of WSLRWEX-PPS firmware 3. The user needs to visit https://www.iot.daviteq.com to register the user for accessing the online manual.
No Comments