Configuration instructions to forward LoraWAN sensor data from Thingpark to Globiots
1. Add a LoraWAN sensor to Globiots
Step 1: Open web-browser and go to link: https://vizuo.globiots.com/login
Step 2: Sign in with provided username and password.
Step 3: At Organization Chart, right-click to desired Node => Select New => Select Lora.

Step 4: Input information of LoraWAN sensor and Acility Network Server
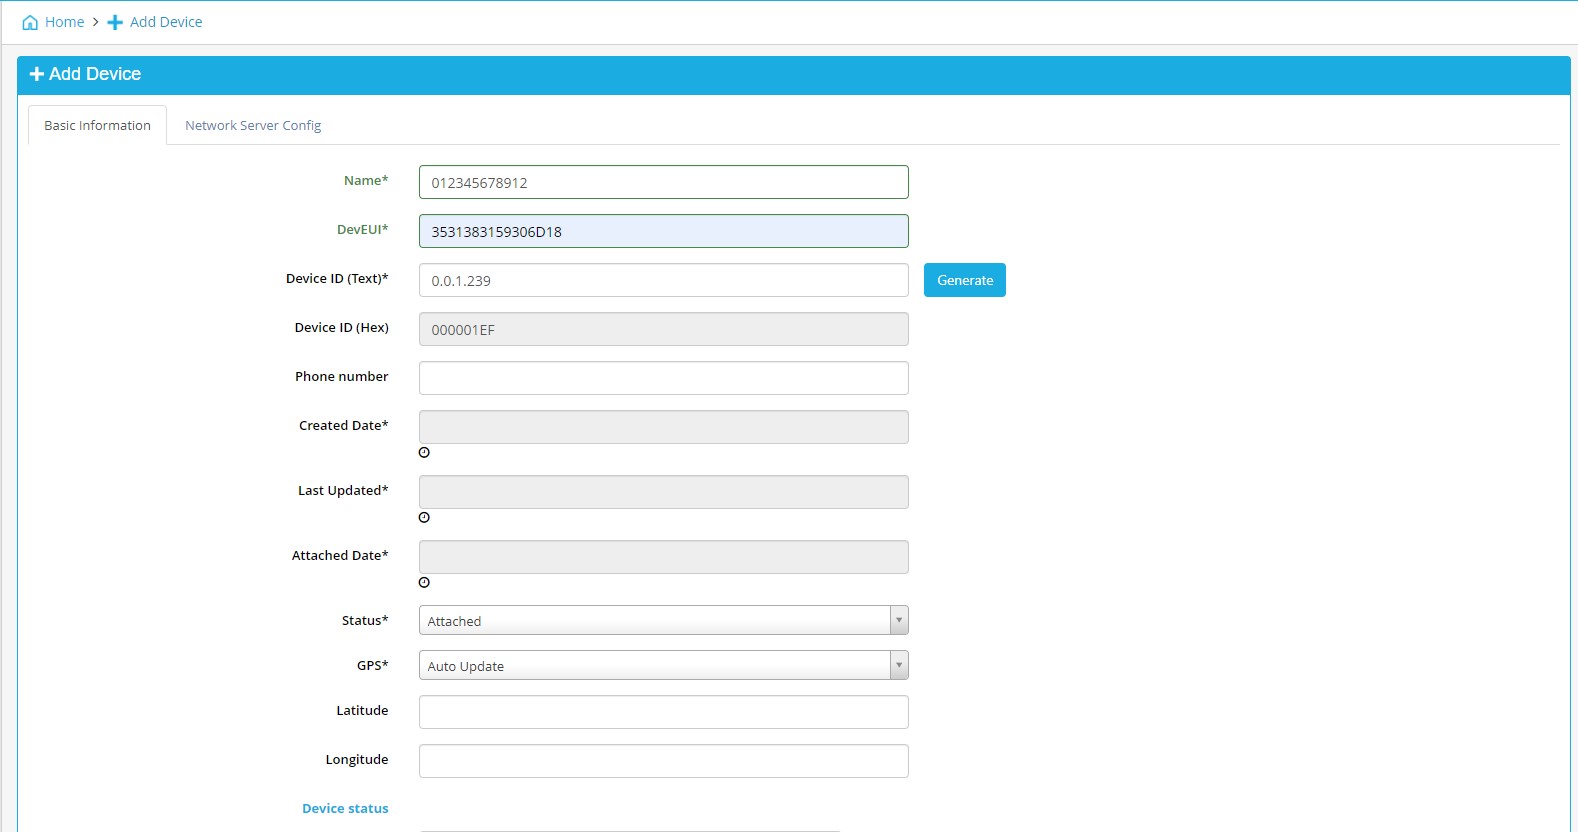
At the tab Basic Information, input LoraWAN sensor information in the form:
- Name: input 12 characters of user-defined sensor name.
- DevEUI: input sensor DevEUI. The DevEUI (16 characters) is on the sensor label or is read out from sensor memory.
- Device ID: click Generate button to get device ID
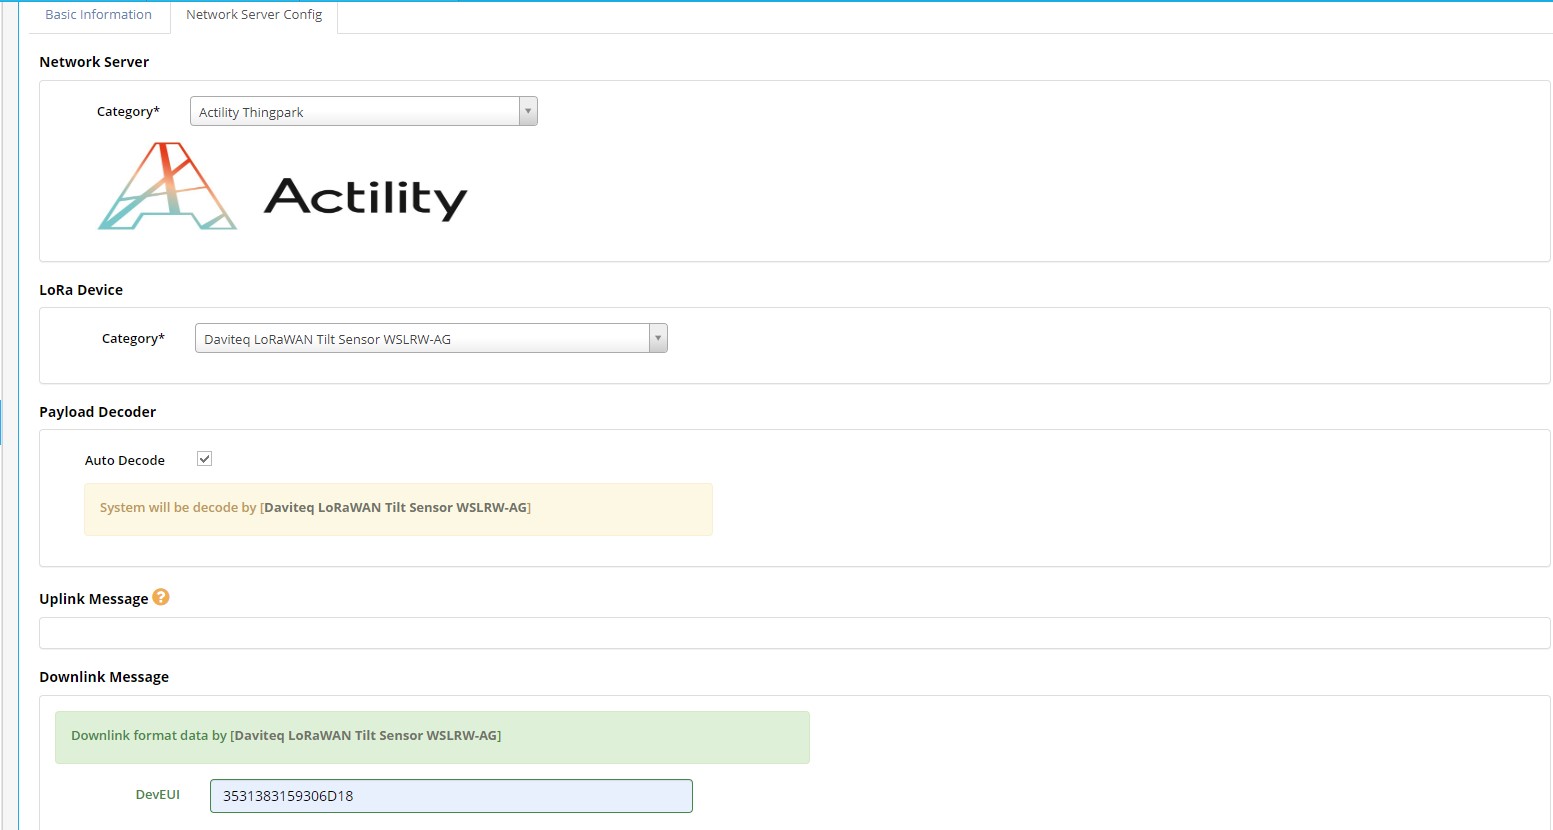
At tab Network Sever Config, select category of Actility Thingpark, select relavant LoRa Device type and fill the sensor DevEUI in Downlink Message section. Then click Save button to complete adding the sensor to Globiots
2. Create a connection from Thingpark to Globiots
Note: If the connection from Thingpark to Globiots is available, skip section 2
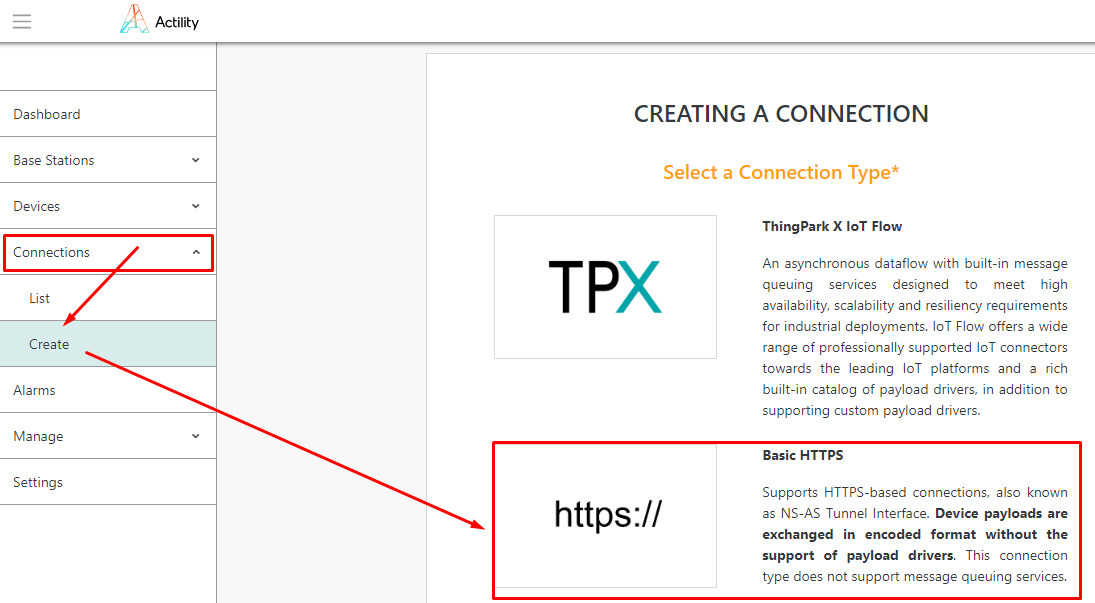
Step 1: Log in to your ThingPark Enterprise account via the link: https://community.thingpark.io/tpe/ and then browse on the left panel to Connections, click the drop-down menu, click Create, click section https:// to create https connection from Thingpark to Globiots
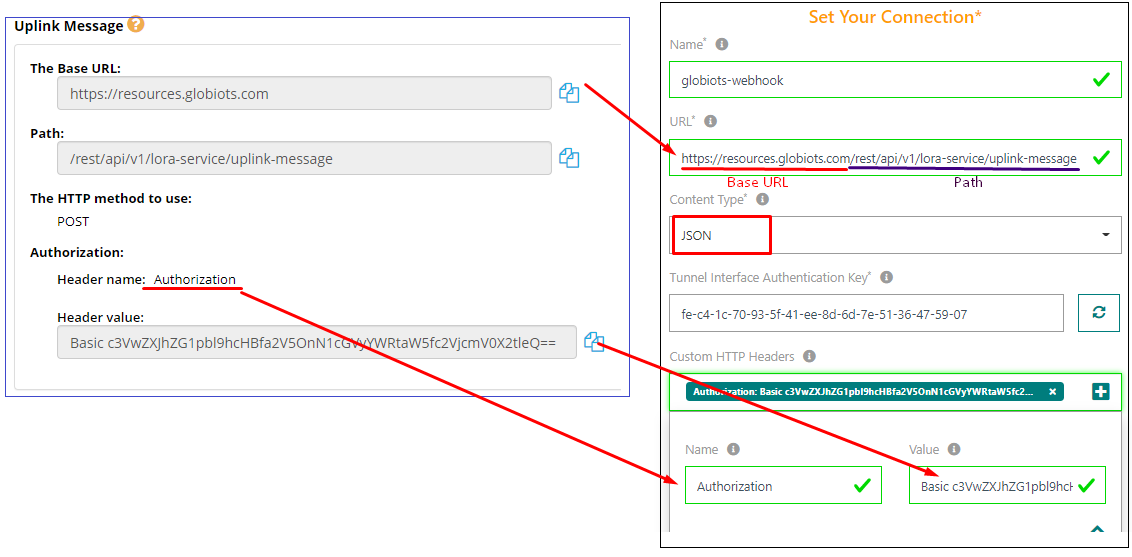
Step 2: Input information to setup the connection as below details, and click Create to complete creating the connection.

Filled information is from the Uplink Message section of the LoraWAN sensor on Globiots (At the Organization Chart panel of Globiots, click the LoraWAN sensor, click tab Network Server Config)
3. Add Daviteq LoRaWAN devices on ThingPark GUI.
ThingPark Enterprise supports all Classes of LoRaWAN® devices.
By default, the sensor supports Over-the-Air Activation (OTAA) with local Join Server that is programmed at the factory.
Manual provisioning of OTAA devices using a local Join Server. To learn more, see Activation modes.
Step 1: Log in to your ThingPark Enterprise account via the link: https://community.thingpark.io/tpe/ and then browse on the left panel to Devices, click the drop-down menu, click Create

2. To add a device, select the Generic supported by your device on your screen.
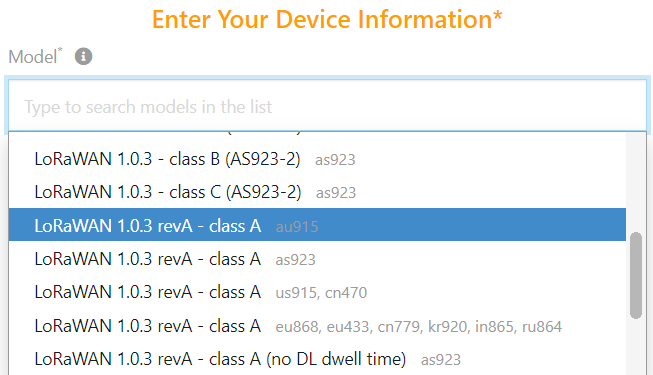
3. Select the Model of LoRanWAN 1.0.3 revA - class A with correct Frequency Plan
4. Fill the form as below table:
| Field | Input field |
| Name | As user-defined |
| DevEUI | As DevEUI on label of the device |
| Activation mode | Over-the-Air Activation (OTAA) with local Join Server |
|
JoinEUI |
Input JoinEUI. This value read on memory map or on the label of the device. The default value is 0102030405060708 |
|
AppKey |
Input AppKey.This value read on memory map or on the label of the device. The default value is 0102030405060708090A0B0C0D0E0F10 |
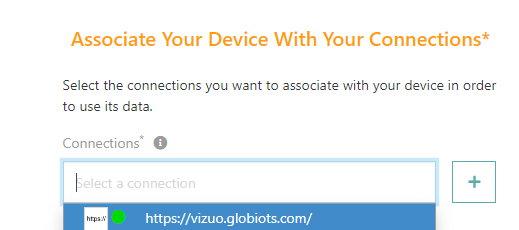
In addition to filling the form, select the connection between Thingpark and Globiots which is created in section 2
After filling the registration form, please click CREATE to add devices to the network server
4. Monitor LoraWAN sensor data on Globiots
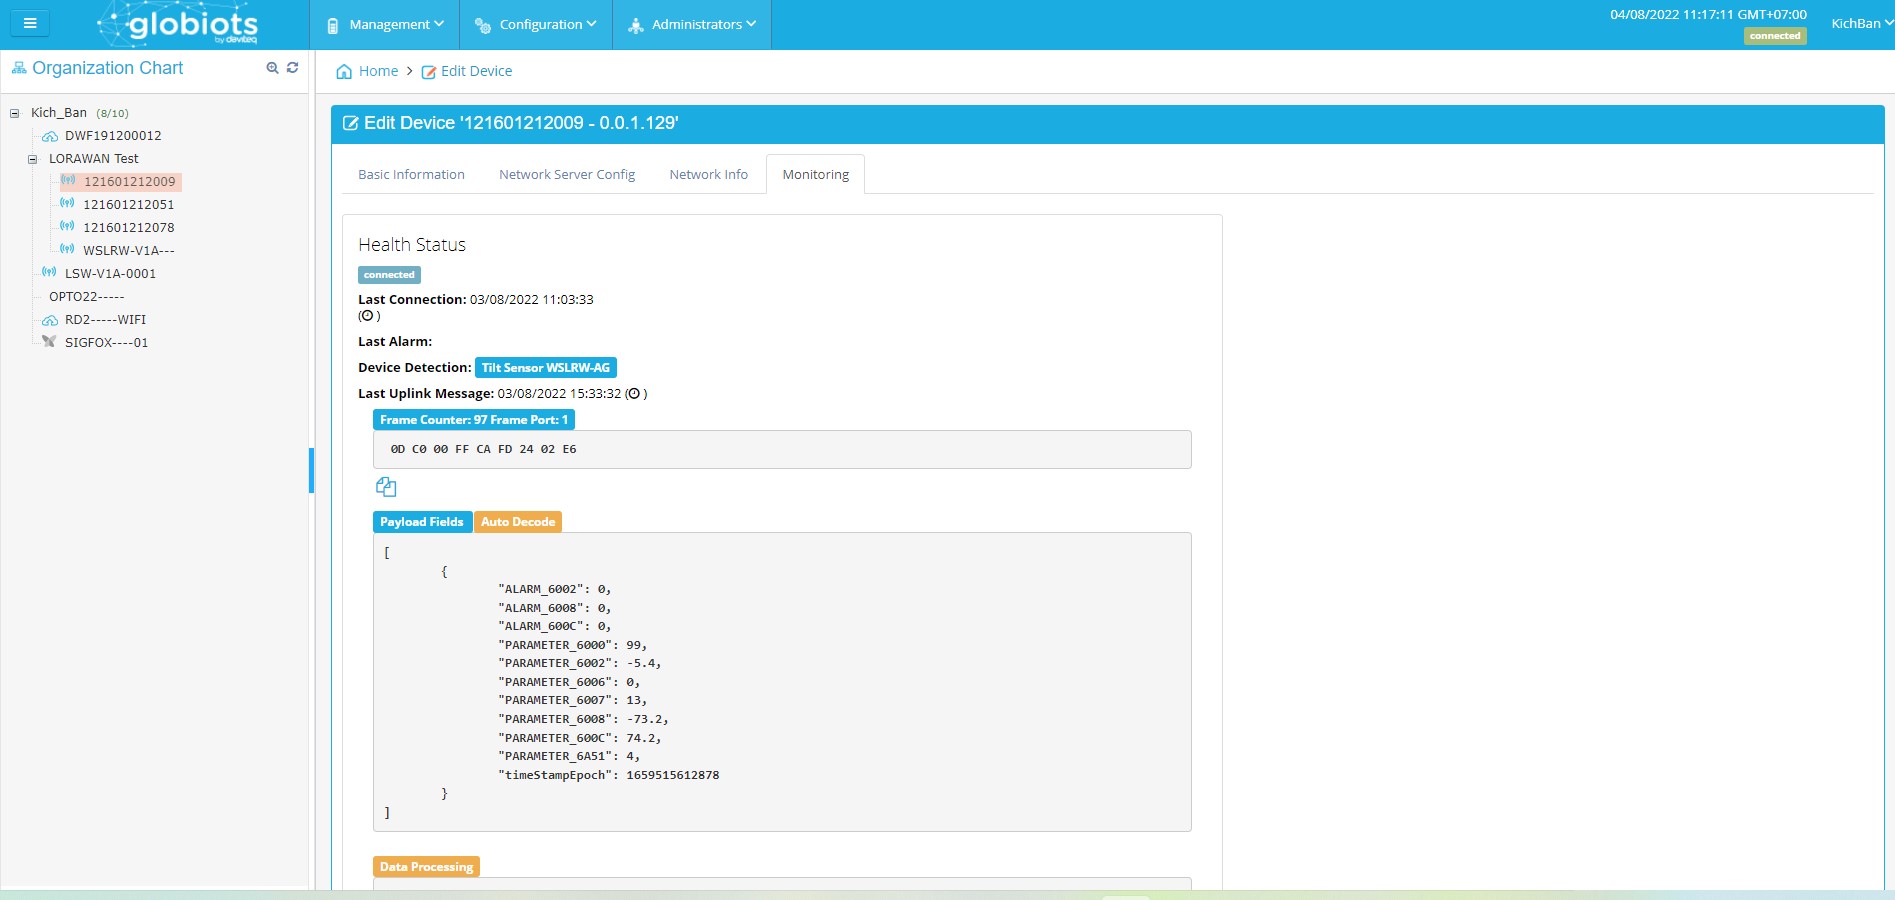
Step 1: At Organization Chart panel on Globiots, click to the LoraWAN sensor name added in Section 1
Step 2: Click Monitoring tab to view the lastest sensor data.
1 Comment
Lực, cái này em phải đưa vô phần chung như anh đã nói. Để các manual riêng nó link tới được. Em cho move nó vô chổ hợp lý đi.
Rà lại xem tên bài chuẩn chưa?