Instruction to configure embedded Chirpstack Network Server in the Gateway
Embedded Chirpstack Network Server Information
Configure Gateway to forward data from LoRaWAN gateway to Embedded Network Server
- Access web UI via URL of http://[Gateway_IP]:4050
Where [Gateway_IP] is the IP of the gateway in the network
Server Address: localhost
Uplink Port: 1700
Downlink Port: 1700
LoRaWAN Region: Depend on your region e.g., EU868, US915, AS923…
Other settings: keep default values
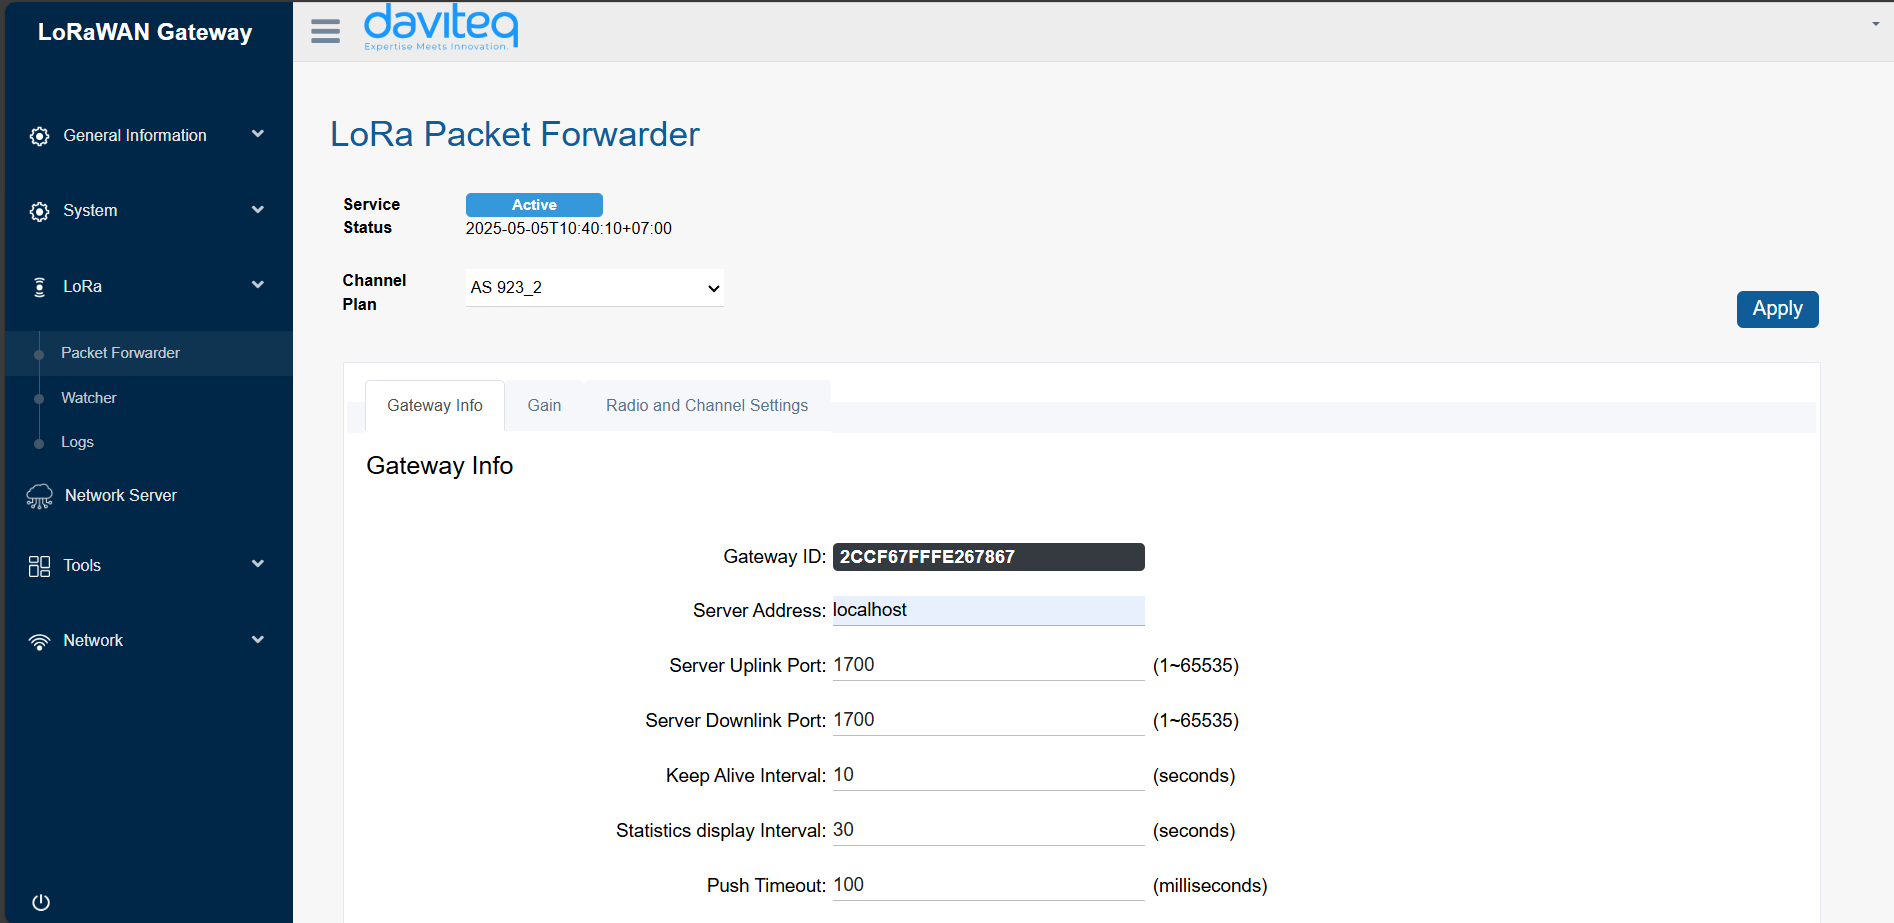
Turn on Network Server
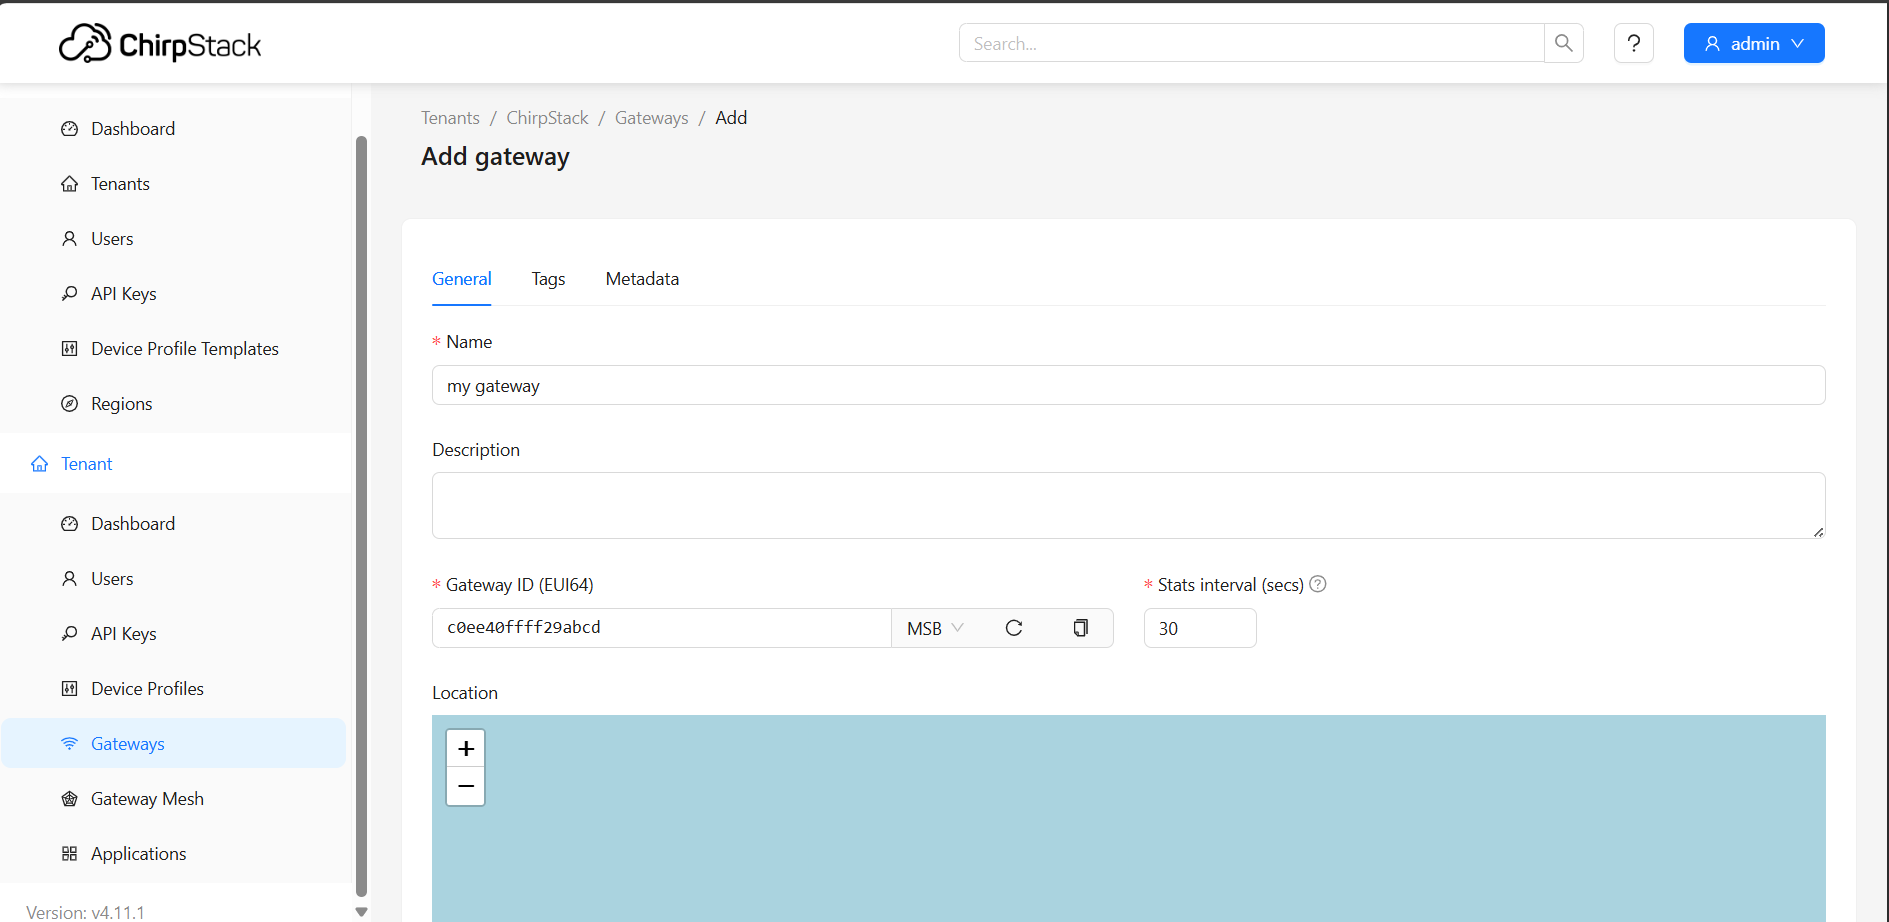
Add Gateway
- Log in to the Chirp Stack web interface: After clicking Open New Tab, web UI to login appear, and login to Chirpstack with user of admin and password of admin
- From the left menu, go to Gateways.
- Click on the “Add gateway” button in the top right corner.
- Fill in the following fields:
Gateway ID: Enter the unique EUI (e.g., c0ee40ffff29abcd) of the gateway.
Name: fill name of gateway (e.g., My Gateway).
Scroll down to click SUBMIT to save
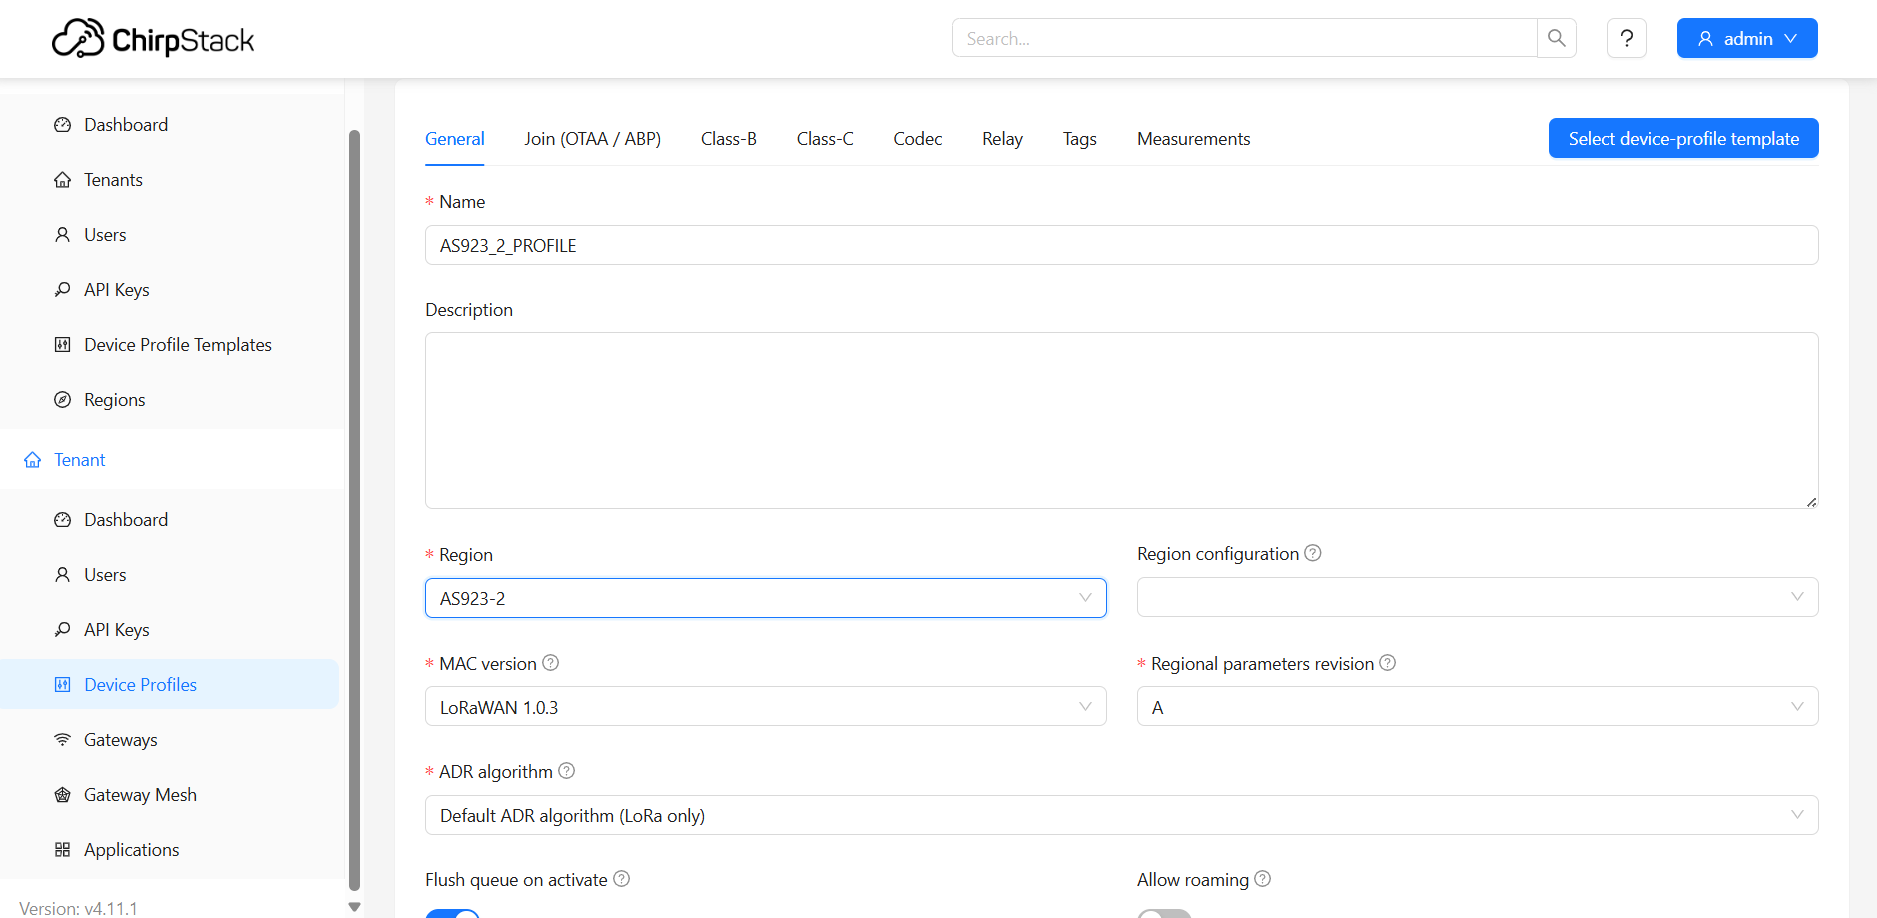
Add Device Profiles
Name: fill name of profile(e.g., AS923_2_PROFILE).
Region: Select LoRaWAN region (e.g., AS923-2)
MAC version: Select LoRaWAN 1.0.3
Regional parameters revision: Select A
Scroll down to click submit to save
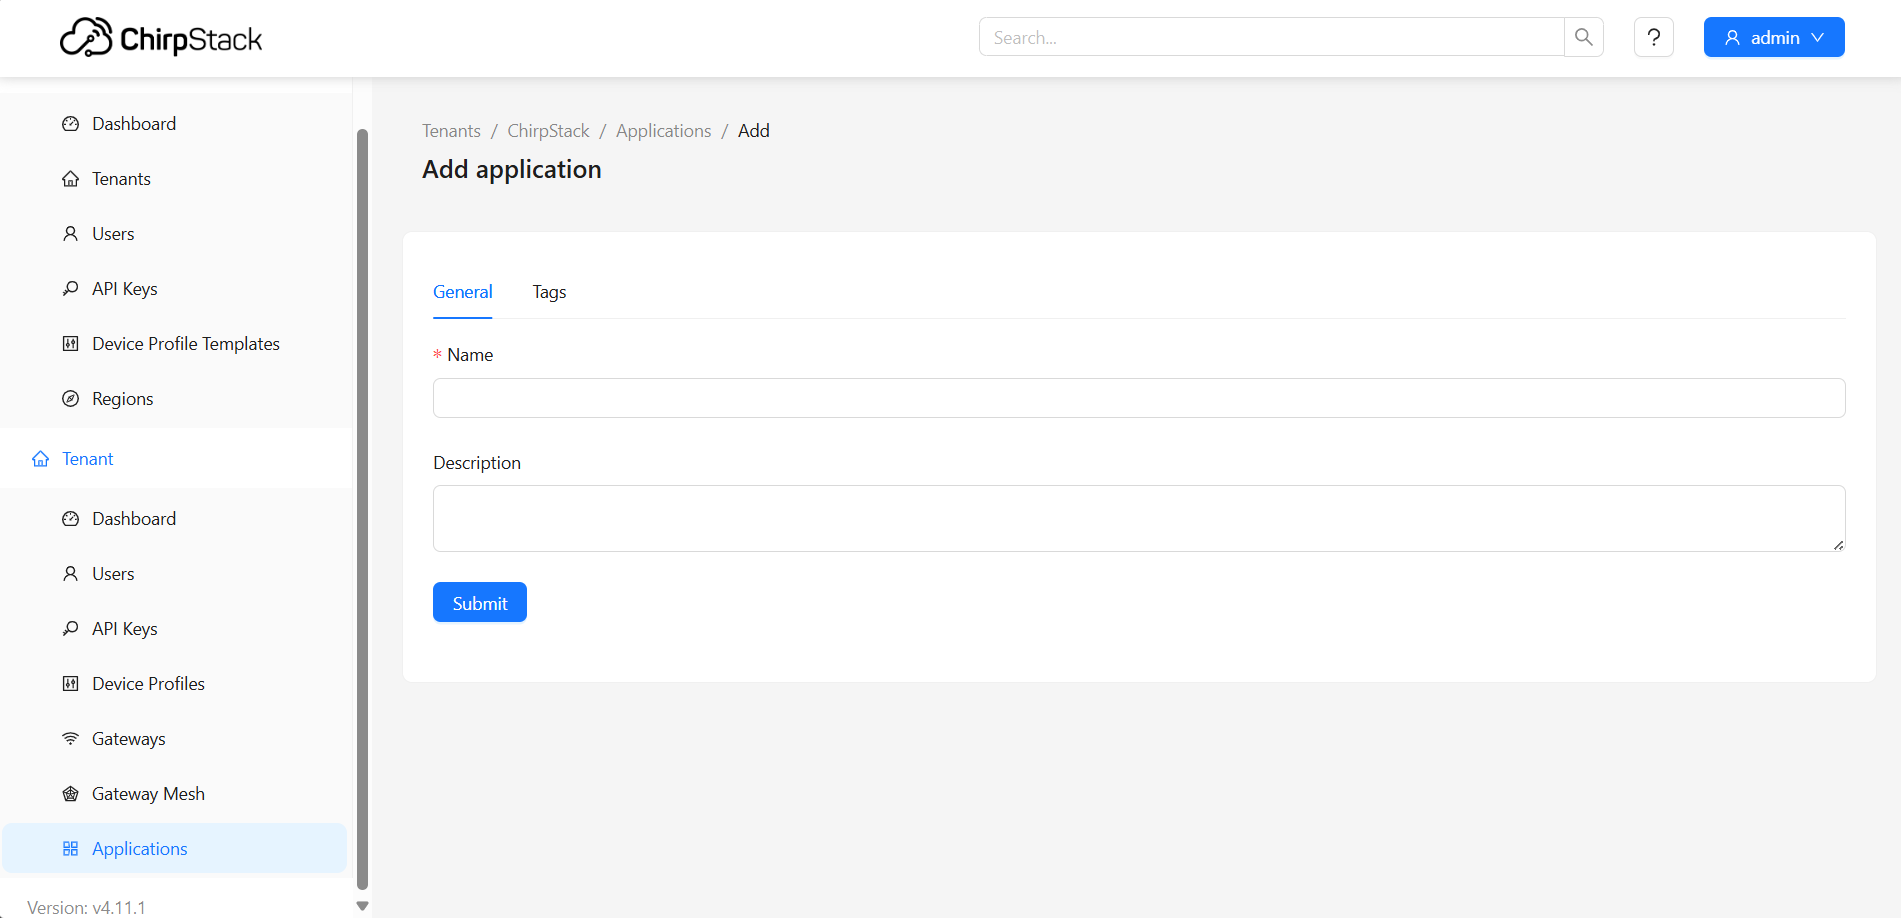
Add Application
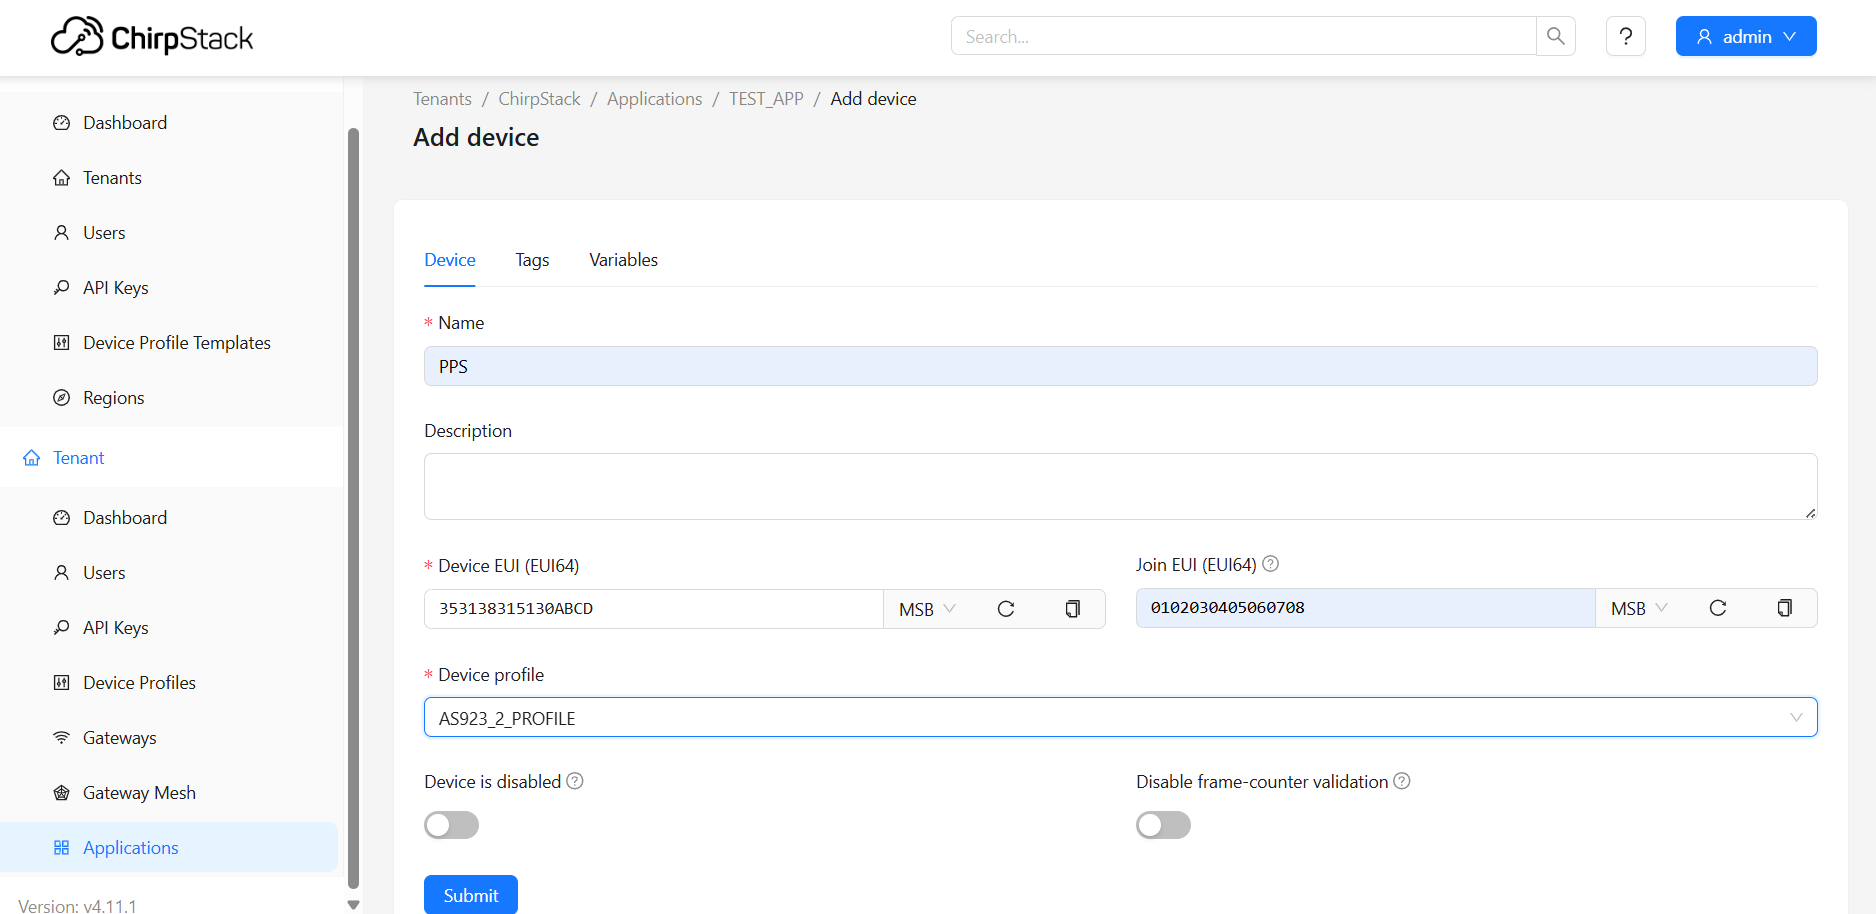
Add Device
Further reference
For further reference on Chirp Stack Network Server, please access the referenced document at link ChirpStack open-source LoRaWAN Network Server
No Comments